
Wall Mounted Air Conditioner With Installation: What to Expect
Buying the unit is only half the decision. Learn what professional installation covers, how to prepare your home, what questions to ask, and how to verify the job is done right.
Start LearningWhy this guide matters: A wall mounted air conditioner performs only as well as its installation. Poor line routing, incorrect refrigerant charge, and inadequate drainage cause most early failures. This guide explains what a proper installation looks like so you can evaluate a package offer with confidence.
What Installation Typically Includes
A professional installation package for a wall mounted air conditioner generally covers the labor and materials needed to put the system into safe, working order. The exact scope varies by provider, so confirm the details in writing before work begins.
Indoor Unit Mounting
The installer secures a wall bracket, hangs the air handler, and verifies that it is level and stable.
Outdoor Unit Positioning
The condenser is placed on a stable pad or wall bracket with adequate clearance for airflow and service access.
Refrigerant Line Set
Copper lines are routed between the indoor and outdoor units, brazed or flared, and insulated along the run.
Condensate Drain
The drain line is routed with a proper slope so condensation exits the unit without backing up indoors.
Electrical Connection
The unit is connected to the correct circuit, and the installer verifies voltage and breaker sizing.
Vacuum and Leak Test
The lines are evacuated to remove moisture and air, then checked for leaks before refrigerant is released.
System Commissioning
The installer starts the system, verifies cooling and heating operation, and confirms airflow and temperature differential.
Basic Handover
The installer explains controls, filter access, and warranty registration, and leaves documentation for the work performed.
Some packages exclude items such as long line sets, electrical upgrades, wall penetrations through masonry, or condensate pumps. Clarify these exclusions early. If you are still comparing formats, the overview of split system air conditioner and installation explains how installation scope differs across system types.
Pre-Installation Planning
Good installation starts before the technician arrives. A little preparation avoids surprises on the install day.
- Confirm the room load: Verify that the selected capacity matches the room's heat gain and heat loss. The guide on what happens if AC is too big or small explains why sizing matters.
- Check the electrical panel: Confirm available capacity and whether a dedicated circuit is needed.
- Plan the line route: Decide how refrigerant lines, drain, and electrical cable will run from indoor to outdoor unit.
- Confirm permissions: Renters should check with the property owner. Some jurisdictions require permits for refrigerant and electrical work.
- Clear access: Remove furniture and wall decor near the planned mounting area, and ensure the outdoor location is reachable.
For apartments and rentals with limited options, the wall mounted air conditioner for apartment guide covers installation constraints. For compact rooms, the wall mounted air conditioner for small room overview helps match capacity to the space.
Indoor Unit Placement
The indoor wall unit should be mounted high on a wall, ideally 7 to 8 feet above the floor, with clear space around the intake and outlet. Avoid locations above heat sources, direct sunlight, or areas where curtains and furniture block airflow. The unit should be level to prevent condensate from pooling inside the chassis.
Consider service access too. The installer needs room to remove the front panel and reach the filters. If you are planning the layout for a combination system, the wall mounted air conditioner heater combo installation guide covers the same placement principles.
Outdoor Unit Placement
The outdoor condenser needs stable mounting, adequate clearance, and a location that allows proper drainage and service access. Typical guidelines include:
- At least 12 inches of clearance on the service access side and several inches around the coil.
- A stable pad or wall bracket that keeps the unit level and above standing water.
- A location out of direct snow accumulation and away from dryer vents or corrosive fumes.
- A route for the condensate drain that does not create a slip hazard or water damage.
If you are mounting the indoor unit on a partition wall, a wall mount bracket for mini split systems may be needed to distribute the load. For installations where an outdoor unit is not feasible, review the wall mounted air conditioner without outdoor unit options and the wall mounted self-contained air conditioning unit format.
The Installation Process Step by Step
While details vary by installer, a standard single-zone installation follows a predictable sequence.
- Site inspection: The installer confirms the mounting locations and the line route.
- Bracket and pad installation: The indoor wall bracket and outdoor pad or bracket are secured.
- Wall penetration: A hole is drilled for the line set, drain, and electrical cable, then finished with a sleeve.
- Line set routing: Copper lines, drain, and cable are routed and secured along the run.
- Connections: The indoor and outdoor units are connected, and the lines are brazed or flared.
- Vacuum and leak test: The system is evacuated and tested before refrigerant is released.
- Electrical hookup: The unit is wired to the correct circuit and breaker.
- Startup and commissioning: The system is powered on and verified for cooling and heating operation.
- Handover: The installer explains operation and maintenance, and provides documentation.
For a broader overview of the process across ductless systems, see the wall mounted air conditioning unit installation guide. If you are evaluating a package that includes the unit and the installation together, the wall mounted air conditioning unit with installation overview covers what to verify in the offer.
Electrical and Refrigerant Requirements
Electrical and refrigerant work are the two areas where cutting corners causes the most problems.
Electrical Supply
Confirm the circuit and breaker rating match the unit's requirements. Some compact units run on standard household voltage, while larger systems need a dedicated circuit. If the panel lacks capacity, an electrician may need to add a circuit before the installer can complete the job.
Refrigerant Handling
Refrigerant must be handled by certified technicians. The line set must be sized correctly, evacuated to remove moisture and air, and charged to the manufacturer's specification. A proper vacuum and leak test protects the compressor and preserves efficiency. If you are considering a standard-voltage combination unit, check the guide on a wall mounted air conditioner heater combo 110 volt configuration.
Questions to Ask the Installer
A short conversation before the work begins prevents most misunderstandings.
| Topic | Question to Ask | Why It Matters |
|---|---|---|
| Scope | What exactly is included in the installation? | Reveals exclusions such as long line sets, electrical upgrades, or wall repairs. |
| Licensing | Are you licensed and insured for refrigerant and electrical work? | Protects you if something goes wrong and ensures code compliance. |
| Permits | Will you handle any required permits? | Unpermitted work can complicate resale and insurance claims. |
| Line Set | How long is the line run, and is it within the manufacturer's limit? | Exceeding the limit reduces capacity and can void the warranty. |
| Vacuum | Will you vacuum the lines and perform a leak test? | Moisture and leaks are the leading causes of early compressor failure. |
| Drainage | How will the condensate drain be routed and tested? | Improper drainage causes indoor water damage and mold. |
| Warranty | What does the workmanship warranty cover, and for how long? | Labor defects are separate from the equipment warranty. |
For more on selecting a contractor, the split unit air conditioner installation cost page and the wall unit air conditioner installation cost overview explain what factors influence labor scope and timeline.
Post-Installation Checklist
Before the installer leaves, verify the following items yourself.
- Cooling and heating test: The unit should reach the setpoint and deliver a clear temperature differential at the supply vent.
- Drain flow: Water should exit the condensate line freely without dripping indoors.
- No abnormal noise: Listen for rattles, vibration, or refrigerant gurgling that suggests a charge issue.
- Documentation: Collect the refrigerant charge record, leak test result, and warranty registration instructions.
- Controls: Confirm the remote or thermostat works and that the installer explains the modes.
- Wall finish: Check that the wall penetration is sealed and that the installation looks clean.
If you notice water issues after the first day, the guide on water coming out of air conditioner vents and the article on water leaking from air conditioner outside unit help diagnose common causes. For routine upkeep, see the wall mounted air conditioner cleaning service overview.
Common Installation Mistakes
These are the errors that most often lead to performance problems or callbacks.
- Skipping the vacuum: Trapped moisture and air damage the compressor and reduce efficiency.
- Incorrect line set length: Excessively long runs reduce capacity and may violate the manufacturer's limit.
- Poor drain slope: A flat or reversed drain causes water to back up into the indoor unit.
- Undersized electrical circuit: A circuit that trips under load is a sign the breaker or wiring is not matched to the unit.
- Blocked outdoor airflow: A condenser hemmed in by walls or debris loses efficiency and overheats.
- No leak test: A slow refrigerant leak is easy to miss at startup and expensive to diagnose later.
If a wall unit stops cooling after installation, the article on wall unit air conditioner not blowing cold air covers initial troubleshooting steps. For broader system issues, the trouble shooting air conditioning guide and the split system air conditioning repairs overview explain when to call a technician.
If you are comparing a wall-mounted split with other formats, the wall air conditioners and heaters hub and the wall mounted heating and air conditioning units overview are useful starting points.
Recommended Wall Mounted Air Conditioners With Installation
⚠️ AFFILIATE DISCLOSURE: This website contains affiliate links. As an Amazon Associate, we earn from qualifying purchases. If you make a purchase through these links, we may receive a small commission at no additional cost to you. Read our full affiliate policy.

Windowless Air Conditioner & Heater Combo Unit 2000W White,55cm | Ductless Wall Mount AC for Garage & Apartment, No Hose Needed, Portable Heating Fan with Touch & 2-8H Timer
Check price on Amazon
BPTCUE Dual Use Compact Portable Wall Mounted Air Conditioner Hot Cold for Bedroom, 2 in 1 Air Conditioner Heater
Check price on Amazon
2 in 1 Cooler and Heater Wall Mounted AC Unit 2000W White,55cm | Ductless Air Conditioner & Space Heater, Portable Tabletop & Wall Fan with Touch Screen, Remote, 2-8H Timer for Bedroom
Check price on Amazon
Wall-Mounted Air Conditioner Heater, 1800W PTC Heating, Quiet Operation, Remote Control, Timer, No Window Installation, Compact Portable Heater for Bedroom, Garage, RV, White (White)
Check price on Amazon
Keystone 10,000 BTU Wall Mounted Air Conditioner with Supplemental Heat and Dehumidifier, 230V, Wall AC with Remote Control for Small and Medium Sized Rooms up to 450 Sq.Ft., Quiet, High Efficiency AC
Check price on Amazon
Wall Mounted Air Conditioner Ductless 1800W Portable AC Fan Unit, Powerful Turbo Fan, with Remote and Led Display, No Window Needed, for RV Garage Fast Heating (White)
Check price on Amazon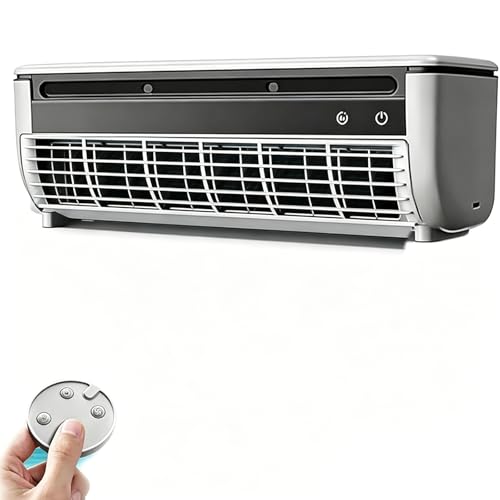
Mini Split Air Conditioner, Wall Mounted Ductless AC Unit, Portable Air Cooler No Window, Remote Control, 3 Quiet Speeds, Perfect for Bedroom, RV, Office, Small Spaces (White)
Check price on Amazon
COSTWAY 12000BTU Mini Split Air Conditioner& Heater | 20 SEER2 115V Wall-Mounted Ductless AC Cools up to 750 Sq. Ft, Energy Efficient Inverter AC with Heat Pump
Check price on AmazonFrequently Asked Questions
What does installation include for a wall mounted air conditioner?
Standard installation typically covers mounting the indoor wall unit, positioning the outdoor condenser, running the refrigerant line set, connecting the condensate drain, wiring the electrical supply, and performing a vacuum and leak test. The exact scope varies by provider, so confirm the details in writing before work begins.
Can a wall mounted air conditioner be installed by a homeowner?
Refrigerant handling, brazing, vacuuming, and final electrical connections are best left to licensed technicians. Some jurisdictions also require permits for refrigerant work. A professional installer ensures the system is charged correctly and that the warranty remains valid.
How long does wall mounted air conditioner installation take?
A single-zone ductless installation usually takes one day for a standard installation. Complex jobs with long line sets, electrical upgrades, or multi-zone configurations can take longer. Ask your installer for an estimated schedule before the work begins.
Where should the indoor and outdoor units be placed?
The indoor wall unit should be high on a wall with clear airflow, away from heat sources and direct sunlight. The outdoor condenser needs stable mounting, adequate clearance, and a location that allows proper drainage and service access.
What should I check after installation is complete?
Confirm that the unit cools and heats properly, that the condensate drain flows freely, and that there are no unusual noises or vibrations. Verify that the installer has documented the refrigerant charge, performed a leak test, and provided warranty registration instructions.
Ready to Compare Wall Mounted Units With Installation?
Review the recommended models above, confirm your room sizing and installation scope, and choose the package that matches your home and comfort needs.
View Recommended Units