Window Fitting for Portable Air Conditioner: Complete Guide
Everything you need to know about venting a portable AC through any window type safely, securely, and efficiently
A portable air conditioner is only as good as its exhaust setup. Unlike a window air conditioner, which sits directly in the frame, a portable unit needs a clean path to push hot air outside. That path usually goes through a window — and how well you fit that window determines how cool your room actually gets. This guide walks through window fitting for portable air conditioners across every common window type, from sliding sashes to crank-out casements, and explains the kits, panels, and techniques that make the seal airtight.
Why the Window Fit Determines Performance
A portable AC works by pulling heat from the room and dumping it outdoors through an exhaust hose. If that hose exits through an open window with no seal around it, two problems occur. First, the hot exhaust air can loop back into the room. Second, the unit creates negative pressure indoors, which draws warm outside air through every gap in the window frame, door jambs, and outlets. The result is a unit that runs constantly but never reaches the set temperature.
A proper window fitting solves both problems. A sealed panel holds the hose in place, blocks outdoor air from entering, and keeps the exhaust stream directed outward. Independent testing consistently shows that a well-sealed window kit can restore a portable unit to its rated cooling capacity. Without one, the same unit may struggle to cool even a small bedroom.
Key principle: The window kit is not an accessory — it is a functional requirement. Treat the seal around the exhaust hose with the same care you would give to the seal around a window AC installation kit.
Window Types and How to Fit Each One
Not every window accepts the same kit. Before ordering a portable unit, identify the window you plan to vent through and confirm that a compatible panel or adapter exists. The table below maps the most common window types to their fitting approach.
| Window Type | Fitting Approach | Best For |
|---|---|---|
| Single or double-hung (vertical sliding) | Vertical window panel kit; panel sits in the lower sash opening and the sash closes down onto it | Most residential bedrooms and living rooms |
| Horizontal sliding window | Horizontal panel kit; panel spans the sliding track and the moving sash presses against it | Apartments and modern homes with side-sliding sashes |
| Casement (crank-out) | Specialized casement adapter or a sealed plywood insert cut to the screen frame; hose routes through a circular port | Older homes and European-style windows |
| Awning (top-hinged) | Similar to casement; a rigid insert with a hose port is the most reliable option | Contemporary homes with top-hinged sashes |
| Bay or picture window | Use a side sash if it opens; otherwise a custom panel or an alternative vent path | Living rooms where the main pane is fixed |
| Sliding glass door | Tall door panel kit with a hose port; the door slides against the panel to seal | Open-plan spaces and rooms without suitable windows |
If your window is unusually narrow or unusually shaped, measure the opening before buying anything. Portable AC window kits are adjustable within a range, and pushing a panel beyond that range weakens the seal. Units designed for small window openings exist, and the same sizing logic applies to portable vent panels.
What Comes in a Portable AC Window Kit
Most portable air conditioners ship with a basic venting package. Understanding each component helps you spot missing or undersized parts before installation day.
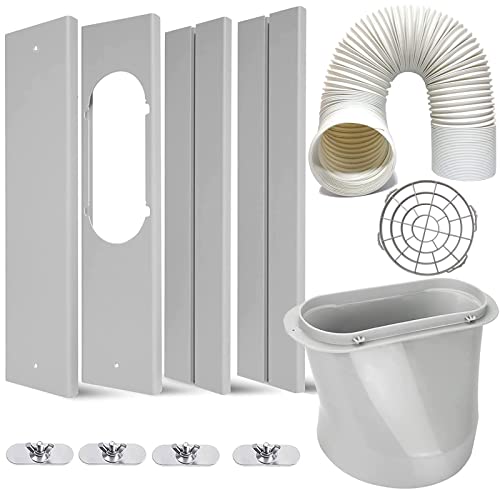
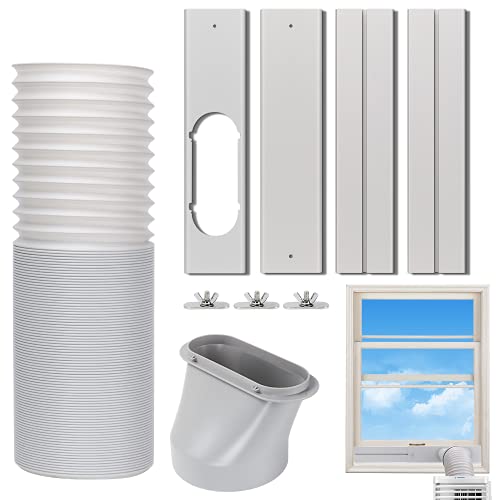
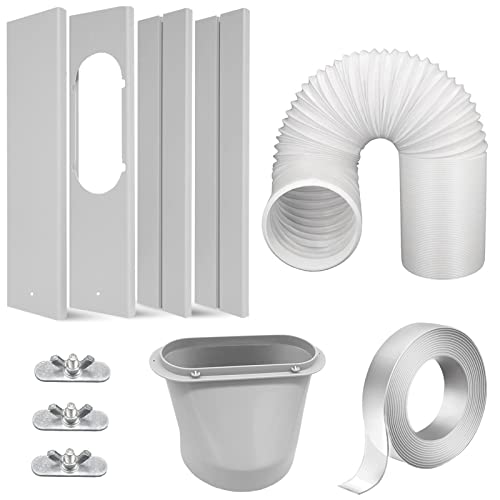
- Exhaust hose: A flexible duct, typically 5 to 6 inches in diameter, that carries hot air from the unit to the window. Longer hoses reduce efficiency, so keep runs as short and straight as possible.
- Hose adapter and window nozzle: Connectors that lock the hose into the panel. Some units use a threaded collar; others use a friction fit.
- Window panel: Adjustable plastic or aluminum slats that fill the open portion of the window. Panels usually extend across a defined width range and include a circular cutout for the hose.
- Foam seal and weather stripping: Closed-cell foam that lines the panel edges and the sash contact points to close small gaps.
- Screws or sash locks: Hardware that secures the panel and prevents the window from being opened from outside.
Some kits omit the panel entirely and include only a hose and a flat nozzle. Those are intended for temporary setups or for venting through a dedicated window panel purchased separately. If your unit arrives without a panel, confirm the hose diameter and order a matching panel rather than improvising with cardboard.
Step-by-Step Window Fitting Process
The following sequence works for the majority of vertical and horizontal sliding windows. Adapt the panel orientation for casement and awning windows, where a rigid insert replaces the sliding panel.
- Measure the window opening. Record the width and height of the open section, plus the depth of the track. Compare these figures to the panel's stated adjustment range. Leave at least half an inch of overlap on each side for the seal.
- Assemble the panel. Slide the panel halves to the measured width and lock them with the provided clips or screws. Test the fit in the window before attaching the hose.
- Attach the hose adapter. Thread or snap the window nozzle onto the exhaust hose, then insert the nozzle into the panel cutout. Confirm the hose is fully seated — a partial connection leaks hot air into the room.
- Seat the panel in the window. For a vertical sliding window, place the panel in the lower track and close the sash down onto its top edge. For a horizontal slider, position the panel in the track and slide the moving sash against it.
- Apply foam sealing. Run closed-cell foam along the top and bottom edges of the panel and any gap between the sash and the frame. Pay special attention to the corners, where leaks are most common.
- Secure the window. Install the sash lock or a cut-to-length wooden dowel in the track so the window cannot be forced open. This step is both an efficiency measure and a security measure.
- Connect to the AC unit. Attach the indoor end of the hose to the unit's exhaust port. Keep the hose as straight as possible and avoid kinks, which restrict airflow and raise operating temperature.
- Test the seal. Run the unit on high for fifteen minutes. Hold a thin tissue near the panel edges; if it flutters, air is leaking and additional foam is needed.
Safety note: Never block the exhaust hose or route it into a wall cavity, attic, or chimney. Portable AC exhaust contains heat and moisture and must terminate outdoors in open air. Also confirm that the unit is on a level surface and that the hose does not slope upward, which can trap condensation.
Single-Hose vs Dual-Hose Window Setups
The number of hoses changes what the window fitting must accomplish. A single-hose unit uses one duct for exhaust and relies on indoor air to cool the condenser. That design creates negative pressure, which pulls warm outdoor air through every unsealed gap. A dual-hose unit uses one duct to draw outdoor air for the condenser and a second to exhaust it, maintaining balanced pressure.
For window fitting, dual-hose units require a panel with two ports or a wider panel that accommodates both hoses. The sealing effort is similar, but the payoff is larger: because the unit is not fighting incoming warm air, the window seal does not need to be perfect for the unit to perform. If you are choosing between the two designs, dual-hose models are generally the stronger choice for rooms that receive direct sun or have poor insulation.
Related venting accessories, such as a window vent designed for portable air conditioners, are available for both configurations. Confirm the port count before ordering.
Common Window Fitting Mistakes to Avoid
- Leaving the panel loose. A panel that rattles or shifts lets hot air in with every gust. Lock the slats and add foam at the contact points.
- Using the wrong hose length. Extending the hose beyond the manufacturer's recommendation reduces cooling capacity and can overheat the compressor. Keep the run short.
- Venting into an enclosed space. A garage, screened porch, or interior hallway is not outdoors. The exhaust must reach open air.
- Ignoring the sash lock. An unsecured window above a panel is an open invitation. Install the lock or a dowel every time.
- Skipping the foam on casement windows. Crank-out windows have irregular geometry; a rigid insert plus foam is the only reliable seal.
- Forgetting drainage. Portable units collect condensate. Confirm the drain plug is accessible and that the unit sits level so water does not pool.
When a Window Is Not an Option
Some rooms have no suitable window: basements with small hopper windows, interior offices, or rooms where the only window is a fixed picture pane. In those cases, alternative exhaust paths include a wall thimble, a sliding door panel, or a drop-ceiling vent. Each requires more installation work than a window kit, but the sealing principle is identical: a rigid barrier with a hose port and foam at every seam.
If the room has no exterior wall or window at all, a portable AC is not the right tool. A ductless mini-split system or a window-mounted unit in an adjacent room may be a better fit. For spaces where humidity is the main concern rather than heat, a whole-house dehumidifier addresses the root cause more directly.
Frequently Asked Questions
Can I vent a portable air conditioner without a window?
Yes, but it requires an alternative exhaust path. You can vent through a wall opening, a sliding door, or a drop ceiling. Using a window is simply the most common and least invasive method.
Do portable air conditioners need a window kit?
Yes. A window kit creates a sealed barrier that holds the exhaust hose and prevents hot outdoor air from re-entering. Without a proper seal, cooling performance drops significantly.
What is the difference between a single-hose and dual-hose window kit?
Single-hose units pull indoor air to cool the condenser and exhaust it outside, creating negative pressure that draws in warm air through gaps. Dual-hose units use outdoor air for the condenser and exhaust it back out, maintaining balanced pressure and better efficiency.
How do I seal a casement window for a portable AC?
Use a rigid insert — plywood or a dedicated casement adapter — cut to fit the screen frame, with a circular port for the hose. Line the insert edges with closed-cell foam and secure it against the frame. Do not rely on the crank mechanism to hold the seal.
Can I use a longer exhaust hose to reach a distant window?
Only within the manufacturer's stated limit. Extending the hose increases resistance, reduces airflow, and can cause the compressor to overheat. If the window is far from the unit, relocate the unit closer rather than adding hose length.
Final Thoughts
Window fitting for a portable air conditioner is a small job with an outsized effect on comfort. Measure the opening, match the kit to the window type, seal every seam, and secure the sash. Do those four things and the unit will perform close to its rated capacity. Skip them and you will spend the summer listening to a compressor that never catches up. For related installation topics, the guides on window AC bracket support and window AC installation kits cover the fixed-unit side of the same problem.