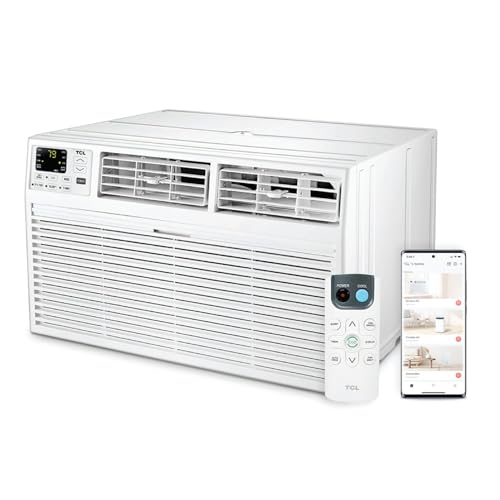
120 Volt Through the Wall Air Conditioner: The Complete Buyer's Guide
Everything you need to know about 120V through the wall AC units — how they work, who they suit, sizing and efficiency factors, installation considerations, and how to choose the right model for your room.
START THE GUIDEWhy this guide matters: A through the wall air conditioner is a long-term commitment — once the sleeve is installed, the opening in your wall stays. A 120 volt unit is the most flexible electrical option for most homes, but it is not right for every room. This guide helps you understand the trade-offs before you commit, so you choose a unit that cools well, fits your wall, and stays efficient for years.
What Is a 120 Volt Through the Wall Air Conditioner?
A 120 volt through the wall air conditioner is a self-contained cooling unit installed inside a permanent sleeve that is built into an exterior wall. Unlike a window air conditioner that rests in a window frame, a through the wall unit becomes part of the wall itself. The "120 volt" designation refers to the electrical supply: these units run on standard North American household voltage, so they can be connected to a conventional dedicated 120V circuit rather than a 240V circuit.
This combination — permanent wall installation plus standard household voltage — is what makes 120V through the wall units so practical for apartments, condominiums, older homes, and hotel or motel rooms. The wall sleeve stays in place, and the chassis (the working unit) can be slid out for service, cleaning, or replacement without tearing into the wall again.
How the 120V Wall Unit Works
The unit pulls indoor air across a cold evaporator coil, removes heat and humidity, and blows the cooled air back into the room. Heat absorbed by the refrigerant is released to the outdoors through the condenser coil on the exterior side of the sleeve. A 120V unit is designed so that its electrical draw stays within the capacity of a dedicated household circuit — typically a 15-amp or 20-amp branch circuit, depending on the model's rated current.
Many 120V through the wall models also offer a heat function, either through a heat pump or an electric resistance heater. If you need year-round comfort, look for a model explicitly rated as a heat-and-cool unit rather than a cool-only chassis. If your priority is cooling efficiency, you may compare these against a 115 volt through the wall air conditioner, which uses a very similar electrical profile but is sold under a slightly different nominal voltage label.
Who Should Choose a 120 Volt Through the Wall Unit?
Through the wall units are not a universal solution. They shine in specific situations, and they are a poor fit in others. Understanding which group you fall into is the single most important decision in this buying journey.
Strong Candidates for a 120V Wall Unit
- Apartment and condo residents who want permanent cooling without losing window space or blocking a view. A through the wall sleeve is also far more secure than a window unit that can be pushed in.
- Homeowners in older houses where adding ductwork or a 240V circuit would require significant electrical work. A 120V circuit is far easier to provide.
- Hotel, motel, and rental property owners who need a durable, serviceable, standardized cooling solution — the sleeve-and-chassis format is the industry standard for a reason.
- Rooms with limited window area or windows that are unsuitable for a window AC, such as casement or sliding windows that cannot safely hold a unit.
- People who want a cleaner look than a protruding window unit, with the unit flush or near-flush with the wall.
When a 120V Wall Unit Is Not the Right Choice
- Very large rooms or open-plan spaces. A 120V chassis has a limited cooling output; for spaces beyond the typical capacity range, a 240V unit or a ducted system is more appropriate.
- Renters who cannot modify the wall. Cutting a permanent opening usually requires landlord approval and, in many jurisdictions, a permit. If you cannot modify the building, a portable or window unit is the practical route.
- Walls that cannot be modified. Load-bearing walls, walls with plumbing or wiring inside, or walls finished with materials you cannot match after cutting may rule out a through the wall installation.
- Whole-home cooling goals. One wall unit cools one room. For a full house, a whole house AC system is the correct approach.
120V vs 240V: Understanding the Electrical Difference
The voltage question is the first real technical decision in this category. It affects which models you can consider, what electrical work is needed, and how much cooling capacity is realistically available.
| Factor | 120 Volt Through the Wall AC | 240 Volt Through the Wall AC |
|---|---|---|
| Electrical supply | Standard household 120V branch circuit, typically dedicated | Dedicated 240V circuit, often requiring a new breaker and wiring |
| Typical cooling output | Small to medium rooms | Medium to large rooms and higher-capacity applications |
| Installation complexity | Easier electrical work; often feasible without a panel upgrade | More involved electrical work; may require panel capacity review |
| Best suited for | Apartments, condos, older homes, single-room cooling | Larger rooms, commercial spaces, heavy-duty use |
| Circuit requirements | Usually a 15A or 20A dedicated circuit, per the model's rating | Higher-amperage dedicated circuit, per the model's rating |
If you are unsure which voltage your space can support, the general-purpose guide on 110V vs 240V air conditioners explains the practical differences in more depth. For most single-room residential cooling, a 120V unit is the simpler and more realistic starting point.
Sizing a 120V Through the Wall AC Correctly
Oversizing and undersizing both cause problems. An undersized unit runs constantly and never fully dehumidifies the room. An oversized unit cools the air quickly but cycles on and off too often, leaving the room clammy and wearing out the compressor. Getting the sizing right is the difference between comfort and regret.
The Practical Sizing Approach
Start with the room's square footage, then adjust for the conditions that change the real cooling load. A room with large windows, direct afternoon sun, poor insulation, or a kitchen nearby needs more capacity than a shaded, well-insulated bedroom of the same size. Ceiling height also matters: a room with high ceilings has more air volume to cool.
Rather than guessing, use a structured method. The guide on how to size an air conditioner walks through the calculation step by step, and you can cross-check your result against the room-size reference in the 10,000 BTU air conditioner room size breakdown. If the room is genuinely large, a single wall unit may not be enough regardless of voltage — compare against a 12,000 BTU through the wall air conditioner to see where the capacity ceiling sits.
Quick Sanity Check
- Small bedroom or office: low-capacity 120V chassis is usually sufficient.
- Medium living room or open kitchen area: mid-capacity 120V unit, with careful attention to sun exposure.
- Large room or multiple connected spaces: consider 240V or a different system type entirely.
When in doubt, size slightly toward the lower end rather than the higher end — a correctly sized unit that runs longer cycles dehumidifies better and is more comfortable.
Efficiency Factors That Actually Matter
Efficiency is not a single number. For a through the wall unit, several ratings and design features work together to determine how much electricity the unit uses over a cooling season.
Key Ratings to Compare
- CEER / EER: The energy efficiency ratio measures cooling output per unit of electricity at a specific test condition. Higher is better, and it is the most directly comparable efficiency number for single-room units.
- SEER2: The seasonal efficiency rating reflects performance across a range of conditions. It is most relevant when comparing higher-tier models, and you can learn how it is calculated in the SEER rating guide.
- ENERGY STAR certification: A model that meets the program's efficiency threshold is independently verified to be among the more efficient options in its class.
Design Features That Improve Real-World Efficiency
- Inverter or variable-speed compressor: Instead of switching fully on and off, the compressor modulates its output. This is generally more comfortable and more efficient in the long run. The comparison in inverter vs non-inverter AC explains the trade-offs in detail.
- Programmable or smart thermostat control: Scheduling cooling around occupancy reduces waste. A Wi-Fi thermostat approach is worth understanding even if your unit uses a simpler onboard control.
- Good insulation and air sealing around the sleeve: The best chassis in the world cannot compensate for a poorly sealed wall opening. Proper flashing and insulation around the sleeve are part of the efficiency equation.
Installation: What to Expect
Through the wall installation is a construction project, not a plug-in task. Understanding the process helps you plan realistically and ask the right questions of an installer.
The Installation Sequence
- Site selection: Choose an exterior wall with adequate structural support, clearance from obstructions, and a location that lets conditioned air reach the occupied part of the room.
- Electrical verification: Confirm that a dedicated 120V circuit of the correct amperage is available. If not, an electrician will need to run one.
- Opening and framing: The wall is cut and framed to accept the sleeve. The opening must be level, square, and correctly sized for the sleeve.
- Sleeve installation and sealing: The sleeve is set in place, flashed to shed water, and insulated around the perimeter to prevent air leakage and condensation.
- Chassis installation: The unit slides into the sleeve and is secured. The installer checks drainage, airflow, and operation.
Because this work involves structural and electrical components, it is best handled by a qualified installer. The overview of HVAC installation provides useful context on what a professional installation involves, and if you want to understand the electrical side more fully, review the guide on 110V vs 240V air conditioners before committing to a circuit plan.
Permits and Building Rules
Many jurisdictions require a permit for cutting a new opening in an exterior wall, and apartment or condo associations often have rules about exterior modifications. Check both before scheduling the work. A short delay at the planning stage prevents a much longer problem later.
Product Tiers: How to Think About the Market
Through the wall units are sold across a wide range of quality and capability. Rather than thinking in terms of specific figures, it helps to understand the market in tiers. The tiers below describe relative positioning — features, build quality, and control sophistication — so you can match a tier to your priorities.
Essential Tier
Straightforward cooling with basic mechanical controls and standard efficiency. A solid choice for a secondary room, a rental unit, or a space where cooling is the only requirement.
- Simple rotary or push-button controls
- Standard efficiency rating
- Straightforward chassis design
Balanced Tier
The most common choice for primary living spaces. These models add better efficiency, quieter operation, and more useful control options without moving into premium territory.
- Improved efficiency rating
- Digital controls and remote
- Better sound insulation
- Optional heat function
High-End Tier
Feature-rich models for buyers who want the best comfort and efficiency in a 120V format. Expect advanced controls, quieter compressors, and refined airflow management.
- High efficiency and ENERGY STAR
- Inverter or variable-speed operation
- Smart or programmable control
- Premium build and finish
Professional-Grade
Heavy-duty chassis designed for hospitality, rental, and light commercial use where durability and serviceability matter most. These are built for long service life and easy maintenance.
- Reinforced construction
- Serviceable chassis design
- Consistent performance under heavy use
- Standardized sleeve compatibility
Within any tier, the model that fits best is the one whose capacity, efficiency, and control features match your room and habits. A mid-tier unit with the right capacity will outperform a premium unit that is the wrong size for the space.
Buying Checklist
For the broader context of how these units compare with other cooling options, the overviews of PTAC units and space-saving air conditioners are useful companion reads. If you are weighing a wall unit against a window unit, the U-shaped window air conditioner guide shows what the window-mount alternative looks like in practice.
Maintenance Habits That Extend the Unit's Life
A through the wall unit is exposed to outdoor conditions year-round, which makes routine maintenance more important than for a seasonal window unit. The core tasks are straightforward and can be handled by most owners.
- Clean or replace the air filter regularly. A clogged filter forces the unit to work harder and reduces cooling. Check it at least monthly during the cooling season.
- Inspect and clean the outdoor coil. Dust, pollen, and debris accumulate on the exterior side. A gentle rinse and soft brush help maintain heat transfer.
- Check the sleeve and seals. Look for gaps, cracked caulk, or water staining. Reseal as needed to keep air and moisture out.
- Keep the drain path clear. Condensate must drain freely. A blocked drain can cause water to back up into the room.
- Schedule an annual service. A technician can check refrigerant charge, electrical connections, and overall operation. The guide to HVAC cleaning and service explains what a good service visit covers.
If the unit is running but the airflow has weakened, the troubleshooting walkthrough at my air conditioner is running but not blowing air covers the most common causes before you call a technician.
Frequently Asked Questions
What does 120 volt mean for a through the wall air conditioner?
A 120 volt through the wall air conditioner runs on standard North American household voltage, which means it can be connected to a conventional dedicated outlet without major electrical rewiring. This makes it a practical choice for apartments, older homes, and rooms where a 240 volt circuit is unavailable.
Can a 120 volt through the wall air conditioner cool a large room?
120 volt through the wall units generally serve small to medium rooms, typically up to around 400 square feet. For larger spaces, higher-capacity 240 volt models or a ducted system are usually more appropriate because the cooling output of a standard 120 volt circuit is limited.
Does a through the wall air conditioner require professional installation?
Because through the wall units require cutting a permanent opening in an exterior wall, structural framing, and proper sealing, professional installation is strongly recommended. Correct sleeve placement and flashing prevent water intrusion and preserve the wall's insulation value.
How is a through the wall AC different from a window AC?
A through the wall air conditioner is installed inside a permanent wall sleeve rather than resting in a window frame. It frees up window space, offers a more secure and finished look, and can often be serviced or replaced without removing the sleeve. Window units are typically easier to install and remove seasonally.
Can a 120V wall unit also provide heat?
Yes. Many 120V through the wall models are available as heat-and-cool chassis, using either a heat pump or an electric resistance heater. If you want year-round use, confirm the model is explicitly rated for heating as well as cooling.
What maintenance does a through the wall AC need?
The essentials are regular filter cleaning or replacement, periodic cleaning of the outdoor coil, inspection and resealing of the sleeve and wall seals, keeping the condensate drain clear, and an annual professional service check. These habits protect both efficiency and service life.
Choose the Right Wall Unit for Your Room
A 120 volt through the wall air conditioner is an excellent fit when you need permanent, secure, single-room cooling without the electrical burden of a 240V circuit. The key is to match capacity to the room, confirm your electrical setup, and choose a tier that reflects how you will use the space. Once those pieces are in place, a well-chosen wall unit can serve comfortably for many years.