AC Condenser Fan Replacement: Complete Guide
Diagnose a failing outdoor fan motor, understand the replacement process, and decide whether to tackle it yourself or call a professional.
START DIAGNOSINGWhat the Condenser Fan Does
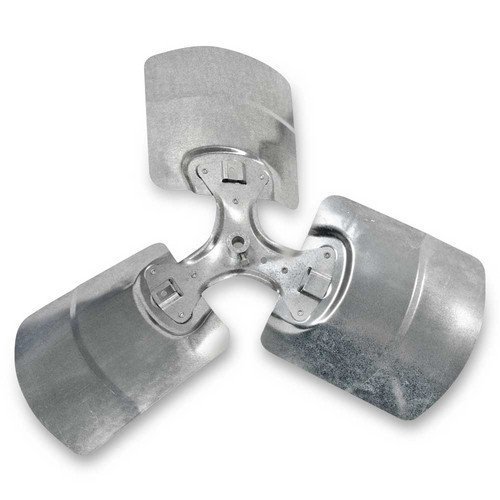
The condenser fan is the large fan on top of your outdoor AC unit. It pulls air across the condenser coils so heat can be released into the outside air. Without it, the system cannot shed heat, pressures rise, and the compressor may shut down or be damaged.
Your air conditioner moves heat rather than creating cold air from nothing. The indoor evaporator coil absorbs heat from your home, and the refrigerant carries that heat outside to the condenser coil. The condenser fan is responsible for moving outdoor air across those hot coils so the heat can dissipate. If the fan stops, the entire heat-rejection cycle stalls.
Because the fan runs continuously during cooling cycles, its motor is one of the most common wear items in a residential split system. Bearings dry out, windings fail, capacitors weaken, and blades can become unbalanced. Understanding how the fan fits into the broader system helps you recognize symptoms early and avoid a compressor failure. For a broader refresher, see our guide on AC components and how each part interacts.
This guide walks you through the practical side of AC condenser fan replacement: how to confirm the motor is truly the problem, which tools to gather, how the swap is performed safely, and when the job is best left to a licensed technician.
Signs Your Condenser Fan Motor Is Failing
Not every cooling problem points to the fan, so matching symptoms to the fan motor narrows things down quickly. The cards below describe the most common indicators homeowners report.
Fan Not Spinning
The outdoor fan stays still while the compressor hums. This may be a failed motor, a bad capacitor, or a seized bearing.
Fan Spins Slowly
A motor that turns sluggishly often has weakened windings or a failing run capacitor rather than a completely dead motor.
Grinding or Squealing
Noise from the fan area usually means worn bearings. Left alone, the shaft can seize and burn out the motor.
Warm Air From Vents
When the fan cannot move air across the condenser, the system struggles to cool. This overlaps with the symptoms in AC blowing warm air.
Compressor Overheating
A stalled fan raises refrigerant pressure and temperature, which can trip the compressor's internal overload protector.
Tripped Breaker
A shorted fan motor winding can draw excess current and trip the outdoor disconnect or breaker repeatedly.
If the fan is running but the unit still is not cooling, the motor may not be the culprit. Our article on condenser fan running but no cold air covers other causes such as low refrigerant or a dirty coil. Similarly, if the fan spins but the system fails to cool, review condenser fan spinning but not cooling for a focused troubleshooting path.
How to Diagnose the Problem
Before ordering a replacement motor, confirm the fan motor itself is defective. A capacitor is far simpler to replace and often mimics a dead motor. Work through these checks in order.
1. Visual Inspection
Turn off power at the breaker and the outdoor disconnect, then remove the fan grille. Look for debris, bent blades, or a fan blade that rubs against the housing. Leaves and grass clippings can jam a blade and stall the motor without the motor being faulty.
2. Spin Test
With power off, try to spin the blade by hand. It should turn freely with slight resistance. If it feels stiff or gritty, the bearings are worn and the motor likely needs replacement. If it spins easily but does not start under power, suspect the capacitor first.
3. Capacitor Check
The run capacitor gives the fan motor its starting torque. A bulging top or a reading outside the rated microfarad range indicates a failed capacitor. Replacing a capacitor is a straightforward task and should be ruled out before condemning the motor. If you are unsure of the part, our overview of AC components explains where the capacitor sits.
4. Electrical Checks
With power confirmed off, inspect the wiring harness for burns or loose connectors. A multimeter can check continuity across the motor windings. An open winding means the motor is dead. If the compressor runs but the fan does not, and the capacitor tests good, the motor is the likely failure.
⚠️ Important: Never test or touch electrical components with power on. The outdoor unit contains line voltage that can cause serious injury. Always verify power is off at the breaker and the outdoor disconnect before opening the unit.
Safety Precautions Before You Begin
Condenser fan replacement is a moderately involved repair that touches line voltage and refrigerant-containing equipment. Take these precautions seriously.
- Shut off power at two points. Turn off the breaker inside the home and pull the disconnect block at the outdoor unit.
- Confirm zero voltage. Use a non-contact voltage tester on the fan wiring before touching anything.
- Wear gloves and eye protection. Fan blades have sharp edges and the coil fins can cut.
- Do not bend the coil fins. They are fragile and bending them restricts airflow.
- Keep the refrigerant circuit closed. Fan replacement does not require opening refrigerant lines. If you suspect a refrigerant leak, stop and call a licensed technician, as described in refrigerant leak repair.
- Work on a stable surface. The outdoor unit sits on a pad, and the top panel can be awkward to lift alone.
If at any point you are unsure about the wiring or the condition of the compressor, pause the job. The risk of a mistake is higher than the inconvenience of waiting for a professional.
Tools and Parts You Need
Gather everything before you start so the unit is not left open while you search for a tool.
- Nut driver set (typically 1/4-inch and 5/16-inch)
- Adjustable wrench or socket set
- Multimeter with capacitance setting
- Non-contact voltage tester
- Work gloves and safety glasses
- Replacement fan motor matched to your unit's voltage, horsepower, and rotation direction
- Replacement run capacitor if the old one tests weak
- Wire nuts or crimp connectors
- Zip ties for cable management
Matching the motor correctly matters. The replacement must share the original motor's voltage, phase, horsepower, RPM, rotation direction, and shaft size. A mismatch can cause premature failure or incorrect airflow. Bring the old motor's nameplate data with you when sourcing a replacement.
Step-by-Step Condenser Fan Replacement
The sequence below reflects a typical residential split-system condenser. Exact panel arrangements vary, so adapt to your unit while keeping safety first.
- Disconnect all power. Turn off the AC breaker in the main panel and pull the disconnect at the outdoor unit. Verify with a voltage tester.
- Remove the top grille. Unscrew the fan grille, which usually holds the motor and blade assembly. Lift it carefully and set it aside without stressing the wiring.
- Disconnect the fan wiring. Photograph the wiring before removing it. Disconnect the motor leads from the capacitor and contactor. Label wires if needed.
- Remove the fan blade. Loosen the set screw on the blade hub and pull the blade off the motor shaft. Penetrating oil helps if it is rusted. Note the blade orientation.
- Unbolt the old motor. Remove the mounting bolts or screws holding the motor to the grille or housing. Lift the motor free.
- Install the new motor. Mount the replacement motor in the same position. Reinstall the fan blade at the correct height so it sits inside the shroud without rubbing.
- Wire the new motor. Reconnect the leads following your photograph. Match color codes and capacitor connections exactly. Secure with wire nuts or crimp connectors.
- Reassemble and test. Reinstall the top grille and restore power. Listen for smooth operation and confirm strong airflow upward before closing up the unit.
After the swap, monitor the system through a full cooling cycle. If the unit still behaves oddly, the issue may extend beyond the fan. Review condenser fan running but no cold air and AC blowing cold air but house not cooling to rule out other faults. For noise that persists after replacement, see condenser unit making loud buzzing noise.
Motor Tiers and What to Expect
Replacement fan motors fall into broad tiers. The table below describes relative positioning without referencing specific figures. For broader decisions about the system as a whole, see our guide on condenser fan motor replacement considerations and AC condenser fan replacement.
| Tier | Best For | Typical Characteristics |
|---|---|---|
| Entry-level | Older units nearing end of service life | Basic bearings and standard windings; adequate for light duty and mild climates |
| Mid-range | Most residential replacements | Improved bearings and sealed housings; balanced balance between durability and smooth operation |
| Premium | Hot climates and long cooling seasons | Heavy-duty windings and premium bearings; better heat tolerance and quieter running |
| Commercial-grade | High-cycle or commercial systems | Reinforced construction designed for continuous operation and harsher environments |
In general, mid-range motors offer a solid choice for the tier for typical homes, while premium motors make sense where the unit runs long hours. Choose a motor rated for your unit's voltage and confirm the rotation direction before installing. If the entire condenser is aging, compare repair against broader options in condenser replacement for the home.
When to Call a Professional
Many homeowners can handle a fan motor swap with basic tools and patience. However, some situations call for a licensed technician:
- You are uncomfortable working with line voltage or testing capacitors.
- Diagnosis is unclear and multiple components may be failing.
- There are signs of refrigerant leaks, oil residue, or ice on the lines.
- The compressor trips repeatedly or shows signs of overheating.
- The unit is under warranty, since DIY work can void coverage.
A technician brings proper meters, motor matching experience, and the ability to verify system pressures after the repair. If the fan failure is part of wider compressor trouble, review compressor running but not cooling and compressor not working but fan is running before deciding on repair scope. For an overview of the repair landscape, our AC repair guide helps frame the decision.
Frequently Asked Questions
How long does a condenser fan replacement take?
For an experienced DIYer, the swap typically takes one to two hours including diagnosis and testing. First-timers should allow extra time for careful wiring and verification.
Can I run the AC with a broken condenser fan?
No. Running the system without condenser airflow raises refrigerant pressure and temperature, which can damage the compressor. Turn the system off until the fan is repaired.
How do I know if it is the motor or the capacitor?
A failed capacitor often prevents the motor from starting even though the windings are good. Test the capacitor with a multimeter first. If it tests within range and the motor still will not start, the motor is the likely failure.
Does a new fan motor require a new capacitor?
Not always, but replacing a tired capacitor alongside a new motor is common practice. A weak capacitor can shorten the life of a new motor, so many technicians replace both at the same time.
Why does the new fan run but the unit still not cool?
The fan is only one part of the heat-rejection cycle. Low refrigerant, a dirty condenser coil, or a failing compressor can cause the same symptom. Review condenser fan spinning but not cooling for next steps.
Can a bad fan motor cause the breaker to trip?
Yes. A shorted winding or seized motor can draw excess current and trip the breaker or outdoor disconnect. Stop resetting the breaker repeatedly and diagnose the motor.
Final Thoughts
AC condenser fan replacement is one of the more approachable repairs in home cooling, provided you confirm the diagnosis, match the motor correctly, and respect the electrical safety steps. A failing fan is easy to spot once you know what to look and listen for, and addressing it promptly protects the compressor from the pressure and heat that build when airflow stops.
If the diagnosis points beyond the fan, or if the system shows signs of refrigerant or compressor trouble, a professional evaluation is the safer path. For related reading, explore blower fan replacement for the indoor side of the system, and AC condenser unit for a full component overview.