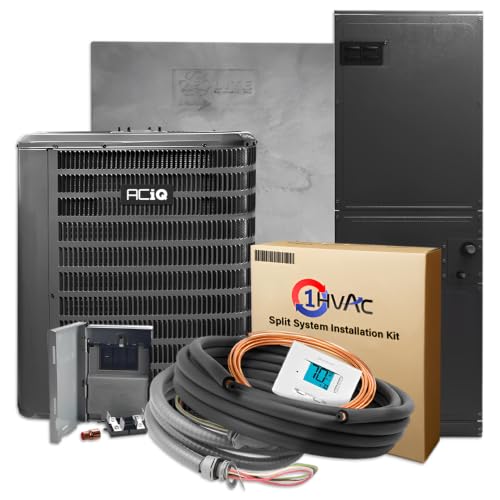
AC Condenser Replacement for Home: A Complete Homeowner Guide
Understand when your outdoor condenser needs replacement, how to choose the right unit for your home, what the installation process involves, and how to make a confident, informed decision.
Explore the GuideWhat an AC Condenser Is and Why It Matters
The air conditioning condenser is the large outdoor unit that releases heat absorbed from inside your home. Inside the condenser cabinet you will find the compressor, condenser coil, and condenser fan. The compressor pressurizes refrigerant, the coil dissipates heat into the outdoor air, and the fan moves air across the coil to speed up the exchange. When any of these components degrade, the entire system loses cooling capacity and efficiency.
Because the condenser is exposed to weather, dirt, debris, and constant vibration, it is one of the most wear-prone parts of a home cooling system. Understanding its role helps you recognize warning signs early and plan a replacement before a breakdown occurs during peak summer heat.
If you want to understand the broader system first, our overview of AC components explains how the condenser, evaporator, and refrigerant loop work together. You can also read about the condenser unit in more detail to build a solid foundation before planning a replacement.
Signs Your AC Condenser Needs Replacement
Not every problem requires a new condenser. However, certain symptoms consistently point to end-of-life conditions or damage that is not economically sensible to repair. Watch for these indicators:
- Age beyond 12 to 15 years. Most residential condensers are designed for a 12 to 18 year service life depending on climate and maintenance history.
- Frequent breakdowns. Repeated compressor or fan motor failures suggest the unit is nearing the end of its reliable service window.
- Refrigerant leaks that return. Persistent leaks often indicate coil corrosion or micro-fractures that are difficult to repair permanently.
- Loud or unusual noises. Grinding, banging, or screeching sounds can signal failing bearings or a deteriorating compressor. See our guide on the condenser unit making loud buzzing noise for troubleshooting context.
- Visible rust, bent fins, or physical damage. Storm damage and severe corrosion reduce heat exchange and shorten remaining service life.
- Reduced cooling with rising energy use. A declining condenser forces the system to run longer, and you may notice rooms struggle to reach the set temperature.
Safety note: Refrigerant handling, electrical disconnects, and brazing require licensed professionals. Never attempt to open the condenser cabinet, disconnect refrigerant lines, or bypass electrical safety devices on your own.
If your system is blowing air that is not cold even when the outdoor unit is running, review compressor running but not cooling before assuming replacement is the only option.
Repair or Replace: How to Decide
HVAC professionals generally weigh the age of the condenser, the scope of the repair, efficiency of the existing system, and the condition of the indoor coil and ductwork. A useful starting point is the rule of thumb: if the condenser is older than 12 years and the repair requires a major component such as the compressor, replacement often offers better long-term reliability and efficiency.
Small repairs such as a capacitor, contactor, or fan motor can extend the life of a healthy condenser. However, when repairs involve refrigerant recovery, compressor work, or coil replacement, the labor and part scope grow quickly. In these scenarios, a new condenser with a modern efficiency rating can reduce future service interruptions and lower seasonal energy use.
Related guides that help with the decision include condenser fan replacement for a targeted fix, compressor motor replacement for major component context, and condenser fan motor replacement considerations to understand typical repair scope in tier terms. You can also review compressor fundamentals to understand why the compressor dominates repair decisions.
How to Choose the Right Condenser for Your Home
Choosing the right condenser is about matching capacity, efficiency, refrigerant type, and compatibility with the rest of the system. A poorly matched condenser can reduce comfort, increase humidity, and shorten equipment life.
Capacity and load calculation
The condenser must match the calculated cooling load of your home. A professional load calculation considers square footage, ceiling height, insulation, window area, orientation, and local climate. Oversized condensers short-cycle, which reduces dehumidification and adds wear. Undersized units run continuously and fail to maintain comfort during peak heat. Our 2-ton system overview illustrates how capacity is typically discussed for mid-size homes.
Efficiency rating
Look for the SEER2 rating, which reflects seasonal efficiency under current DOE test procedures. Higher ratings reduce energy use over the life of the unit. If your indoor coil and air handler are older, confirm compatibility before choosing a high-efficiency condenser. Our guides on efficiency and standards can help you interpret ratings.
Refrigerant type
New condensers use refrigerants aligned with current regulations. Matching the condenser to the existing indoor coil refrigerant type is essential. Mixing refrigerants or mismatching components is unsafe and voids warranties.
Compatibility with indoor equipment
The condenser must be compatible with the indoor coil, metering device, and furnace or air handler. In many cases, replacing the condenser and indoor coil together improves performance and preserves the manufacturer warranty. Ask your contractor to verify the AHRI match for the proposed combination.
Noise and placement
Modern condensers vary in sound levels. If the outdoor unit sits near a bedroom window or patio, compare sound ratings within the tier you are considering. Placement also affects efficiency: ensure adequate clearance for airflow and service access.
For broader buying guidance, our section on AC repair and replacement decisions and the overview of air conditioning systems provide helpful context as you prepare to speak with contractors.
Condenser Tier Comparison
Condensers are commonly grouped by market position and feature set. The table below uses universal tier descriptors instead of numeric figures so the comparison stays useful over time. Use it to align your expectations with the tier you are considering.
| Tier | Best For | Typical Characteristics |
|---|---|---|
| Entry-level | Homeowners replacing a basic system on a straightforward budget | Standard single-stage compressor, essential features, durable construction, solid choice for the tier |
| Mid-range | Households seeking better efficiency and quieter operation | Two-stage or variable-speed compressor options, improved sound insulation, higher SEER2 ratings |
| Premium | Homeowners prioritizing comfort, humidity control, and long-term efficiency | Fully variable-speed compressors, advanced controls, premium materials, top-tier seasonal efficiency |
| Commercial-grade | Large homes, multi-zone systems, and demanding duty cycles | Heavy-duty components, reinforced cabinet, extended warranty coverage, professional-grade build |
Whichever tier you choose, confirm that the condenser is part of a matched system. A mid-range condenser paired with an incompatible indoor coil can underperform an entry-level condenser paired with a proper match.
For more detailed repair and replacement context around specific parts, see blower fan replacement and condenser fan replacement.
The AC Condenser Replacement Process Step by Step
Understanding the installation sequence helps you ask the right questions and set realistic expectations. While every home differs, a typical residential condenser replacement follows these phases:
- Assessment and load calculation. The contractor inspects the existing system, verifies ductwork and electrical capacity, and confirms the correct condenser capacity for your home.
- Permit application. Many jurisdictions require a mechanical permit for refrigerant and electrical work. The contractor typically files the permit and schedules inspection.
- Refrigerant recovery. Existing refrigerant is recovered using EPA-compliant equipment and procedures.
- Disconnect and removal. Electrical power is locked out, refrigerant lines are disconnected, and the old condenser is removed from the pad.
- Pad and line set preparation. The contractor checks the pad for level, inspects or replaces the line set as needed, and prepares the new unit for placement.
- New condenser placement. The new unit is set on the pad with proper clearance for airflow and service access.
- Electrical and refrigerant connections. Wiring is connected to the disconnect, brazing is completed, and the system is evacuated to remove moisture and air.
- Charging and testing. Refrigerant is charged to the manufacturer specification, and the system is tested for pressures, temperatures, and airflow.
- Commissioning and handover. The contractor verifies operation, reviews maintenance steps, registers the warranty, and schedules the inspection.
If your installer recommends additional ductwork or electrical upgrades, ask for the rationale and the expected impact on performance. Related reading on ductwork replacement considerations and condenser and furnace compatibility can help you evaluate those recommendations.
Aftercare, Maintenance, and Warranty Tips
A correctly installed condenser delivers its best performance when it is maintained. The following practices protect your investment and keep the system efficient:
Post-Replacement Checklist
- Keep the area around the outdoor unit clear of leaves, debris, and vegetation.
- Rinse the condenser coil gently with a garden hose each cooling season.
- Replace indoor air filters on schedule to maintain airflow.
- Schedule professional maintenance once per year to check refrigerant charge and electrical connections.
- Register the warranty within the manufacturer's deadline.
- Keep the installation and inspection paperwork for future service.
If you notice performance changes after replacement, consult our troubleshooting resources on compressor fan running but not cooling, condenser fan running but no cold air, and condenser fan spinning but not cooling. Early diagnosis prevents small issues from becoming major repairs.
For homeowners comparing local service providers, our overviews of AC companies in your area and AC contractors near you can help you shortlist qualified professionals. If you are exploring financing or service plans, review AC system tier and pricing context for a framework of what to expect across market segments.
Frequently Asked Questions
How do I know if my AC condenser needs replacement?
Common signs include frequent breakdowns, loud or unusual noises, refrigerant leaks, reduced cooling performance, rust or physical damage on the outdoor unit, and an age beyond 12 to 15 years. A technician can confirm whether repair or full replacement is the better path.
Can I replace just the outdoor condenser unit?
In some cases a condenser-only replacement is possible, but it must match the indoor coil and refrigerant type. Mismatched components often reduce efficiency and void warranties, so many professionals recommend replacing the condenser and indoor coil together for optimal performance.
How long does an AC condenser replacement take?
A straightforward residential condenser replacement typically takes four to eight hours. Factors like electrical upgrades, line set replacement, permit inspections, or difficult placement can extend the job to a full day or more.
Should I upgrade to a higher SEER condenser during replacement?
If your existing system is older and less efficient, upgrading to a higher SEER2-rated condenser can lower long-term energy use and improve comfort. Check local utility rebates and federal tax credit eligibility, and confirm that the indoor coil and furnace or air handler are compatible.
Do I need a permit to replace an AC condenser?
Most jurisdictions require a mechanical permit for condenser replacement because refrigerant handling and electrical connections are regulated. A licensed HVAC contractor typically handles the permit application and inspection process.