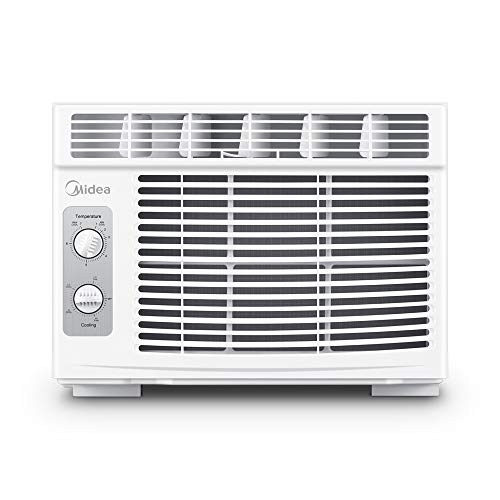
How to Put a Window Air Conditioner in a Sliding Window
Complete step-by-step guide for safely installing a window AC in a horizontal sliding window. Learn the right tools, brackets, and sealing techniques for a cool, efficient home.
SEE INSTALLATION STEPSInstalling a window air conditioner in a sliding window is different from a traditional double-hung window. Horizontal sliding windows require special brackets, proper sealing, and careful weight distribution. This guide will walk you through every step to ensure a secure and efficient installation.
Why Sliding Windows Need Special Attention
Sliding windows (also called horizontal sliding or gliding windows) open sideways rather than up and down. This creates unique challenges for window AC installation:
- Weight support: The window frame may not support the AC's weight as well as a double-hung window.
- Sealing: The side-to-side motion leaves gaps that must be properly sealed to prevent air leaks.
- Bracket compatibility: Not all window AC brackets work with sliding windows.
Most window AC units are designed for vertical (double-hung) windows, but with the right approach, you can successfully install them in horizontal sliding windows. If you're considering other options, you might also explore portable air conditioners that don't require a window or portable units with no window requirements.
Tools & Materials You'll Need
Before starting, gather these essential tools and supplies. Having everything ready will make the installation smoother.
- 🛠️ Screwdriver (Phillips & flathead)
- 📏 Measuring tape
- 🔩 Window AC bracket kit (sliding window compatible)
- 🪚 Foam weather stripping
- 🪚 Window seal tape (or foam insulation tape)
- 📐 Level
- 🔧 Drill (if required for bracket mounting)
- 🧲 Support bracket or L-brackets
- 🪚 Caulking gun with silicone sealant
- 🧹 Utility knife
If you're looking for a specific bracket, check out the universal window AC support bracket for added stability. For sealing, a universal adjustable window sealing plate can be very helpful.
Step-by-Step Installation Guide
Follow these steps carefully to install your window AC in a sliding window safely and effectively.
Step 1: Measure Your Window Opening
Measure the height and width of your window opening. For sliding windows, you'll typically install the AC in the bottom track where the window slides. Measure the opening height when the window is fully open and the width from the window frame to the edge of the track.
- Minimum opening height: At least the height of your AC unit + 1 inch for clearance.
- Width: Should be at least the width of the AC + 2 inches for foam padding.
If your window is too small, consider a small window air conditioner less than 12 inches high or a 5,000–6,000 BTU AC for compact spaces.
Step 2: Choose the Right Bracket
Standard window AC brackets often don't fit sliding windows because they're designed for vertical sashes. You need a bracket that attaches to the bottom track and supports the AC from below. Look for:
- Adjustable support arms that extend to the window frame.
- Heavy-duty construction (at least 100 lbs capacity).
- Included hardware for mounting to the track.
Some brackets also come with side supports to prevent the AC from tilting. For a durable option, check the outdoor wall mounting bracket for mini-split systems, though it's designed for larger units.
Step 3: Install the Support Bracket
- Position the bracket in the bottom track of the sliding window.
- Adjust the arms so they extend to the outer window frame.
- Secure the bracket using the provided screws or bolts. If your window frame is metal, you may need to drill pilot holes.
- Use a level to ensure the bracket is perfectly horizontal. An uneven bracket can cause the AC to strain or leak.
Step 4: Prepare the Window and AC Unit
- Clean the window track to remove dirt and debris.
- Apply foam weather stripping along the bottom edge of the AC unit to create a seal against the window frame.
- Attach the side panels (if your AC comes with them) to fill the gaps between the AC and the window frame.
- Check the AC's drain hole to ensure it's clear and sloped slightly outward to prevent water from leaking inside.
For extra sealing, use universal adjustable window sealing plates to cover any remaining gaps.
Step 5: Place the AC into the Window
- Lift the AC unit (with help if needed – units can be heavy) and place it on the support bracket.
- Slide the AC into the window opening so the front face is flush with the interior window frame.
- Ensure the AC is level front-to-back and side-to-side. Use shims if necessary.
- Close the sliding window gently against the top of the AC unit. Do not force it.
Step 6: Secure the AC and Window
- Lock the sliding window in place using the window's locking mechanism.
- Install the L-brackets (provided with most ACs) to secure the window sash to the AC frame.
- Fill any gaps between the AC and the window frame with foam insulation strips.
- Apply silicone caulk around the outside edges to prevent water intrusion.
If your window doesn't lock properly, consider using a window sealing plate to help secure it.
Step 7: Test the Installation
- Plug in the AC and turn it on.
- Check for air leaks around the edges. If you feel drafts, add more weather stripping.
- Verify the AC is draining properly – you should see water dripping outside.
- Run the AC for 15 minutes to ensure it cools efficiently.
If you encounter issues like the AC leaking water inside the house or the fan running but not cooling, refer to our troubleshooting guides.
Common Issues & Solutions
AC Not Cooling Properly
If the AC runs but doesn't cool, check the filter, thermostat, and refrigerant levels. You might also want to read AC not blowing cold air – outside unit not running or my air conditioner is not blowing out cold air for common fixes.
Water Leaking Inside
Ensure the AC is slightly tilted outward (about 1/4 inch) so water drains outside. If the problem persists, see my air conditioner is leaking water inside the house.
Window Won't Close Properly
If the sliding window doesn't close completely, you may need a universal adjustable window sealing plate to fill the gap. For crank-out windows, see installing a portable AC in a casement window.
Benefits of a Proper Sliding Window AC Installation
- Energy Efficiency: Proper sealing prevents cooled air from escaping, saving you money on electricity bills.
- Improved Comfort: A well-installed AC cools your room evenly and quietly.
- Safety: Secure brackets and locking mechanisms prevent the AC from falling or being pushed in.
- Durability: Correct installation reduces stress on the unit, extending its lifespan.
For more energy-saving tips, check out our energy saving tips for AC guide.
Not comfortable installing it yourself? If your window is unusually sized, or you're unsure about the electrical load, it's best to find an HVAC contractor near me or check our how to choose an HVAC contractor guide for professional help.