
Outdoor Wall Mounting Bracket for Ductless Mini Split Air Conditioners
Everything you need to know about selecting, sizing, and installing a wall mounting bracket for a ductless mini split condenser — so your outdoor unit stays secure, level, and quiet for years.
VIEW RECOMMENDED BRACKETSWhy the bracket matters: A ductless mini split system is only as reliable as the surface that holds its outdoor condenser. The right wall mounting bracket lifts the unit off the ground, protects it from snow and splash, dampens vibration, and simplifies future service access. This guide walks you through bracket types, load ratings, wall preparation, installation steps, and the features that separate an entry-level bracket from a professional-grade one.
What Is an Outdoor Wall Mounting Bracket?
An outdoor wall mounting bracket for ductless mini split air conditioners is a rigid steel or stainless steel frame that is fastened to an exterior wall and supports the condenser unit above grade. Unlike a simple ground pad, a wall bracket keeps the condenser off the soil, away from standing water, and out of reach of debris, lawn equipment, and snow accumulation. It also frees up ground space, which is especially useful in narrow side yards, balconies, and urban properties where a pad would obstruct walkways.
Because the condenser contains the compressor, fan, and refrigerant circuit, it produces continuous vibration during operation. A well-designed bracket includes cross-bracing and mounting points for rubber isolation pads, so vibration is transferred into the wall structure as little as possible. This is the difference between a system you barely notice and one that hums through the bedroom wall at night. If you are still planning the full outdoor installation, our guide to the outdoor condensing unit covers placement, clearances, and airflow considerations that pair naturally with bracket selection.
Why Use a Wall Bracket Instead of a Ground Pad?
Ground pads are a perfectly valid solution when you have a level, well-drained surface and enough clearance. A wall bracket becomes the better choice in specific situations:
- Limited ground space: Narrow side yards, balconies, and zero-lot-line properties often have no room for a pad and service clearance.
- Snow and flood exposure: Elevating the condenser keeps it above snow lines and ground splash, reducing corrosion and ice damage.
- Debris and pest control: Lifting the unit away from soil, mulch, and leaf litter limits rodents, insects, and vegetation growth near the coil.
- Cleaner aesthetics: A wall-mounted condenser looks intentional and tidy, especially on new construction and modern facades.
- Service access: An elevated unit is easier to inspect, clean, and service without kneeling in mud or snow.
The main trade-off is that the wall must be structurally capable of carrying the load. Brackets transfer weight and vibration into the building, so you need verified framing or masonry behind the mounting points. If the wall structure is uncertain, a ground stand or pad is the safer route. Our guide on multi-zone mini split systems also explains how outdoor placement affects line-set routing when multiple indoor heads share one condenser.
Types of Outdoor Wall Mounting Brackets
Brackets are generally classified by load capacity, material, and mounting style. The descriptors below use a consistent tier system so you can compare brackets relatively, without reference to any specific currency or figure.
Fixed L-Bracket Pairs
Two powder-coated steel arms bolted directly to the wall, typically with a simple crossbar. Suitable for smaller single-zone condensers in sheltered locations. Solid for light loads, but offers less adjustability and fewer isolation options.
Reinforced Cross-Brace Brackets
Heavier gauge steel with diagonal bracing and predrilled isolation-pad mounts. A balanced tier that handles most residential mini split condensers while resisting vibration and wind load. The most common professional choice for standard homes.
Stainless Steel Adjustable Brackets
Corrosion-resistant stainless construction with slotted arms for leveling and fine height adjustment. A long-term investment for coastal, humid, or harsh climates where rust-proof finish and precise alignment matter most.
Heavy-Duty Multi-Unit Frames
Engineered frames for larger condensers, multi-zone systems, or rooftop and wall applications with high wind exposure. Reinforced welds, thick high-grade steel, and rated load capacities well above typical residential needs.
How to Size a Bracket for Your Mini Split Condenser
Sizing is the single most important decision. An undersized bracket is a safety risk, while an oversized commercial-grade frame is simply unnecessary for a small single-zone unit. Follow this sequence:
- Find the operating weight. Check the condenser's specification label. Use the operating weight, not the shipping weight, and add roughly 10 to 15 percent as a safety margin for refrigerant charge, snow, and wind load.
- Match the bracket load rating. Choose a bracket rated comfortably above your calculated figure. Never select a bracket that is only marginally adequate.
- Check the wall span. The bracket arms must align with structural framing or masonry. Measure stud spacing and confirm the bracket's mounting-hole pattern fits.
- Confirm clearance requirements. Verify the manufacturer's minimum clearances for airflow, service access, and line-set routing before committing to a mounting height.
- Plan for vibration isolation. Select a bracket with rubber pads or add isolation feet. This is the most effective step for reducing noise transfer into the home.
⚠️ Safety note: A wall bracket carries a heavy, vibrating mechanical unit above head height. If you cannot verify that the mounting surface is structural framing, blocking, or solid masonry, do not proceed. Consult a licensed HVAC technician or structural professional before installing a bracket on siding, stucco, or veneer alone.
Bracket Comparison by Tier and Best Use
| Tier | Material | Best For | Key Characteristics |
|---|---|---|---|
| Entry-Level | Powder-coated steel | Small single-zone condensers, sheltered walls | Simple L-arm design, basic crossbar, limited adjustability |
| Mid-Range | Heavy-gauge steel | Standard residential mini split systems | Diagonal bracing, isolation-pad mounts, balanced strength-to-weight |
| Premium | Stainless steel | Coastal, humid, and harsh climates | Rust-proof finish, slotted adjustable arms, precise leveling |
| Commercial-Grade | High-grade reinforced steel | Large condensers, multi-zone systems, high wind zones | Reinforced welds, high rated load capacity, engineered bracing |
Installation Steps for a Wall Mounting Bracket
Bracket installation is straightforward but demands care. The following sequence reflects standard professional practice; always defer to the bracket manufacturer's instructions and local building codes where they differ.
- Plan the location. Choose a wall with structural framing, adequate airflow clearance, and a sensible line-set route to the indoor unit. Keep the condenser above typical snow depth and away from dryer vents and heat sources.
- Mark and verify framing. Use a stud finder to locate studs or blocking. Mark the bracket mounting holes so every fastener lands in solid structure. For masonry, plan appropriate anchors.
- Mount the bracket. Level the bracket before tightening fasteners fully. A bracket that is out of level puts uneven stress on the condenser mounts and can cause noise.
- Add vibration isolation. Install rubber isolation pads or feet on the bracket arms before setting the condenser. This is the most important acoustic step.
- Set and secure the condenser. Lift the unit with proper equipment and help, bolt it to the bracket per the manufacturer's pattern, and confirm it is level in both directions.
- Connect and test. Route the line set and drain per the installation manual, then run the system and listen for unusual vibration or resonance. Adjust isolation pads if needed.
If your project involves a multi-zone system or a more complex outdoor arrangement, the guide on multi-zone ductless heating and cooling systems explains how to coordinate multiple condensers and shared wall space. For systems where the condenser is remote from the indoor unit, understanding moving a cool air conditioner safely can help you plan the relocation without stressing the bracket or line set.
Features That Separate a Good Bracket From a Great One
Two brackets can look similar in photos and perform very differently over a decade of weather and vibration. Prioritize these features:
Corrosion Protection
Powder coating is fine inland; stainless steel or a rust-proof finish is the better long-term investment near the coast, in humid climates, or anywhere salt spray and persistent moisture are present.
Cross-Bracing
Diagonal bracing resists racking and wind load far better than simple L-arms. Look for welded or bolted cross members rather than a single crossbar.
Isolation Mounts
Predrilled points for rubber pads or vibration-damping feet are a hallmark of a thoughtfully designed bracket. They are the simplest way to keep compressor noise out of the wall.
Adjustability
Slotted arms and leveling features make installation easier and reduce stress on the condenser mounts. Adjustability is especially valuable on older or imperfect exterior walls.
Common Mistakes to Avoid
- Fastening only into siding or sheathing. The bracket must anchor into framing, blocking, or masonry. Surface fastening is a failure waiting to happen.
- Ignoring operating weight. Selecting a bracket based on dry weight alone leaves no margin for refrigerant, snow, or wind.
- Skipping vibration isolation. A rigid bracket transmits compressor vibration directly into the wall structure and into living spaces.
- Mounting too low. A condenser close to grade is exposed to splash, snow, and debris. Elevate it appropriately for your climate.
- Blocking airflow clearances. A bracket placement that crowds the coil or service panel makes the system inefficient and hard to maintain.
- Forgetting the drain route. Plan condensate drainage before mounting; retrofitting a drain path around a bracket is unnecessarily difficult.
If the unit later shows symptoms such as the compressor not starting, the compressor not running guide can help you distinguish a mounting-related electrical issue from a mechanical fault. Likewise, if cooling performance drops after installation, the AC not cooling properly checklist covers the most common causes.
Recommended Outdoor Wall Mounting Brackets for Mini Split Systems
Below are bracket options across entry-level, mid-range, premium, and commercial-grade tiers. Compare features such as material, load rating, cross-bracing, and vibration isolation before selecting the one that matches your condenser and wall structure.
⚠️ AFFILIATE DISCLOSURE: This website contains affiliate links. As an Amazon Associate, we earn from qualifying purchases. If you make a purchase through these links, we may receive a small commission at no additional cost to you. Read our full affiliate policy.
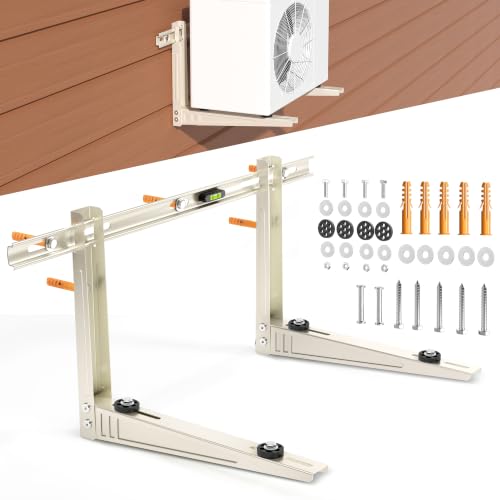
Toutgood Mini Split Wall Mounting Bracket for 7000 BTU to 12000 BTU | Max 400Lb Capacity, Galvanized Steel with Dual Anti-Rust Coating for Outdoor Ductless Air Conditioner Minisplit AC Heat Pump
Check price on Amazon
Qualward Mini Split Wall Mount Bracket, Heavy Duty, Fits 7000-18000 BTU Ac | Galvanized Steel Frame, 265 lb Capacity, Anti-Vibration Pads, Leveling Bar, Rust Protection for Ductless ACs and Heat Pumps
Check price on Amazon
Tikcode Mini Split Wall Mounting Bracket for 9000 Btu to 18000 Btu Air Conditioner AC Heat Pump Systems, Heavy Duty AC Support Bracket for Outside, Holds Up to 400lbs
Check price on Amazon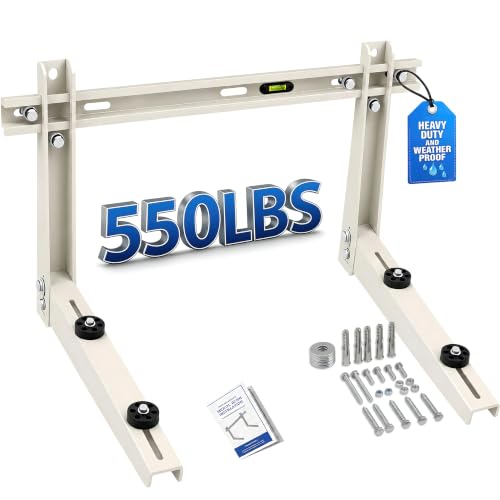
Heavy Duty Mini Split Wall Mounting Bracket, 550 lb, Fits 9000–36000 BTU AC | Galvanized Carbon Steel, Dual Anti-Rust Coating, Leveling Bar and Anti-Vibration Pads for Outdoor Ductless AC and Heat Pumps
Check price on Amazon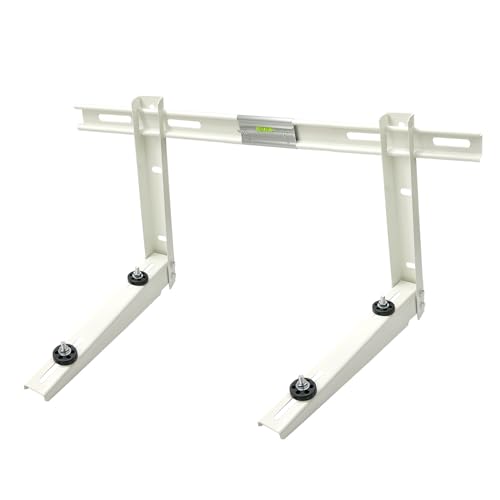
Mini Split Wall Mounting Bracket for Outside Ductless AC Heating System 7000-18000 Btu
Check price on Amazon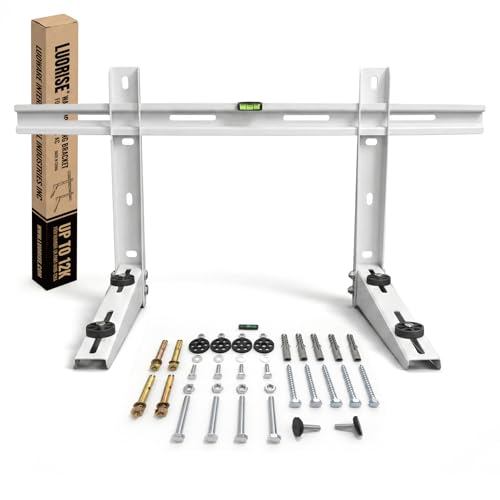
LUORISE Mini Split Wall Mounting Bracket, 7000-12000 BTU AC Support | Heavy-duty wall bracket for ductless mini split AC and heat pump units; adjustable crossbar with rubber pads
Check price on Amazon
Mini Split Wall Mounting Bracket, 550 lb Capacity, Fits 9000–36000 BTU AC | Galvanized Carbon Steel, Dual Anti-Rust Coating, Leveling Bar and Anti-Vibration Pads for Outdoor Ductless AC and Heat Pumps
Check price on Amazon
Arouyuki Outdoor Wall Mounting Bracket for Mini Split Air Conditioner | Ductless, Heat Pump Systems, Compressors & HVAC Systems, Heavy Duty, Universal, White, Galvanized Steel
Check price on AmazonFrequently Asked Questions
What size outdoor bracket do I need for my mini split condenser?
Match the bracket load rating to your condenser's operating weight, not just its dry weight. Add roughly 10 to 15 percent as a safety margin for refrigerant charge, snow, and wind load. Brackets are commonly classified by load capacity, so check the unit's specification label and choose a bracket rated above that figure.
Can I mount a mini split condenser on a wall without drilling into the siding?
You can, but the load must transfer safely into the structural framing. Wall brackets are designed to be bolted into studs, blocking, or masonry, so surface-only fastening into siding is not acceptable for a heavy condenser. A ground stand may be a better choice when the wall structure cannot be verified.
How high should the outdoor unit be mounted on a wall bracket?
Keep the condenser above typical snow accumulation and clear of ground splash, often around 12 to 18 inches above grade, while staying within the manufacturer's maximum line-set elevation and length limits. Also leave enough clearance for airflow and service access around the unit.
Do wall mounting brackets reduce vibration and noise?
Yes, when paired with rubber isolation pads or vibration-damping feet. A rigid bracket transmits compressor vibration into the wall structure, so acoustic isolation accessories are strongly recommended, especially for bedrooms and shared walls.
Are stainless steel or galvanized brackets better for coastal areas?
Stainless steel is generally the better long-term investment in coastal and high-humidity climates because it resists corrosion more reliably. Galvanized or powder-coated steel is a solid choice for inland regions, provided the coating remains intact over time.
Can a wall bracket be used for a multi-zone mini split system?
Yes, provided the bracket is rated for the combined weight and wind load of the condenser it supports. Multi-zone systems often use a single larger condenser, so a commercial-grade bracket may be appropriate. Coordinate the outdoor placement with the line-set routing described in our multi-zone mini split guide.
Related Guides
If you are planning a complete outdoor installation, these guides on AC Units Guide can help you connect the bracket decision to the rest of the system:
Ready to Secure Your Mini Split Condenser?
Compare the recommended brackets above by tier, material, and load rating, then confirm the wall structure and clearance requirements for your specific condenser. A well-chosen bracket is a long-term investment in quiet operation, corrosion resistance, and safe service access.