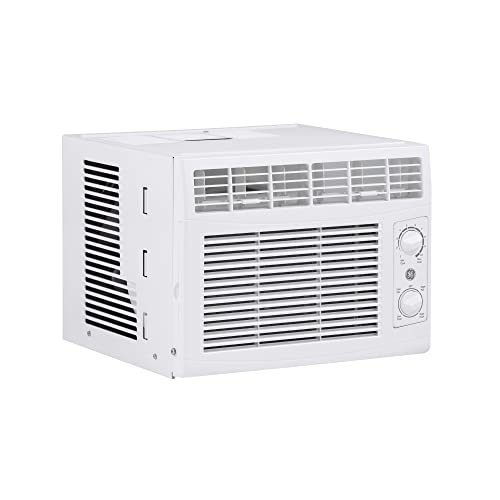
Installing a Small Window Air Conditioner: A Complete Step-by-Step Guide
Everything you need to know to safely install a compact window AC unit — from measuring your window and checking electrical requirements to sealing the unit and testing performance.
Before You Begin: Is a Small Window AC Right for Your Space?
Small window air conditioners typically fall in the 5,000 to 8,000 BTU range and are designed for rooms up to roughly 350 square feet. They are an excellent fit for bedrooms, home offices, dorm rooms, and small apartments. If you are still deciding between a window unit and other cooling options, our guide on installing an AC unit covers the broader landscape of cooling installations.
Window units are popular because they are self-contained, do not require ductwork, and are relatively simple to install compared to split systems. That said, the installation still demands careful measurement, proper support, and attention to electrical safety. If your window type is unusual — for example, a casement or crank-out window — a standard window unit may not fit, and you may need to explore alternatives such as installing a portable AC unit in a casement window or installing a portable air conditioner in a crank-out window.
Tools and Materials You Will Need
Gather everything before you start so the installation goes smoothly without interruptions. Most of these items are common household tools.
Measuring Tape
For measuring the window opening and the AC unit dimensions accurately.
Power Drill & Screwdriver
For attaching the support bracket and securing side panels.
Spirit Level
Ensures the unit sits level so condensation drains properly.
Window AC Bracket or Support
Provides secure outdoor support, especially for heavier units.
Weather Sealant or Foam Insulation
Seals gaps around the unit to prevent air leaks and pest entry.
Work Gloves
Protects your hands from sharp metal edges on the unit and window frame.
Step-by-Step Installation Guide
Follow these steps in order. Rushing any stage — especially measuring and support — can lead to problems later.
Measure the Window and the Unit
Measure the width and height of your window opening. Then compare those measurements to the AC unit's dimensions (usually listed in the product specifications). The unit should fit with the window able to close securely behind it. Also check the window sill depth — the unit needs enough surface to rest on, plus the bracket extends outward. If the window is too narrow or the sill too shallow, a different unit or window location may be required.
Verify Electrical Requirements
Small window AC units typically run on a standard 115-volt household circuit, but you should confirm this in the manual. Check that the outlet you plan to use is on a circuit that can handle the unit's amperage without tripping breakers. Avoid using extension cords — plug the unit directly into a grounded outlet. If the outlet is far from the window, consider having an electrician install a dedicated outlet nearby.
Prepare the Window and Frame
Clean the window frame and sill, removing dust, debris, and any old weather stripping. Check that the window opens and closes smoothly. If your window is old or the frame is damaged, repair it before installing the AC — a weak frame cannot safely support the unit. For older homes where the window frame may need reinforcement, review our guide on installing a window air conditioner in a wall for related structural considerations.
Install the Support Bracket
Most small window AC units come with a support bracket, or you can purchase one separately. The bracket attaches to the exterior wall below the window and cradles the back of the unit. Use a drill to secure the bracket according to the manufacturer's instructions. This step is critical: the bracket prevents the unit from tipping outward and takes stress off the window frame. Use a level to ensure the bracket — and later the unit — sits level, with a slight downward tilt toward the outdoors for drainage.
Lift and Place the Unit
With a helper if possible, lift the AC unit into the window opening and slide it back until it rests securely on the bracket and sill. The front of the unit should face indoors and the back should extend outdoors. Center the unit in the window opening. Check the level again — the unit should tilt very slightly toward the outside so condensation drains away from the room.
Secure the Unit and Close the Window
Lower the window sash so it rests snugly against the top of the AC unit. Many units include a sash lock or bracket to keep the window from being opened from outside. Attach the side panels (accordion-style panels) that come with the unit to fill the gaps between the unit and the window frame. Screw the panels into place if the manufacturer provides screws.
Seal the Gaps
Use foam insulation or weather sealant to fill any remaining gaps around the unit, especially along the top and sides. This prevents outside air from leaking in, keeps insects out, and improves the unit's efficiency. Proper sealing is often overlooked but makes a noticeable difference in cooling performance and energy use. For more on sealing and insulating, see our guide on insulating a window AC unit.
Test the Installation
Plug the unit in and turn it on. Listen for unusual vibrations or rattling, which may indicate the unit is not level or the side panels are loose. Check that cool air flows steadily and that no water drips indoors. Let it run for 15 to 20 minutes and confirm the room begins to cool. If the unit vibrates excessively, re-check the level and tighten all fasteners.
Common Mistakes to Avoid
- Skipping the support bracket: Relying only on the window sill is risky, especially for units above the first floor.
- Ignoring the slight outdoor tilt: A unit that tilts inward will drip condensation into your room.
- Using an extension cord: This can overheat and is a fire hazard. Plug directly into a grounded outlet.
- Not sealing gaps: Air leaks waste energy and let humidity and insects inside.
- Forgetting to check the window lock: Secure the window so it cannot be opened from outside.
When to Consider a Different Installation Approach
Some windows — such as sliding windows, casement windows, or windows without a sill — are not compatible with standard window AC units. In those cases, alternatives include through-the-wall installation, portable units, or mini-split systems. If you are weighing your options, our articles on installing a through-the-wall air conditioner and installing a mini-split explain the requirements and trade-offs of each approach. For homes without ductwork, installing air conditioning in a house without ducts provides a useful overview of ductless solutions.
Frequently Asked Questions
Many small window units are designed for DIY installation and come with the necessary brackets and panels. However, if you are uncomfortable lifting heavy objects, working at height, or drilling into exterior walls, hiring a professional is a safer choice. Units installed above the first floor especially benefit from professional support and secure brackets.
The back of the unit needs unobstructed airflow to exhaust heat. Keep at least 12 to 18 inches of clearance behind the unit and avoid placing it where shrubs, fences, or walls block the vents. Poor airflow reduces cooling performance and strains the compressor.
Standard window AC units are designed for double-hung windows. Sliding windows require a special bracket or a different unit type. If your window slides horizontally, explore portable AC options or consult a specialist before purchasing a window unit.
Clean or replace the air filter every two to four weeks during heavy use, and at least once per season during lighter use. A clean filter maintains airflow, improves cooling efficiency, and extends the life of the unit.
The side panels are designed to fill gaps, but they have limits. If the gap is larger than the panels can cover, you may need additional foam insulation or a different unit size. Never force a unit into a window that is too small — this damages the frame and compromises safety.
Final Thoughts
Installing a small window air conditioner is a manageable project for most homeowners, provided you measure carefully, use a support bracket, and seal the unit properly. A correct installation means quieter operation, better cooling, and lower energy consumption. Once your unit is in place, regular maintenance — cleaning filters, checking seals, and inspecting the bracket — will keep it running efficiently for years. If your installation involves unusual window types or older home construction, the related guides linked throughout this article will help you navigate the alternatives. Explore our recommended small window air conditioners below to find a unit that matches your room size and installation setup.
Ready to Choose Your Small Window AC?
Browse our curated selection of compact window air conditioners suited for bedrooms, offices, and small living spaces.
View Recommended Units