Insulating a Window AC Unit: The Complete Guide
Stop air leaks, keep cool air inside, and get more from every cooling cycle. A practical, step-by-step guide to sealing and insulating your window air conditioner the right way.
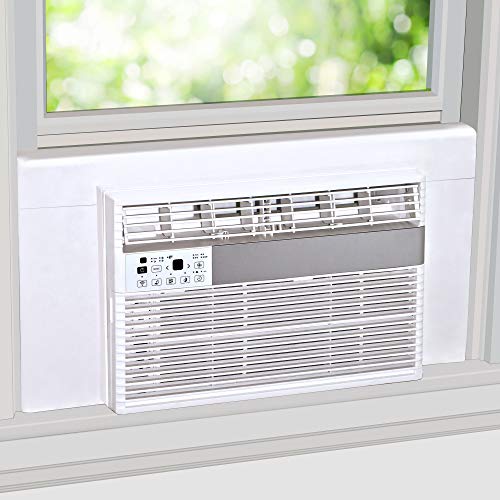
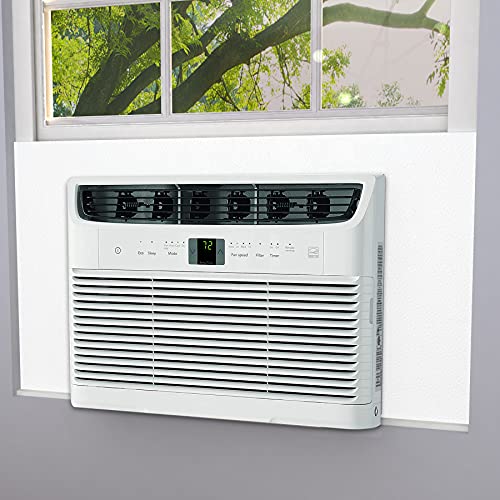
Start SealingWhy this matters: A window air conditioner is only as effective as the seal around it. Gaps around the unit let hot outdoor air in and push cooled air out, forcing the compressor to work harder and longer. Proper insulation is one of the simplest, highest-impact improvements you can make — often before considering an upgrade to a more efficient model.
Why Insulating a Window AC Unit Matters
A window air conditioner sits in an opening that was never designed to hold it. The window frame, sash, and the gap between the unit and the surrounding structure are natural pathways for air exchange. Even a small opening — a quarter-inch gap along the window sash, for example — can allow a surprising amount of conditioned air to escape and outdoor humidity to enter.
When you insulate a window AC unit properly, several things happen at once. The unit holds its set temperature more steadily, the compressor cycles less frequently, and the room feels more comfortable with fewer hot and cold spots. Insulation also helps keep insects, dust, and outdoor noise out, which improves the overall experience of using a window unit in a bedroom or living space.
Insulation is especially valuable for older windows, where frames may be warped or the sash no longer closes flush. If you are still deciding on the right unit for your opening, our guide to installing a window air conditioner in a wall explains the structural considerations, and the small window air conditioner installation guide covers compact openings where sealing is even more critical.
Common Air Leaks Around Window AC Units
Before you apply any insulation, it helps to understand where the air is actually escaping. Most leaks around a window air conditioner fall into a few predictable categories.
- The gap between the upper and lower window sashes. When the window is raised to fit the unit, the two sashes no longer meet. This is often the largest single leak point.
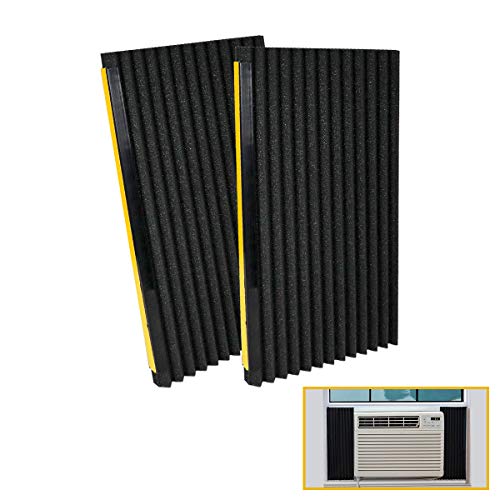
- The sides of the unit where it meets the window frame. Even with the included side panels, the accordion-style panels rarely seal perfectly, especially if the window frame is not perfectly square.
- The top of the unit and the lower sash. The sash resting on top of the unit can leave a thin gap along its entire length.
- The bottom sill and the unit's base. Rain, drafts, and insects can enter here, particularly if the unit is not tilted slightly outward for drainage.
- Around the window frame itself. Older frames may have cracks at the corners or gaps between the frame and the wall.
A quick way to find leaks is to close the room, turn on the AC, and run a damp hand or a tissue along the perimeter of the unit on a windy day. Any spot where the tissue flutters or your hand feels a draft is a priority for sealing.
Materials and Tools You Will Need
You do not need specialized equipment to insulate a window AC unit. Most of what you need is available at a hardware store, and the job typically takes an afternoon. The table below outlines common materials and what each is best suited for.
| Material | Best For | Notes |
|---|---|---|
| Weatherstripping foam tape | Sash gaps, frame edges, top of unit | Choose closed-cell foam for outdoor use; it resists moisture better than open-cell foam. |
| Window insulation kit (shrink film) | Covering the entire window opening around the unit | Use a heavy-duty outdoor-rated film if the window faces direct sun or wind. |
| Insulated side panels | Replacing thin manufacturer panels | Rigid foam board cut to size offers better thermal resistance than standard accordion panels. |
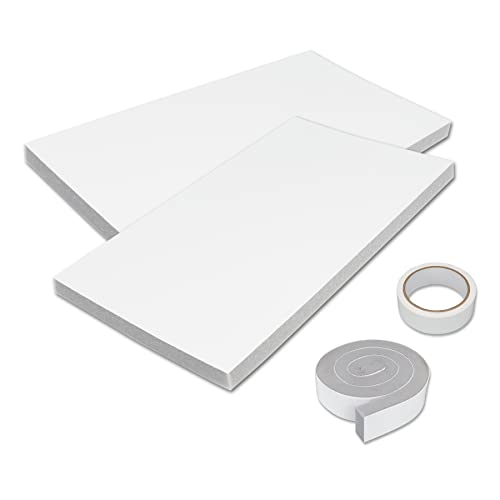
| Rigid foam board (closed-cell) | Filling larger gaps, insulating the top gap | Cut slightly oversized for a friction fit; seal edges with foil tape. |
| Foil tape or HVAC tape | Sealing foam board edges and joints | More durable than duct tape outdoors and resists UV degradation. |
| Caulk (exterior-grade silicone) | Cracks in the window frame and sill | Clean and dry the surface first; silicone adheres well to most frame materials. |
| Draft stopper or foam noodle | The gap between the two sashes | A simple, removable option for renters who cannot modify the window. |
| Support bracket (if not already installed) | Keeping the unit level and stable | Proper support prevents sagging that opens new gaps over time. |
For tools, a utility knife, measuring tape, scissors, and a caulk gun cover nearly every method in this guide. If you are installing a new unit rather than sealing an existing one, the wall installation guide and the compact unit guide walk through the mounting process step by step.
Step-by-Step Insulation Methods
The methods below are arranged from simplest to most thorough. You can use one or combine several, depending on the size of the gaps and whether you rent or own the home.
Method 1: Seal the Sash Gap with Weatherstripping
The gap between the upper and lower sashes is usually the largest leak. Clean the surfaces where the sashes meet, then apply closed-cell foam weatherstripping along the bottom edge of the upper sash and the top edge of the lower sash. Press firmly so the adhesive bonds. When the window is lowered onto the unit, the foam compresses and closes the gap. For a renter-friendly alternative, wedge a foam draft stopper or a section of foam pipe insulation into the gap instead.
Method 2: Reinforce the Side Panels
Manufacturer side panels are typically thin plastic or accordion folds that do little to stop air movement. Measure the opening on each side of the unit and cut rigid closed-cell foam board to fit. Slide the foam board behind or in place of the original panels, then seal the edges with foil tape. This adds both thermal resistance and a physical barrier against drafts. If you are working with a through-the-wall installation, the same principle applies — see the through-the-wall air conditioner guide for context on how the sleeve and frame interact.
Method 3: Insulate the Top Gap
The lower sash resting on top of the unit often leaves a thin, continuous gap. Cut a strip of rigid foam board to the width of the window and thick enough to fill the gap snugly. Wrap the strip in foil tape on the exposed edges, then press it into place between the sash and the top of the unit. This is one of the most effective single improvements because the gap runs the full width of the window.
Method 4: Weatherstrip the Window Frame Perimeter
Inspect the window frame for cracks at the corners and gaps where the frame meets the wall. Fill cracks with exterior-grade silicone caulk. Apply foam weatherstripping along the frame where the sash slides, so the window closes against a soft seal rather than bare wood or vinyl. This step is especially important in older homes, where frame movement over time creates new openings.
Method 5: Apply a Window Insulation Film
For a comprehensive seal, apply a shrink-film insulation kit over the entire window opening around the unit. Tape the film to the frame, then shrink it taut with a hair dryer. This creates a continuous air barrier that covers the sash gap, side panels, and any small leaks in one step. Use outdoor-rated film if the window is exposed to weather. The film is removable, which makes it a good option for seasonal setups.
Method 6: Seal the Exterior with Foam Board and Tape
From the outside, check the perimeter of the unit where it meets the window frame. Cut closed-cell foam board to fill any visible gaps, and seal all joints with foil tape. Make sure the unit retains a slight outward tilt so condensation and rain drain away from the room. Do not block the exterior intake or exhaust louvers — airflow over the condenser coils is essential for the unit to reject heat properly.
If you are considering a different style of unit altogether, the installation guides for portable units in casement windows and portable units in crank-out windows cover sealing approaches for openings that cannot accept a traditional window unit. For homes without ductwork, installing air conditioning in a house without ducts explains the alternatives, including ductless systems that avoid window openings entirely.
Mistakes to Avoid
- Sealing the vents. Covering the exterior louvers traps heat and can cause the unit to overheat or cycle inefficiently.
- Using indoor-only tape or foam outdoors. Standard duct tape and open-cell foam degrade quickly in sun and rain. Use UV-resistant foil tape and closed-cell foam.
- Ignoring the tilt. A unit that tilts inward will pool condensation and leak into the room. Maintain a slight outward slope and check it after adding insulation, since foam board can change the angle.
- Over-compressing weatherstripping. Foam that is crushed too tightly loses its ability to spring back and seal. Choose a thickness that compresses by about half when the window closes.
- Skipping the frame. Sealing only around the unit while leaving cracks in the window frame open defeats much of the effort. Treat the frame as part of the envelope.
- Forgetting support. A unit that sags over time opens new gaps at the top and sides. A proper support bracket keeps the seal intact season after season.
Seasonal Maintenance and Re-Sealing
Insulation is not a one-time task. Weatherstripping compresses, tape lifts, and foam board can shift with temperature changes. A brief inspection at the start of each cooling season keeps the seal effective.
- Remove the unit or pull it slightly forward, and inspect the foam and weatherstripping for cracks, compression, or moisture damage.
- Replace any weatherstripping that no longer springs back when pressed.
- Re-tape foam board edges that have lifted, and re-caulk any frame cracks that have reopened.
- Check the unit's tilt and support bracket, and adjust if the unit has settled.
- Clean the filter and inspect the exterior coils before reinstalling, so the unit starts the season with clear airflow.
If you are planning a larger upgrade — for example, moving from a window unit to a ductless system — the mini-split installation guide and the central air installation guide for homes with ducts explain what the transition involves. For a broader look at system-level efficiency, installing a new HVAC system covers the decision factors.
Frequently Asked Questions
Can I insulate a window AC unit without removing it?
Yes. Most of the methods in this guide — weatherstripping the sash, adding foam board to the side panels, and applying shrink film — can be done with the unit in place. Removing the unit makes it easier to inspect the frame and exterior, but it is not required for a basic seal.
What is the single most effective insulation step?
Sealing the gap between the upper and lower window sashes typically delivers the largest improvement, because that gap is usually the longest and widest leak path. Reinforcing the side panels is a close second.
Will insulation make the unit run less often?
In most cases, yes. By reducing air exchange, the room holds its temperature longer, so the compressor cycles less frequently. The effect is most noticeable in rooms with large window openings or older frames.
Is it safe to cover the entire window with film?
Yes, as long as the film does not block the unit's exterior intake or exhaust vents. The film should cover the window opening and frame, not the working parts of the appliance.
How often should I replace weatherstripping?
Inspect it at the start of each cooling season. Replace any foam that has lost its rebound or shows cracks. In hot, sunny climates, annual replacement is common.
Does insulating help with noise?
Yes. A tight seal reduces the amount of outdoor noise entering through the gaps around the unit, and it can also soften some of the unit's own operational sound.
Insulating a window AC unit is a small project with an outsized effect. Start with the sash gap and side panels, add frame sealing and film as needed, and check the seal each season. The result is a quieter, more comfortable room and a cooling system that holds its set temperature with less effort. If you are still choosing the right unit for your space, the installation guides linked throughout this article cover sizing, mounting, and sealing for a wide range of window and wall configurations.