Installing Central AC: The Complete Homeowner's Guide
Central air conditioning is the gold standard for whole-home comfort, but installing central AC is a major project that touches your electrical panel, ductwork, refrigerant lines, and outdoor equipment placement. This guide walks you through every phase of the process so you can plan confidently, ask the right questions, and know exactly what a quality installation looks like.
Start With PlanningWho this guide is for: Homeowners researching central AC installation before requesting quotes, buyers evaluating a home that needs a new system, and anyone upgrading from window or portable units to whole-home cooling. You will learn what the installation involves, how to prepare your home, what to expect from contractors, and how to verify the work was done correctly.
Phase 1: Planning and Load Calculation
Every successful central AC installation begins with accurate planning. The single most important step is the load calculation, commonly called a Manual J load calculation. This engineering-based assessment determines exactly how much cooling capacity your home needs by analyzing square footage, ceiling height, insulation levels, window orientation, local climate data, and internal heat sources. Skipping this step and relying on a rough rule of thumb is the leading cause of oversized systems that cool too quickly, leave rooms humid, and wear out prematurely.
During planning, your contractor should also perform a Manual J-based duct design (Manual D) if ductwork is being added or modified. This ensures every room receives the correct airflow. Use our air conditioner sizing guide to understand the variables involved before your first contractor visit.
| Planning Task | Purpose | Who Performs It |
|---|---|---|
| Manual J load calculation | Determines required cooling capacity | HVAC contractor or energy auditor |
| Manual D duct design | Maps duct sizing and layout for airflow | HVAC designer |
| Electrical load review | Confirms panel capacity for the new unit | Licensed electrician |
| Equipment placement survey | Selects indoor and outdoor locations | Installer and homeowner |
| Permit application | Ensures code compliance and legal approval | Contractor or homeowner |
Phase 2: Assessing Your Existing Ductwork
If your home already has a forced-air furnace, the odds are good that the existing duct system can support central cooling, but it must be inspected first. Ducts sized for heating may be undersized for cooling, and leaks in the duct run can waste a significant portion of the cooled air before it reaches your rooms. A thorough assessment covers duct sizing, insulation condition, sealing at joints, and whether the layout supports balanced airflow.
When ductwork is reused, sealing and insulating is usually the highest-value upgrade in the entire project. Learn about the materials and methods in our guides to insulated air duct and sealing air ducts for efficiency. If your home has no ducts at all, read our dedicated guide on installing central air in a house without ducts before deciding between ducted central AC and a ductless alternative.
For homes with partial or aging duct runs, you may be better served by upgrading the duct system alongside the new equipment. Our articles on insulated ductwork and lined ductwork explain the options and where each performs best.
Phase 3: Choosing the Right Central AC System
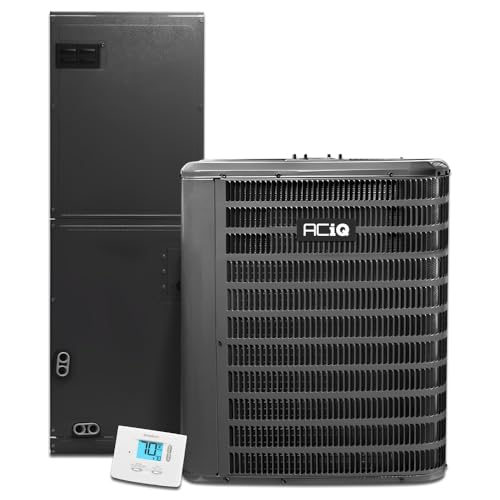
Central AC systems come in several configurations, and the right choice depends on your home layout, efficiency goals, and whether you also need heating. The most common setup is a split system with an outdoor condenser paired with an indoor evaporator coil and air handler. Packaged units combine everything in one outdoor cabinet and suit homes with limited indoor space. If you want year-round comfort from one system, consider a heat pump, which we cover in our comparison of heat pump vs air conditioner.
Efficiency is measured by SEER ratings. A higher-efficiency unit reduces long-term energy use but typically sits in a higher market tier, so weigh the trade-off against how long you plan to stay in the home. Our guide to SEER ratings breaks down the numbers, and our overview of SEER2 DOE standards explains the current rating framework used for new equipment. If you are also replacing a furnace, explore installing a new HVAC system for a coordinated approach.
System Tiers at a Glance
Market tiers help you compare systems without getting lost in specifications. An entry-level central AC meets baseline efficiency standards and suits mild climates or secondary homes. A mid-range unit adds better efficiency ratings, quieter operation, and improved compressor controls, making it a strong fit for most primary residences. A premium or top-tier system offers variable-speed compressors, advanced humidity control, and the quietest outdoor operation, ideal for hot, humid climates and homeowners prioritizing long-term efficiency.
Phase 4: Electrical Requirements and Panel Upgrades
Central AC draws significant power, and your electrical panel must have a dedicated circuit sized for the new equipment. During the survey phase, an electrician will verify available capacity and check whether the panel can support the added load. Many older homes need a panel upgrade or a subpanel before installation can proceed, which adds a distinct phase to the project timeline.
Understand the voltage and circuit demands in our guides on 110V vs 240V AC units and amps and breaker size for AC. If you are uncertain whether your home is ready, our article on checking your home electrical panel outlines what inspectors look for.
Phase 5: Placing the Indoor and Outdoor Units
Placement decisions affect efficiency, noise, and serviceability. The outdoor condenser needs clearance for airflow, protection from direct sun where practical, and a level pad that will not settle. It should be positioned away from bedroom windows if noise is a concern. The indoor air handler or coil sits in a closet, attic, basement, or garage, with adequate access for future maintenance.
Our guide to AC indoor and outdoor placement covers clearance distances and site selection in detail. If your plan involves an attic or crawl space, review installing an air handler for the specific requirements of those locations. For homes on slabs or with tight mechanical rooms, a packaged system may simplify placement.
Phase 6: Running Refrigerant Lines and Drainage
Refrigerant line sets connect the outdoor condenser to the indoor evaporator coil. Line length, elevation changes, and routing all affect performance, so the installer must follow the manufacturer's limits precisely. Lines are typically routed through walls and along exterior walls in protective conduit. Proper brazing, pressure testing, and evacuation are critical to a leak-free system.
Learn what goes into a correct line set installation in our article on refrigerant line set length, and understand the vacuum process in how to vacuum an AC system. Condensate drainage is equally important: a clogged or improperly sloped drain line is one of the most common causes of water damage after installation. Our guide to AC leaking water covers drain design and troubleshooting.
Phase 7: Ductwork Installation and Sealing
In homes without ducts, this phase dominates the project. Duct runs must be sized per the Manual D design, supported at correct intervals, and sealed at every joint with mastic or approved tape. Insulation prevents condensation and energy loss, particularly in unconditioned attics and crawl spaces. Flexible duct is common for branch runs, while sheet metal ductwork is typical for trunks and high-static sections.
Our guides on metal air duct, insulated flexible air duct, and insulating ductwork in crawl spaces cover material selection and best practices. If your existing system needs new trunk lines, installing central air with existing ductwork explains how to integrate new and old components safely.
Phase 8: Permits, Codes, and Contractor Selection
Nearly every jurisdiction requires a permit for central AC installation, and the work must pass inspection before the system is considered complete. A reputable contractor will handle the permit and schedule inspections as part of the project. Verify licensing, insurance, and EPA Section 608 certification for refrigerant handling before signing anything.
Choosing the right installer matters as much as choosing the right equipment. Our guides on choosing an HVAC contractor, getting installation quotes, and HVAC license and insurance walk you through the vetting process. Also review common installation mistakes so you can spot red flags during the bid phase. If you need to understand the labor component of the project, our overview of labor for air conditioner installation explains what drives the hours involved.
Phase 9: Testing, Commissioning, and the First Week
After the equipment is installed, the contractor must commission the system: verify refrigerant charge by superheat or subcooling, measure static pressure and airflow at each register, confirm the temperature split across the coil, and check that the condensate drain flows freely. Ask for these readings in writing. A system that is not properly charged will underperform and may fail early.
Our guides on testing a new AC installation, questions to ask your installer, and the first week after installation tell you exactly what to monitor. Register the warranty promptly using our warranty registration guide so coverage is active from day one.
Typical Installation Timeline
- Day 1: Site survey, load calculation review, equipment delivery, and outdoor pad preparation.
- Day 2: Indoor air handler or coil installation, refrigerant line routing, and electrical connections.
- Day 3: Ductwork modification or installation, sealing, and insulation.
- Day 4: System evacuation, charging, startup, and airflow balancing.
- Day 5: Final inspection, homeowner walkthrough, and documentation handoff.
Homes requiring new ductwork from scratch or a panel upgrade may extend beyond this range. Your contractor should provide a project-specific schedule with inspection milestones.
Common Mistakes to Avoid
The most frequent installation errors trace back to shortcuts in planning and commissioning. Oversizing the system based on guesswork, skipping the load calculation, failing to seal duct joints, and neglecting to verify refrigerant charge are all avoidable. A system installed without a permit may also create problems at resale. Review our full list of common AC installation mistakes and keep it handy during contractor discussions.
Another recurring issue is mismatched equipment: an outdoor condenser paired with an indoor coil it was not designed for will not achieve rated efficiency and may void the warranty. Always confirm the AHRI match between indoor and outdoor components.
Central AC vs Ductless: When Installation Changes the Equation
If your home has no ductwork and adding it is impractical, a ductless mini-split may be a better fit. Our comparison of ductless vs ducted AC covers the trade-offs in comfort, installation complexity, and zoning flexibility. For homes where ducts exist but are in poor condition, the decision often comes down to whether to seal and reuse them or transition to a ductless approach. Read installing air conditioning in a house without ducts for a decision framework.
For older homes with specific structural challenges, installing central air and heat in an older home addresses the unique considerations of legacy construction.
Frequently Asked Questions
How long does central AC installation take?
A straightforward installation in a home with existing ductwork typically takes one to two days. Projects that require new ductwork or major electrical upgrades can extend to three to five days depending on the complexity of the home.
Can I install central AC myself?
Central AC installation involves refrigerant handling, high-voltage electrical work, and precise ductwork design. These tasks require licensed professionals and EPA certification. DIY installation is not recommended and may void equipment warranties and violate local building codes.
Do I need new ductwork for central AC?
If your home already has ductwork from a forced-air furnace, it may be reusable after inspection and sealing. Homes without existing ducts require a full ductwork design and installation, which is the most labor-intensive part of the project.
What size central AC do I need?
Sizing must be based on a Manual J load calculation that accounts for square footage, insulation, window area, climate, and occupancy. An oversized unit short-cycles and dehumidifies poorly, while an undersized unit runs continuously and struggles during peak heat.
Does central AC installation require a permit?
Yes, nearly all jurisdictions require a permit for central AC installation. The work must be inspected before the system is considered complete. A licensed contractor typically handles the permit application and inspection scheduling as part of the project.
How do I verify the installation was done correctly?
Ask for commissioning documentation including refrigerant charge readings, static pressure measurements, airflow at each register, and the temperature split across the coil. Confirm the AHRI match between indoor and outdoor equipment, and verify the warranty has been registered.
Ready to Move From Research to Installation?
You now understand the full scope of installing central AC, from load calculations and ductwork assessment to commissioning and warranty registration. The next step is to request quotes from licensed contractors who will perform a Manual J calculation and provide written commissioning readings. Use the guides above to evaluate each proposal on its technical merits rather than marketing claims.