Mini Splits for RVs: Complete Cooling Guide
Everything you need to know about choosing and installing a ductless mini split system for your motorhome, camper, or travel trailer — from BTU sizing and power options to real-world installation considerations.
START LEARNINGWhy this guide matters: RV owners often discover that a factory-installed rooftop unit struggles on hot days, drains batteries quickly, or simply cannot keep up with a large coach. A ductless mini split offers a different approach — quiet operation, high efficiency, and precise temperature control. This guide walks you through the decision process step by step so you can choose the right system for your rig before you buy.
In This Guide
Why Consider a Mini Split for an RV?
Recreational vehicles present unique cooling challenges. Roof area is limited, wall thickness is thin, and the available power is often restricted compared to a residential home. Traditional RV air conditioners — typically rooftop units — are designed for these constraints, but they come with trade-offs: they can be noisy, they cycle on and off frequently, and they consume a significant amount of power during startup.
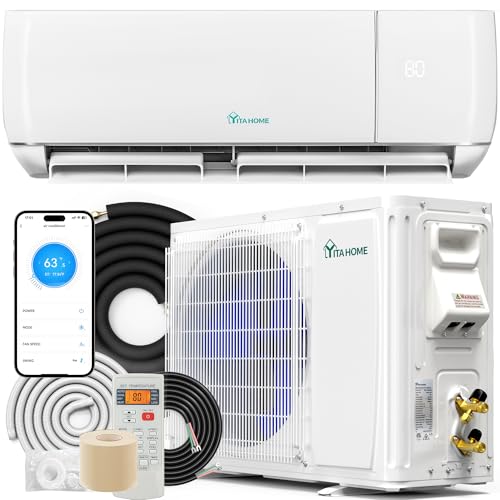
Mini split systems, also known as ductless heat pumps, take a different approach. They split the system into two parts: an outdoor condenser unit and one or more indoor air-handling heads. Because there is no ductwork, installation is more flexible and energy losses are lower. For RV owners, this translates into quieter operation, more even cooling, and often better efficiency compared to older rooftop units.
Mini splits are not a universal solution for every RV. They are best suited to larger motorhomes, fifth wheels, and travel trailers where the owner has the space, the electrical capacity, and the willingness to modify the rig. For smaller campers, a well-chosen portable or window unit may still be the more practical answer. This guide helps you determine whether a mini split is the right fit for your situation.
Mini Split Types Suitable for RVs
Not all mini split configurations work well in an RV. The physical constraints of a vehicle — limited outdoor mounting space, thin walls, and vibration — narrow the options. The three configurations below are the most common choices for RV applications.
Single-Zone Wall-Mounted Mini Split
The most straightforward configuration: one outdoor unit paired with one wall-mounted indoor head. Ideal for a main living area in a Class A motorhome or a large travel trailer. Provides precise temperature control and quiet operation.
Multi-Zone Mini Split
One outdoor unit connected to two or three indoor heads, allowing independent temperature control in the bedroom and living area. Requires more outdoor space and a larger electrical service, but offers the best comfort for larger coaches.
Low-Profile or Ceiling Cassette
Ceiling cassette heads distribute air in multiple directions and save wall space. They are more complex to install in an RV ceiling and are usually reserved for custom builds. Explore mini split cassettes for details.
For RV applications, the wall-mounted single-zone system is by far the most popular choice. It is the easiest to install, the most widely available, and the simplest to service on the road. If you have a large coach and want independent comfort in two areas, a multi-zone system is worth considering, but be prepared for a more involved installation. You can learn more about how these systems compare in the broader mini split heat pump guide.
How to Size an RV Mini Split (BTU Guide)
Sizing is the single most important decision when selecting a mini split for an RV. An undersized unit will run continuously and fail to keep up on hot days, while an oversized unit will cool too quickly, cycle frequently, and leave the interior feeling clammy because it does not run long enough to remove humidity.
RVs are not built like houses. They have thinner insulation, more glass per square foot, and a large surface area relative to their interior volume. As a result, the general rule of thumb used for homes — roughly 20 BTU per square foot — tends to underestimate the cooling load in an RV. A more realistic starting point for RV sizing is 25 to 30 BTU per square foot of interior space, adjusted upward for large windows, poor insulation, or full sun exposure.
| RV Interior Size | Suggested Cooling Capacity | Typical RV Type |
|---|---|---|
| Up to 150 sq ft | 5,000 – 8,000 BTU | Class B camper van, small travel trailer |
| 150 – 250 sq ft | 9,000 – 12,000 BTU | Mid-size travel trailer, small Class C |
| 250 – 400 sq ft | 12,000 – 18,000 BTU | Large travel trailer, fifth wheel |
| 400 – 600 sq ft | 18,000 – 24,000 BTU | Class A motorhome, large fifth wheel |
| 600+ sq ft | 24,000 BTU+ (multi-zone) | Large Class A with multiple zones |
These figures are a starting point, not a final answer. Factors that push the required capacity upward include large panoramic windshields, dark exterior colors, single-pane windows, and travel in hot, humid climates. Factors that reduce the requirement include shade, light-colored exteriors, and upgraded insulation. If you want a more detailed walkthrough of the sizing process, the 400 sq ft mini split guide and the 500 sq ft mini split guide explain the math in more depth.
Practical tip: When in doubt, size slightly on the larger side for an RV rather than the smaller side. Unlike a house, an RV has very little thermal mass, so it heats up quickly. A slightly larger unit running at a lower output is generally more comfortable than a smaller unit running at maximum output all day.
Power Considerations: Shore Power, Generator, and Solar
Power is where RV mini split installations differ most from residential installations. A typical residential mini split runs on 208–240V and draws anywhere from 8 to 15 amps depending on capacity. In an RV, you have three possible power sources, and each has different implications.
Shore Power (Campground Hookup)
At a campground with a 30-amp or 50-amp pedestal, a mini split is straightforward to run. A 30-amp service provides roughly 3,600 watts, which is enough for a small mini split plus basic loads. A 50-amp service provides roughly 12,000 watts and comfortably supports a larger single-zone system or even a multi-zone setup. If you primarily camp with full hookups, power is rarely a limiting factor.
Generator
Running a mini split from an onboard generator is possible but requires careful planning. Mini splits have a lower startup surge than traditional RV rooftop units, which is an advantage. However, the continuous draw still matters. A soft-start device can help reduce the initial surge and allow a smaller generator to handle the load. As a general rule, plan for a generator that can supply the mini split's rated running amperage plus a comfortable margin for other appliances.
Solar and Battery (Boondocking)
Running air conditioning from solar and batteries is demanding. A mini split is more efficient than a typical rooftop unit, but it still draws significant continuous power. Successful boondocking setups usually involve a large lithium battery bank, a high-output inverter, and substantial solar array. This is an advanced configuration and is best planned with a qualified RV electrical specialist. If you are building this kind of system, the mini split heat pump overview is a useful starting point for understanding the equipment involved.
Installation Considerations for RV Mini Splits
Installing a mini split in an RV is more involved than installing one in a house. The structure is different, the available space is tighter, and the system must withstand vibration and movement. Below are the main considerations to plan for before committing to a purchase.
- Outdoor unit mounting: The condenser needs a secure, level mounting location with adequate airflow. Common options include a rear bumper mount, a custom frame on the back of the coach, or a roof-mounted platform. Vibration isolation is essential — use rubber mounts and check fasteners regularly.
- Line set routing: The refrigerant lines connecting the indoor and outdoor units must be routed through the RV wall or roof. This requires careful planning to avoid sharp bends and to protect the lines from UV exposure and abrasion. You can learn more about mini split line sets in the dedicated guide.
- Indoor head placement: The indoor head should be mounted high on a wall, away from direct sunlight, and positioned so that airflow reaches the main living area. In an RV, wall space is limited, so measure carefully before choosing a location.
- Electrical work: Most mini splits require a dedicated circuit. In an RV, this means installing a breaker in the existing panel or adding a sub-panel. This work should be performed by a qualified electrician familiar with RV electrical systems.
- Vacuuming and charging: The system must be evacuated with a vacuum pump before refrigerant is released. This is not a step that can be skipped — moisture in the lines will damage the compressor over time. If you are not comfortable with refrigeration work, hire a professional.
Many RV owners choose to have a professional handle the installation, especially the refrigerant and electrical portions. If you plan to do part of the work yourself, the mini split DIY guide explains which steps are realistic for a confident homeowner and which are best left to a licensed technician. The mini split heating and cooling installation guide covers the general process in more detail.
Important: Modifying an RV's structure or electrical system can affect its warranty and resale value. Check with your RV manufacturer before cutting into walls or roof, and keep documentation of any professional installation work.
Maintenance for RV Mini Splits
A mini split in an RV needs more frequent attention than one in a house because the environment is harsher. Road vibration, dust, and constant movement all take a toll. The good news is that the routine maintenance tasks are straightforward.
- Clean or replace the indoor filter every two to four weeks during heavy use. In an RV, dust and pollen accumulate quickly. A clogged filter reduces airflow and forces the system to work harder.
- Inspect the outdoor coil regularly. Road debris, insects, and dust can block the condenser fins. Rinse the coil gently with a garden hose when the unit is off.
- Check the mounting hardware after every long trip. Vibration can loosen bolts and fittings. A quick visual inspection and a torque check on the mounting brackets will prevent most problems.
- Inspect the line set insulation. UV exposure and vibration can degrade the insulation around the refrigerant lines. Replace any sections that are cracked or missing.
- Schedule a professional check before each cooling season. A technician can verify refrigerant charge, check electrical connections, and clean components that are difficult to reach.
For a broader maintenance routine that applies to most ductless systems, see the mini split heat pump maintenance overview. Keeping up with these tasks will extend the life of the system and keep it running efficiently.
How to Choose the Right Mini Split for Your RV
With the background covered, here is a practical decision framework. Work through these questions in order — each answer narrows the field.
Step 1: Determine Your Interior Size
Measure the interior living space in square feet. Use the sizing table above as a starting point, then adjust for window area, insulation, and climate. If you are between two sizes, lean toward the larger capacity for an RV.
Step 2: Decide on Single-Zone or Multi-Zone
If your RV has one main living area, a single-zone system is simpler and less expensive to install. If you have a separate bedroom that you want to cool independently, a multi-zone system may be worth the added complexity. Review the multi-zone mini split guide for a detailed comparison.
Step 3: Evaluate Your Power Situation
If you mostly camp with full hookups, power is not a major constraint. If you boondock frequently, you need to plan your electrical system carefully and consider a soft-start device. If you rely on a generator, verify its capacity against the mini split's running amperage.
Step 4: Choose an Efficiency Tier
Mini splits are available across a range of efficiency levels. Entry-level models meet the basic standards and are a reasonable choice for occasional use. Mid-range models offer better efficiency and quieter operation. High-end tier models provide the best efficiency, the quietest operation, and the most advanced features — a good fit for full-time RVers who run the system daily. The most energy efficient mini split guide explains how to compare efficiency ratings.
Step 5: Plan the Installation
Decide early whether you will install the system yourself or hire a professional. The refrigerant and electrical work are the two areas where professional help is most valuable. If you plan to hire, the mini split installers directory can help you find qualified technicians.
For a dedicated discussion of the specific equipment used in motorhome applications, see the mini split RV air conditioner guide. If you are also considering a traditional rooftop unit, the motorhome AC unit overview provides a useful comparison.
Ready to Compare Systems?
Browse our curated selection of mini split systems suitable for RV use. Each listing includes key specifications to help you match a system to your coach.
View Recommended SystemsFrequently Asked Questions
Can I install a mini split in an RV myself?
Partially. Mounting the indoor and outdoor units, routing the line set, and running the electrical conduit are tasks a confident DIYer can handle. Evacuating the line set and charging the system with refrigerant require specialized tools and training, so those steps are best left to a licensed technician. The mini split DIY guide covers this in more detail.
How many BTU do I need for my RV?
As a starting point, use 25 to 30 BTU per square foot of interior space. A 200 sq ft travel trailer typically needs 9,000 to 12,000 BTU. A 400 sq ft Class A motorhome typically needs 18,000 to 24,000 BTU. Adjust upward for large windows, poor insulation, or hot climates.
Will a mini split work on a 30-amp campground hookup?
In many cases, yes — a small single-zone mini split (around 9,000 BTU) can run on a 30-amp service alongside basic loads. Larger systems may require a 50-amp hookup. Always check the rated amperage of the specific unit you are considering and plan your electrical budget accordingly.
Can I run a mini split from solar and batteries?
It is possible but demanding. A mini split draws continuous power, so you need a large lithium battery bank, a high-capacity inverter, and a substantial solar array. This is an advanced setup best planned with an RV electrical specialist.
What is the difference between a mini split and a traditional RV rooftop AC?
A mini split separates the compressor (outdoor) from the air handler (indoor), which makes it quieter and often more efficient. A rooftop unit is a single packaged unit mounted on the roof. Rooftop units are easier to install in an RV, while mini splits offer better comfort and efficiency but require more planning.
How do I maintain a mini split in an RV?
Clean the indoor filter every two to four weeks during heavy use, inspect the outdoor coil for debris, check mounting hardware after long trips, and schedule a professional check before each cooling season. Detailed steps are covered in the maintenance section above.
Final thought: A mini split is a meaningful upgrade for the right RV and the right owner. It rewards careful planning — accurate sizing, realistic power budgeting, and a well-executed installation. Use this guide as your research starting point, then compare the recommended systems below to find the one that fits your coach.