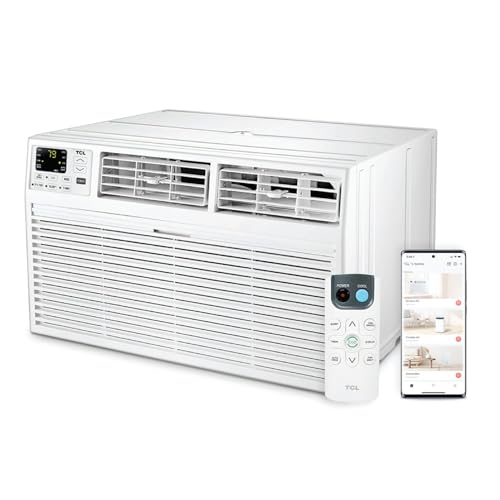
Replacing a Through the Wall Air Conditioner
Your complete guide to removing, sizing, and installing a through-the-wall air conditioner. Learn how to upgrade your wall-mounted unit safely and efficiently.
START THE GUIDEQuick Summary: Replacing a through-the-wall air conditioner involves verifying the wall sleeve and chassis compatibility, measuring the existing opening, selecting a replacement with matching dimensions and BTU capacity, removing the old unit, and seating the new one correctly. Most replacements can be completed in a few hours without structural wall modifications if you stay within the same sleeve standard.
What Is a Through-the-Wall Air Conditioner?
A through-the-wall air conditioner (often abbreviated as TTW or called a wall unit) is a self-contained cooling system installed directly into an exterior wall. Unlike a window air conditioner that hangs from a window frame, a through-the-wall unit sits inside a metal wall sleeve that is built into the wall cavity. This design frees up window space, provides a cleaner exterior appearance, and often delivers better security and insulation than window-mounted alternatives.
These units are common in apartments, hotels, older homes, and offices. Many people also confuse them with PTAC air conditioners, which are packaged terminal units frequently found in lodging and commercial settings. While they share the wall-sleeve concept, PTAC units typically include electric heat and are designed for high-turnover commercial environments.
Why Replace Instead of Repair?
There are several reasons a homeowner or property manager decides to replace a through-the-wall unit rather than repair it:
- Age and efficiency: Units older than 10–15 years often use outdated refrigerants and have lower efficiency ratings. Replacing them can significantly reduce energy consumption.
- Refrigerant transitions: The phase-out of R-22 and the shift toward R-410A systems means older units may face parts and refrigerant availability challenges.
- Frequent breakdowns: Repeated repairs to the compressor or sealed system usually indicate it is time for a replacement.
- Noise and vibration: A worn compressor or fan motor can make an old unit noticeably louder than a modern quiet air conditioner.
- Cooling performance: If the unit no longer cools effectively after basic maintenance, the sealed system may be failing.
Compatibility Comes First: Sleeve and Chassis
The single most important factor in a successful replacement is sleeve compatibility. The wall sleeve is the metal box embedded in the wall. Most through-the-wall units use one of a few standard sleeve sizes, but not all brands share the same dimensions or mounting brackets.
Identify Your Existing Sleeve
Before shopping, measure the inside dimensions of the existing wall sleeve and note the brand and model of the current unit. Common sleeve standards include:
| Sleeve Standard | Typical Interior Width | Typical Interior Height | Notes |
|---|---|---|---|
| Standard Wall Sleeve | Approx. 26 inches | Approx. 15.75 inches | Fits many common residential wall units |
| Compact / Small Sleeve | Approx. 24 inches | Approx. 14.5 inches | Found in some older apartments |
| PTAC Sleeve | Approx. 42 inches | Approx. 16 inches | Commercial/lodging standard with heat |
These figures are approximate and vary by manufacturer. Always verify with the actual sleeve in your wall and the specifications of the replacement chassis. If the new chassis does not match the sleeve, you may need to install a new sleeve or use a manufacturer-approved adapter kit.
Important: Never force a chassis into a sleeve that does not match. A poorly seated unit can leak air, vibrate excessively, or fail to drain condensate properly. If dimensions are close but not exact, check with the manufacturer for a compatible sleeve or trim kit.
Sizing the Replacement Unit
Selecting the right cooling capacity is just as important as physical fit. An undersized unit runs continuously without reaching the set temperature, while an oversized unit short-cycles, which reduces dehumidification and adds wear to the compressor. Use the same sizing logic you would apply to any room air conditioner.
A common rule of thumb is roughly 20 BTU per square foot of floor area, adjusted for ceiling height, sun exposure, occupancy, and appliance heat load. For a more accurate result, use a BTU calculator by room size or review our guide on how to size an air conditioner.
| Room Size (sq ft) | Suggested Cooling Capacity | Typical Use Case |
|---|---|---|
| Up to 150 | 5,000 – 6,000 BTU | Small bedroom, office, studio corner |
| 150 – 250 | 8,000 – 10,000 BTU | Standard bedroom, small living area |
| 250 – 400 | 12,000 – 14,000 BTU | Large bedroom, open living room |
| 400 – 550 | 18,000 – 24,000 BTU | Open-plan space, large family room |
If your existing unit has worked well for the room, matching its capacity is a reasonable starting point—provided the room usage and insulation have not changed. If you have added insulation, shade, or new windows, a slightly smaller unit may be appropriate. Conversely, if the room is now used more heavily or has new heat-producing equipment, consider stepping up one tier.
Efficiency Ratings Matter
Modern through-the-wall units are more efficient than models from a decade ago. Look at the SEER rating (or EER for room units) and consider an ENERGY STAR certified AC if you plan to run the unit frequently. Higher-efficiency models in the premium and high-end tiers typically pay back over the life of the unit through reduced electricity use, even if the initial outlay is greater than an entry-level model.
Step-by-Step Replacement Process
The following steps outline a typical residential through-the-wall replacement. Some steps involve electrical work and should be handled by a licensed professional if you are not experienced with 240-volt circuits.
Gather Information
Record the existing unit's brand, model, BTU rating, voltage, and sleeve dimensions. Photograph the sleeve and wiring before removal.
Power Down
Turn off the dedicated circuit breaker feeding the unit. Confirm power is off with a voltage tester before touching wiring.
Remove the Chassis
Unplug or disconnect the unit, remove the front grille, and slide the chassis out of the sleeve. Most units have retaining screws or brackets.
Inspect the Sleeve
Check for rust, corrosion, or damage. Clean debris, confirm the drain path, and replace the sleeve if it is structurally compromised.
Verify Electrical
Match the new unit's voltage and amperage requirements to the existing circuit. Do not overload an undersized breaker or wiring.
Seat the New Chassis
Slide the replacement unit into the sleeve, engage any mounting brackets, and secure retaining screws according to the manual.
Seal and Insulate
Use manufacturer-approved weather seals around the chassis and sleeve to prevent air leakage and moisture intrusion.
Test and Confirm
Restore power, run the unit through cooling and fan modes, and check for proper drainage, vibration, and airflow.
Removing the Old Unit Safely
Through-the-wall units are heavier than they look, and the chassis is often awkward to grip. Use two people or a furniture dolly. If the unit contains old refrigerant such as R-22, it should be recovered by a certified technician—never vented. For units that slide out as a single piece, support the underside with a block of wood or a platform at wall height before pulling.
If you suspect the wall sleeve is not standard or has been modified, treat the removal as a small renovation project rather than a simple swap. In some cases, a professional window air conditioner installation technician may be the safer route if the opening needs adjustment.
Electrical Considerations
Through-the-wall units typically run on 115V or 230/240V dedicated circuits. Confirm the new unit's requirements match the existing outlet and breaker. If the old unit was on a 115V circuit and the new unit requires 240V, an electrician should evaluate the wiring before installation. Avoid using extension cords or adapters—they are a fire hazard on a high-draw appliance.
If your home has an older electrical panel, review our guide on checking your home electrical panel before committing to a higher-capacity unit.
Should You Replace the Wall Sleeve?
If the sleeve is rusted through, bent, or does not match the new chassis, replace it. A new sleeve can often be installed in the existing wall opening with minimal modification. Some manufacturers sell sleeves that fit standard openings, which makes this job easier than it sounds. Do not assume the old sleeve will work—verify the fit with the new unit's spec sheet before ordering.
Through-the-Wall vs. Other Replacement Options
Before committing to another wall unit, consider whether a different system might better suit the room. The table below compares common alternatives using neutral tier descriptors.
| Option | Installation Complexity | Efficiency Potential | Best For |
|---|---|---|---|
| Through-the-Wall AC (like-for-like) | Moderate (existing sleeve) | Mid-range to premium tiers available | Preserving existing wall opening and exterior look |
| Window AC | Entry-level DIY | Entry-level to mid-range | Quick replacement where a window is available |
| Ductless Mini-Split AC | Professional-grade installation | High-end tier efficiency | Long-term efficiency and quiet operation |
| Portable Air Conditioner | Entry-level DIY | Entry-level to mid-range | Temporary or renter-friendly cooling |
| Central Air Conditioning | Professional-grade, whole-home | Top-tier efficiency when sized correctly | Whole-home comfort where ductwork exists |
A like-for-like through-the-wall replacement is usually the simplest path when the sleeve is intact. A ductless mini-split, by contrast, is a bigger project but offers premium efficiency and much quieter operation. For a deeper comparison, see our guide on pros and cons of ductless air conditioning.
Choosing the Right Replacement Unit
When comparing models, focus on these factors rather than headline claims:
Fit and Sleeve Compatibility
The chassis must match the sleeve interior dimensions and the manufacturer's mounting system. Some brands offer "universal" sleeves, but the safest approach is to buy the same brand or a model explicitly listed as compatible with your sleeve standard.
Cooling Capacity and Airflow
Match capacity to the room, and check the airflow rating. A unit with higher airflow may distribute cool air more evenly in a long room, but excessive airflow can feel drafty. Look for adjustable fan speeds and a swing or louver feature.
Noise Level
Noise is a major complaint with wall units. Look for decibel ratings where available and reviews that mention compressor and fan noise. If quiet operation is a priority, consider a quietest window air conditioner as a benchmark—many quiet wall units share similar compressor technology.
Features That Add Comfort
- Remote control and programmable thermostat: A programmable thermostat or remote control makes it easier to manage schedules and temperature.
- Energy-saving mode: Cycles the compressor and fan to reduce runtime when the room reaches the set point.
- Dehumidification mode: Useful in humid climates.
- Heat pump option: Some wall units include reverse-cycle heating, similar to a PTAC air conditioner with heat pump.
- Self-cleaning or anti-microbial coating: Helps reduce mold and odor buildup on the evaporator.
Maintenance After Replacement
A new unit will last longer if you keep up with basic maintenance. Follow the manufacturer's schedule and:
- Clean or replace the air filter every 2–4 weeks during heavy use.
- Inspect the outdoor grille and sleeve for debris, nests, or leaves.
- Check the condensate drain path to prevent water pooling in the sleeve.
- Schedule a seasonal check of the electrical connections and coil cleanliness.
- If you notice reduced cooling, review our guide on reasons why an air conditioner is not cooling before calling a technician.
For units in dusty environments, professional air duct cleaning may not apply directly, but keeping the room's return air path clear still helps the wall unit breathe. And if your home also uses a central system, a pro HVAC thermostat can help coordinate schedules and reduce overlapping runtime.
When to Call a Professional
DIY replacement is realistic for many homeowners when the sleeve and electrical setup are unchanged. Call a licensed HVAC technician or electrician if:
- The new unit requires a different voltage or amperage than the existing circuit.
- The wall sleeve is damaged, non-standard, or needs to be replaced.
- The opening needs structural modification (framing, siding, or masonry).
- You are unsure about refrigerant handling or sealed-system components.
- The unit will be installed above the first floor or in a hard-to-reach wall.
For larger projects, compare quotes from at least three licensed contractors and ask for proof of insurance. Our guide on how to choose an HVAC contractor covers the questions to ask.
Frequently Asked Questions
Ready to Choose Your Replacement?
Compare features, sleeve compatibility, and efficiency tiers. Our recommended wall units are selected for fit, durability, and balanced performance.
VIEW RECOMMENDED UNITS