
Rooftop RV Air Conditioner: The Complete Buyer and Owner Guide
Everything travelers need to know about rooftop RV air conditioning — how these units work, how to size them for your rig, what to expect during installation, and how to keep them running reliably season after season.
Why rooftop RV air conditioners matter: Inside a motorhome, travel trailer, or camper van, the roof-mounted air conditioner is often the single most important comfort appliance on board. Summer travel across warm regions becomes genuinely enjoyable when you can return to a consistently cool interior after a day on the road. Choosing the right rooftop unit — and understanding how to care for it — makes the difference between steady comfort and a recurring frustration.
What Is a Rooftop RV Air Conditioner?
A rooftop RV air conditioner is a self-contained cooling unit mounted on the roof of a recreational vehicle. Unlike residential central systems, these units package the compressor, condenser, evaporator, and blower into a single assembly that sits above the vehicle interior. Cool air is distributed downward through ceiling vents, and a separate interior ceiling assembly houses controls and filters.
The rooftop configuration saves interior floor and wall space, distributes cold air evenly through the cabin, and allows heat to dissipate outside the living area. Because the unit sits exposed to the elements, weather resistance and durable construction are essential qualities to look for in any candidate model.
Common Types of Rooftop RV Air Conditioners
Several configurations exist, each suited to different travel styles and vehicle layouts. Understanding the differences helps buyers narrow the field quickly.
Standard Cool-Only Units
The most common type. These units focus purely on cooling and pair with a separate furnace or heat strip for heating. Straightforward operation and proven reliability make them a solid baseline choice.
Heat Pump Combination Units
These models reverse the refrigerant cycle to deliver both cooling and heating in moderate conditions. Useful for shoulder-season travel where a furnace may be unnecessary.
Low-Profile Units
Designed with a shorter housing to reduce overall vehicle height. Ideal for rigs that travel under low clearance structures or need to fit into storage with tight overhead limits.
Ducted vs. Non-Ducted Units
Ducted models distribute air through ceiling ducts to multiple outlets, achieving more even cooling in larger RVs. Non-ducted units deliver air directly from the ceiling assembly and suit smaller cabins.
High-Efficiency Models
Newer designs focus on reducing power draw, which matters greatly for boondocking and limited generator capacity. Efficiency gains often justify an upgrade for frequent travelers.
Dual-Unit Configurations
Larger motorhomes and fifth wheels often use two rooftop units for zoned cooling. Independent control allows cooling only the occupied parts of the vehicle, reducing energy use.
How to Size a Rooftop RV Air Conditioner
Correct sizing is the most important decision in any RV cooling setup. Undersized units run constantly and never quite catch up in hot weather, while oversized units cycle on and off frequently, which wastes power and hampers humidity removal. Both outcomes reduce comfort and strain equipment.
RV air conditioners are rated by BTU output, and capacity should match the interior volume of the vehicle rather than just its floor space. A small travel trailer with limited insulation might be comfortable with a unit around 9,000 to 13,500 BTU. Larger motorhomes often need 15,000 BTU or a dual-unit setup. Climate, window area, insulation quality, and the number of occupants all factor into the calculation.
| Tier | Typical Characteristics | Best For |
|---|---|---|
| Entry-Level Tier | Standard cool-only operation, manual controls, basic efficiency | Small trailers, camper vans, and occasional weekend trips |
| Mid-Range Tier | Improved efficiency, quieter operation, optional heat strip, digital controls | Frequent travelers seeking dependable comfort across seasons |
| High-End Tier | Low-profile housing, heat pump function, higher cooling capacity, quieter fan | Larger motorhomes and fifth wheels with extended travel schedules |
| Premium Tier | Dual-zone configurations, smart thermostat integration, advanced efficiency, premium materials | Full-time RVers and luxury coaches seeking top-tier performance |
Practical tip: If you regularly travel in hot, humid regions, favor a unit with a slightly higher capacity than the minimum recommendation for your rig. The extra headroom improves humidity control and reduces runtime during the hottest parts of the day.
Installation Basics for Rooftop Units
Rooftop installation involves more than placing a unit on the roof. The process requires careful preparation to ensure a watertight seal, correct electrical wiring, and proper airflow inside the cabin. Understanding the steps helps owners evaluate contractor proposals and prepare for a smooth project.
Step 1: Verify Roof Structure and Opening
Most rooftop units use a standard 14-inch square roof opening, but verifying existing openings and structural support is essential. On a new installation, careful measurement and reinforcement ensure the roof handles the weight safely.
Step 2: Confirm Electrical Capacity
The unit needs a dedicated circuit of appropriate amperage. Verify that the RV's breaker panel and wiring support the new unit, and consider whether a soft-start accessory is worth adding for generator compatibility.
Step 3: Seal the Roof Gasket Properly
The mounting gasket forms the primary water barrier between the unit and the roof. Torque specifications from the manufacturer must be followed precisely — over-tightening crushes the gasket, and under-tightening leaves gaps that leak.
Step 4: Mount the Interior Ceiling Assembly
The interior assembly houses the controls, filter, and air distribution. It must be aligned correctly and fastened evenly to avoid vibration and airflow problems.
Step 5: Test and Verify Performance
Run the unit through a full cooling cycle, check for leaks around the gasket, verify that airflow reaches all intended vents, and confirm that the thermostat responds correctly.
Power Considerations for RV Air Conditioners
Power supply is a frequent source of frustration for RV owners. A typical rooftop unit draws substantial amperage during startup and continuous operation. Shore power at most campgrounds supports standard units comfortably, but running the air conditioner from a generator or battery bank demands careful planning.
Soft-start devices reduce the inrush current during compressor startup, allowing smaller generators to run the air conditioner without tripping breakers. For travelers who rely on solar or battery power, our guide on portable solar-powered air conditioner camping explores options for off-grid cooling, while semi-truck battery-powered air conditioner covers battery-driven solutions that share much in common with RV setups.
Maintenance Tips to Extend Rooftop Unit Life
Regular maintenance keeps a rooftop RV air conditioner operating efficiently and postpones replacement. The good news is that the most impactful tasks are straightforward and can be performed by most owners.
- Clean the filter regularly: A clogged filter restricts airflow and forces the unit to work harder. Rinse or replace the filter every few weeks during heavy use.
- Inspect the roof gasket annually: Check for cracks, compression, or debris trapped under the gasket. Reseal or replace when needed to prevent water intrusion.
- Clean condenser coils: Debris, dust, and insect nests collect on the exterior coils. Gentle rinsing restores heat transfer efficiency.
- Keep the shroud intact: A cracked or missing shroud allows water and debris into the unit. Replace damaged covers promptly.
- Check electrical connections: Loose connections at the breaker or terminal block cause voltage drops and heat. A technician can verify torque during annual inspections.
- Run the unit periodically: During storage periods, running the air conditioner briefly each month keeps the compressor lubricated and prevents seals from drying out.
- Watch for performance decline: Noticeable drops in cooling capacity often indicate low refrigerant charge or a failing component. Address issues early before they escalate.
For troubleshooting deeper issues, our guide on RV air conditioner repair walks through common fault symptoms and what a technician will typically check. If the vehicle still has a window opening, our overview of RV window air conditioner options explains a complementary approach for smaller cabins.
Choosing Between Rooftop and Alternative RV Cooling
Rooftop units dominate the RV market for good reason: they save space, cool efficiently, and integrate naturally into the vehicle's electrical system. However, they are not the only option. Portable units offer flexibility for travelers who rent different RVs, and window-style units suit certain trailer layouts.
Our comparison of portable vs. window AC helps frame the decision, and travelers who need cooling during off-grid camping can explore portable tent AC for supplementary cooling in auxiliary spaces like awnings or screen rooms.
When to Replace a Rooftop RV Air Conditioner
Most rooftop units last eight to twelve years with proper care. Signs that replacement is on the horizon include repeated refrigerant leaks, compressor noise, declining cooling performance despite maintenance, and visible corrosion on internal components. A failed unit that no longer cools is typically more economical to replace than to repair extensively once it exceeds a certain age threshold.
Homeowners managing larger rooftop systems on residential or commercial buildings may find our guide to rooftop air conditioning units useful for understanding similarities and differences. For a deeper overview of heating and cooling equipment in rooftop environments, our coverage of rooftop heating and air conditioning units is a helpful reference.
Recommended Rooftop RV Air Conditioners
⚠️ AFFILIATE DISCLOSURE: This website contains affiliate links. As an Amazon Associate, we earn from qualifying purchases. If you make a purchase through these links, we may receive a small commission at no additional cost to you. Read our full affiliate policy.

TOSOT 16000 BTU RV Air Conditioner, 43dB Ultra Quiet, White | RV Rooftop AC With Heat Pump Heating and Cooling, Non-Ducted, Wifi and Remote Control, for Campers, Trailers, Food Truck
Check price on Amazon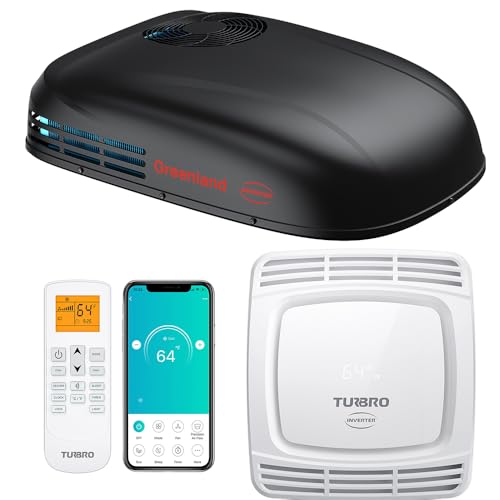
TURBRO Inverter 13.5K BTU RV Air Conditioner with Cooling and Heat Pump | Non-Ducted Low-Profile Rooftop Unit, Quiet Operation, WiFi & Remote Control, LED Atmosphere Light, Black
Check price on Amazon
TURBRO RV Air Conditioner 15,000 BTU with 1,500W Heat 115V AC | Non-ducted Rooftop Unit with Lift Handles, Ceiling Assembly with Atmosphere Lamp, Remote and WiFi-Controlled, White
Check price on Amazon
Gidrox 12V 12000 BTU Inverter RV Air Conditioner with Heat Pump, 43db Quiet Operation Rooftop AC Unit for RVs, Trucks, Vans, Campers,Off Grid
Check price on Amazon
Xenjum RV Cover 30-33 FT, 9-Layer Heavy Duty Travel Trailer Cover, Snowproof Winter Rip-Stop Camper Cover for RVs with Rooftop AC, Breathable Motorhome Cover with Zipper Doors & Storage Bag
Check price on Amazon
VEVOR RV Air Conditioner 13500 BTU Non-Ducted Rooftop RV AC Unit | 65dB Low Noise, Including Air Distribution Box, Operation Panel and Installation Hardware, for Campers Vans Trailers, White
Check price on Amazon
RV Air Conditioner, 12V 10000 BTU Rooftop Air Conditioner for RVs, Trucks, Vans, Campers, Tractor, Low Profile Quiet AC Unit(w/heater)
Check price on Amazon
Arsenda 18000 BTU RV Air Conditioner with Heat Pump, 110-120V, Non-Ducted | Rooftop RV AC Unit, Camper Air Conditioner Cooling & Heating, RV AC for Camper, Travel Trailer, 5th Wheel, Food Truck, White
Check price on AmazonFrequently Asked Questions
What size rooftop RV air conditioner do I need?
RV air conditioners are usually rated in BTU output. Smaller travel trailers and camper vans typically use units around 9,000 to 13,500 BTU, while larger motorhomes and fifth wheels often use 15,000 BTU or dual-unit setups. Sizing should account for interior volume, insulation, window area, and climate.
How long does a rooftop RV air conditioner last?
With regular maintenance and moderate use, a rooftop RV air conditioner typically lasts around eight to twelve years. Cleaning filters, keeping coils free of debris, and protecting the unit from physical damage during travel significantly extend service life.
Can I install a rooftop RV air conditioner myself?
Roof installation requires lifting the unit safely, cutting or confirming a roof opening, sealing the gasket, and wiring a dedicated circuit. Because of safety and warranty considerations, professional installation is usually recommended, especially on newer RVs with existing wiring and roof structures.
Why is my rooftop RV air conditioner not cooling properly?
Common causes include clogged filters, dirty condenser coils, low refrigerant charge, restricted airflow, or a failing compressor. Start by cleaning the filter and coils, verify that the unit receives adequate power, and consult a qualified technician if performance does not improve.
Can a rooftop RV air conditioner run on a generator?
Yes, but generator capacity must match the startup amperage of the air conditioner. A soft-start device reduces the startup surge and allows smaller generators to run the unit. Confirm generator ratings against the unit's electrical specifications before travel.
Should I choose a ducted or non-ducted rooftop unit?
Ducted units deliver air to multiple ceiling outlets for more even cooling across a larger RV interior. Non-ducted units direct air from a single ceiling assembly and work well in compact cabins. The right choice depends on vehicle size and layout.
Next steps: Use the recommendations above to explore rooftop RV air conditioners suited to your vehicle size and travel style. Compare cooling capacity, efficiency, and control options to find a unit that delivers steady comfort throughout your journeys.