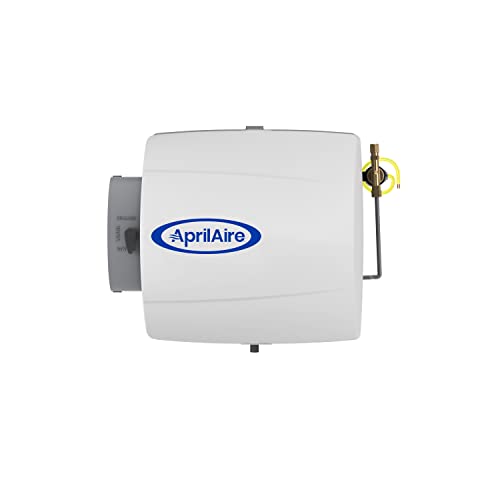
Whole Home Humidifier Installation: The Complete Homeowner's Guide
Dry winter air can leave your home feeling uncomfortable, aggravate respiratory issues, crack wood furniture, and boost static electricity. A whole home humidifier installation delivers balanced moisture through your existing HVAC ductwork, treating every room at once. This guide walks you through how these systems work, which type fits your home, what the installation process involves, and how to keep the unit running efficiently for years.
What This Guide Covers
Why Install a Whole Home Humidifier?
Indoor relative humidity often drops below 30% during cold months, which is well under the 40% to 50% range most health organizations consider comfortable. A whole home humidifier installation restores that balance by injecting moisture directly into the air stream of your furnace or air handler. Instead of moving a portable unit from room to room, you get consistent humidity across the entire house.
The benefits extend well beyond comfort. Proper humidity helps reduce dry skin and irritation, protects hardwood floors and musical instruments from cracking, and can make a home feel warmer at a lower thermostat setting. Homeowners who already run a whole house air purifier often pair it with a humidifier to address both airborne particles and dryness in one integrated system.
It is worth noting that humidity control runs in both directions. If your home swings the other way and feels clammy in summer, a whole house dehumidifier serves the opposite role. Many modern HVAC setups combine both functions alongside whole house ventilation systems for year-round indoor air quality.
Types of Whole Home Humidifiers
Not every humidifier works the same way. The three main categories differ in how they generate moisture, how much maintenance they need, and how they integrate with your ductwork. Understanding these differences is the first step toward a successful whole home humidifier installation.
| Tier | Humidifier Type | Best For | Key Characteristics |
|---|---|---|---|
| Essential tier | Bypass humidifier | Homes with a standard forced-air furnace and moderate humidity needs | No moving parts, uses furnace airflow to move moisture, lowest maintenance complexity |
| Balanced tier | Fan-powered humidifier | Homes with variable-speed furnaces or longer duct runs | Built-in fan pushes moisture independently of furnace airflow, more consistent output |
| Top-tier | Steam humidifier | Large homes, tight construction, or homes needing precise humidity control | Boils water to create steam, works without furnace heat, highest output and control |
Bypass Humidifiers
Bypass units are the most common choice for whole home humidifier installation. They mount on the supply or return plenum and use a short bypass duct to route warm air through a water-soaked pad and back into the airstream. Because they rely on the furnace blower, they only humidify while the system is running. They are simple, reliable, and a solid choice for the essential tier of humidity control.
Fan-Powered Humidifiers
Fan-powered models add a small blower that moves air through the water panel regardless of furnace fan speed. This makes them more effective in homes with variable-speed equipment or long duct runs where static pressure is a concern. They sit in the balanced tier, offering better performance than bypass units without the electrical and plumbing demands of steam systems.
Steam Humidifiers
Steam humidifiers use an electric heating element to boil water and inject vapor directly into the duct. They operate independently of furnace heat, which means they can humidify in mild weather when the heat is not running. They deliver the highest output and the tightest humidity control, placing them in the top tier of residential systems. The trade-off is a more involved installation that requires dedicated electrical service, a cold water line, and a drain.
Important: Steam humidifiers draw significant electrical current and must be wired to a dedicated circuit. This part of the installation should always be handled by a licensed electrician or an HVAC technician qualified for electrical work.
Sizing Your Humidifier Correctly
An undersized humidifier runs constantly and never reaches the target humidity. An oversized unit cycles on and off, wastes water, and can overshoot, leading to condensation on windows. Proper sizing is based on three factors: the volume of conditioned space, the tightness of the building envelope, and the capacity of the HVAC system to distribute moisture.
Manufacturers rate humidifiers in gallons per day. A common starting point is roughly one gallon per day for every 1,000 square feet of well-sealed living space, but this is only a rough guide. A better approach is a humidity load calculation that accounts for ceiling height, insulation, window quality, and air infiltration. Homes with older windows or loose construction need a higher capacity per square foot than a tightly sealed new build.
Your HVAC technician can perform this calculation alongside a Manual J load calculation, which is the same process used when sizing an air conditioner. If you are planning a broader upgrade, our guide to whole house air conditioning systems explains how load calculations inform equipment selection across the board. For homes without ductwork, a whole house ductless heating and cooling system can be paired with a ductless humidifier option instead.
Practical tip: Check your home's humidity with a hygrometer before buying. If readings stay between 35% and 45% in winter, you may need a smaller unit than expected. If readings drop below 25%, size up and consider a steam unit.
The Whole Home Humidifier Installation Process
While every home is different, a professional whole home humidifier installation follows a predictable sequence. Knowing these steps helps you ask the right questions and understand what happens on installation day.
- Site assessment and equipment selection. The technician inspects the furnace, plenum space, water supply, drain access, and electrical panel. This step determines whether a bypass, fan-powered, or steam unit is appropriate and confirms the required capacity.
- Ductwork preparation. For bypass and fan-powered units, the installer cuts openings in the supply and return plenums and fits the humidifier cabinet. A bypass duct connects the two sides. For steam units, a smaller opening is cut in the supply duct for the steam distribution tube.
- Water supply connection. A saddle valve or tee is installed on a nearby cold water line. A copper or flexible supply tube runs to the humidifier's solenoid valve. The saddle valve is opened to test flow.
- Drain connection. A drain line routes from the humidifier to a floor drain, utility sink, or condensate pump. Proper slope is essential to prevent standing water and microbial growth.
- Electrical and control wiring. The humidifier is wired to the furnace control board and a humidistat is mounted on the return duct or wall. Steam units also need a dedicated circuit from the electrical panel.
- Commissioning and testing. The technician sets the humidistat, opens the water valve, runs the furnace, and verifies that moisture is being introduced into the airstream. Water flow, drain function, and electrical connections are all checked before the job is signed off.
The entire process for a bypass or fan-powered unit usually takes three to five hours. Steam humidifier installation takes longer because of the electrical and water work, often six to eight hours. If ductwork modifications are needed, plan for additional time.
Ductwork Considerations
Humidifier performance depends on healthy ductwork. Leaky ducts waste moisture into unconditioned spaces, and undersized return ducts can starve the humidifier of airflow. Before installation, ask the technician to inspect duct sealing and static pressure. If your home has significant duct leakage, addressing it first will make the humidifier far more effective. Our guide to ductless versus ducted systems, along with resources on whole house heating and air conditioning systems, can help you evaluate whether your existing ductwork is up to the task.
DIY vs Professional Installation
The question of whether to tackle whole home humidifier installation yourself comes down to comfort with three tasks: cutting and sealing sheet metal ductwork, tapping a water line, and wiring low-voltage controls. A confident DIYer can handle a bypass humidifier with the right tools and a clear manual. Fan-powered and steam units are more involved.
Several risks make professional installation worthwhile for most homeowners. Incorrect duct openings can leak air and reduce HVAC efficiency. A poorly seated saddle valve can leak inside a wall or ceiling cavity. Wiring mistakes can damage the furnace control board or create a safety hazard. Steam units add electrical code requirements that vary by jurisdiction.
Professional installation also protects your equipment warranty. Many manufacturers require installation by a licensed technician for the warranty to remain valid. If you are also planning related upgrades, such as a whole house electric furnace or a whole house exhaust fan, bundling the work with a single contractor often simplifies scheduling and inspection.
Maintenance After Installation
A whole home humidifier is a low-maintenance appliance, but it is not maintenance-free. Regular care keeps output steady, prevents mineral buildup, and protects your HVAC system from water damage.
- Water panel replacement: Replace or clean the water panel every one to three months during heating season. Hard water accelerates scale buildup and shortens panel life.
- Drain line flushing: Flush the drain line monthly to clear mineral sediment. A clogged drain can overflow the humidifier cabinet and damage ductwork.
- Solenoid and saddle valve inspection: Check annually for leaks and mineral deposits. Replace the solenoid if water flow becomes inconsistent.
- Humidistat calibration: Verify the humidistat reading against a separate hygrometer each fall. A miscalibrated control can over-humidify and cause window condensation.
- Seasonal shutdown: At the end of heating season, close the water supply valve, drain the unit, and set the humidistat to the off position.
If you notice persistent high humidity, condensation on windows, or musty odors after installation, the system may be oversized or the humidistat may be set too high. Addressing high indoor humidity promptly matters because excess moisture can lead to mold growth and structural damage. Our guide on who to call for high humidity in house walks through the diagnostic steps and when to bring in a professional.
Integrating With Other Home Systems
A humidifier works best as part of a coordinated indoor air quality strategy. Pairing it with a whole house air purifier addresses both moisture and particulate matter. If your home also struggles with stale air, a whole house ventilation system can bring in fresh air without sacrificing humidity control. And if you are evaluating a broader HVAC upgrade, our overview of whole house humidifier options provides additional context on how these units fit into a complete home comfort plan.
Frequently Asked Questions
How long does whole home humidifier installation take?
A typical bypass or fan-powered humidifier installation takes between three and five hours for an experienced HVAC technician. Steam humidifier installation can take longer, often six to eight hours, because it requires dedicated electrical wiring, a water line, and a drain connection. If ductwork modifications are needed, add another one to two hours to the estimate.
Can I install a whole home humidifier myself?
A confident DIYer with metalworking tools can install a bypass humidifier, but the work involves cutting into supply and return ductwork, tapping a water line, and wiring the unit to the furnace control board. Mistakes can cause water damage or reduce HVAC efficiency. For steam units and any installation involving electrical work, hiring a licensed HVAC technician is strongly recommended.
What size whole home humidifier do I need?
Sizing is based on your home's square footage, ceiling height, insulation quality, and window tightness. Humidifiers are rated in gallons per day. A common rule of thumb is one gallon per day for every 1,000 square feet of well-sealed living space, but a Manual J or humidity load calculation gives a far more accurate result for your specific home.
Where should a whole home humidifier be installed?
Bypass and fan-powered humidifiers are typically mounted on the supply or return plenum of the furnace, with a bypass duct connecting the two. The unit should sit close to a cold water supply and, for some models, a floor drain. Steam humidifiers can be mounted in the duct or as a standalone unit near the air handler.
How often should a whole home humidifier be maintained?
Replace or clean the water panel every one to three months during the heating season, depending on water hardness. Flush the drain line monthly, inspect the saddle valve and solenoid annually, and have a technician check the humidistat calibration each fall before the heating season begins.
Bottom line: Whole home humidifier installation is a worthwhile upgrade for any home that battles dry winter air. Choose the right tier for your home, size the unit with a proper load calculation, and either follow manufacturer instructions carefully or bring in a licensed HVAC technician. With routine maintenance, a quality humidifier will deliver consistent comfort for many heating seasons.