Cleaning Outside Air Conditioning Unit
A complete step-by-step guide to safely clean your outdoor AC condenser, improve efficiency, and extend the life of your cooling system
START THE GUIDEWhy outdoor cleaning matters: Your outdoor condenser unit works hard all season, pulling air through its coils to release heat. When dirt, leaves, and debris clog the fins, the system struggles to breathe. This guide shows you how to restore airflow safely and keep your cooling system running efficiently.
Understanding Your Outdoor AC Unit
The outdoor portion of a split air conditioning system — often called the condenser unit — contains the compressor, condenser coils, and a large fan. Its job is to release the heat absorbed from inside your home into the outdoor air. When the condenser coils become coated with dust, pollen, grass clippings, or cottonwood fluff, heat transfer drops and the compressor must work harder to achieve the same cooling effect. Over time, this leads to higher energy use, shorter equipment life, and reduced comfort indoors.
Routine cleaning of the outdoor unit is one of the most effective maintenance tasks a homeowner can perform. It requires only basic tools, a few hours of time, and a careful approach. If your system is a central air unit or a central air conditioning setup, the outdoor condenser is the component that benefits most from regular attention. Even if you have a ductless mini-split AC, the outdoor portion still needs the same care. And if you are already noticing that your central air unit is running but not cooling, a dirty condenser could be a contributing factor worth investigating.
This guide walks through the full process: preparing the area, safely disconnecting power, cleaning the coils from the inside out, straightening bent fins, clearing the drain path, and reassembling everything for a test run. It also covers how often to clean, what to check afterward, and warning signs that mean you should call a professional instead of continuing on your own.
Tools and Supplies You Will Need
Before you begin, gather everything in one place. Most items are already in a typical garage. Choose a coil cleaner that is labeled safe for aluminum fins and follow its dilution instructions.
- Adjustable wrench or nut driver set (to remove the fan grille and top panel)
- Garden hose with a spray nozzle (for gentle rinsing)
- Coil cleaning solution (foaming or non-acid, aluminum-safe)
- Soft-bristle brush or coil brush
- Fin comb (to straighten bent condenser fins)
- Wet/dry vacuum with a soft brush attachment
- Work gloves and safety glasses
- Garden shears (to clear vegetation around the unit)
- Replacement air filter for the indoor unit (optional but good practice)
Step-by-Step Cleaning Process
Turn Off the Power
Shut off the AC at the thermostat, then switch off the dedicated breaker for the outdoor unit at your electrical panel. If your unit has a separate disconnect box near the condenser, pull the disconnect or flip the switch inside. Never open the unit while power is connected.
Clear the Surrounding Area
Remove leaves, grass clippings, and debris from around the unit. Keep at least two feet of clearance on all sides and above so air can flow freely. Trim back shrubs and remove any vines growing into the fins.
Remove the Fan and Grille
Unscrew the top grille and carefully lift the fan assembly. Place it aside on a clean surface, being careful not to strain the fan wires. Some units require unplugging the fan motor connector — note how it is attached before disconnecting.
Remove Surface Debris
Use a wet/dry vacuum or a soft brush to lift away loose dirt, leaves, and grass from the outside of the coils. Work gently to avoid bending the fins. Do not use a pressure washer on the coils.
Clean the Coils from the Inside
Spray the coil cleaner on the inside face of the coils, then rinse gently from the inside out with a garden hose. Rinsing from inside pushes dirt outward rather than driving it deeper into the fins. Allow the cleaning solution to dwell for the time recommended on the label.
Straighten Bent Fins
Inspect the condenser fins for bends or crushed sections. Use a fin comb to gently realign them so air can pass through evenly. Take your time — this step restores airflow and improves heat transfer.
Clean the Base and Drain Path
Wipe down the base pan and clear any debris blocking the condensate drain path. If you notice standing water near the unit, a clogged line could be the cause. See our guide on cleaning the air conditioner drain for details.
Reassemble and Test
Reinstall the fan and grille, tighten the screws evenly, and restore power at the breaker and thermostat. Run the system for 15–20 minutes and listen for unusual noises. Feel for warm air leaving the top of the unit — that indicates heat is being rejected properly.
Safety First
Always disconnect power before opening the outdoor unit. The capacitor inside the condenser can hold a dangerous charge even after power is off — never touch the electrical components. If you are unsure about any step, or if the unit shows signs of refrigerant leaks, burnt wiring, or compressor damage, stop and call a certified HVAC technician. For related tasks like indoor coil cleaning, see our guide on cleaning AC evaporator coils. If you notice that your central air unit fan is spinning but not cooling, that could indicate a separate problem that requires professional diagnosis.
How Often Should You Clean the Outdoor Unit?
The right schedule depends on your local environment. Use the table below as a general guide and adjust based on what you observe.
| Environment | Cleaning Frequency | What to Watch For |
|---|---|---|
| Clean suburban area, few trees | Once per cooling season | Light dust on fins, occasional leaves |
| Heavy pollen or cottonwood | Every 2–3 months during season | Fuzzy buildup on coil face, reduced airflow |
| Near dirt, construction, or farmland | Monthly during season | Visible dust coating, mud splash on coils |
| Coastal or humid climate | Every 2 months | Salt residue, mold, or algae growth |
| Pet owners with nearby outdoor unit | Every 2–3 months | Pet hair trapped in fins, matted debris |
In addition to outdoor cleaning, remember to check the indoor air filter regularly. Our guide on cleaning the filter of an air conditioner explains how a clean indoor filter supports the work you do outside. If you are also dealing with musty odors, our article on cleaning mould from an air conditioner covers the indoor side of the system.
Common Mistakes to Avoid
Many well-intentioned DIY cleanings cause more harm than good. Avoid these frequent errors:
- Using a pressure washer — high pressure bends fins and can force water into electrical components.
- Rinsing from the outside in — this pushes dirt deeper into the coil instead of flushing it out.
- Skipping the power disconnect — always shut off the breaker before touching the unit.
- Leaving the fan motor exposed to water — protect the motor and wiring during rinsing.
- Ignoring bent fins — small bends restrict airflow and reduce efficiency over time.
- Cleaning only once at the start of the season — mid-season checkups matter in high-pollen areas.
If you are unsure about the condition of your indoor coils, our detailed guide on cleaning air conditioner condenser coils and cleaning air conditioner coils covers both sides of the system. For a broader maintenance overview, see cleaning coils on a central air conditioner.
When to Call a Professional
Outdoor cleaning is a homeowner-friendly task, but some situations call for a licensed technician. Contact a professional if you notice any of the following:
- Refrigerant lines that are frosted or covered in ice
- Burning smells or scorch marks near electrical components
- The compressor makes loud clanking or grinding noises
- Water pooling around the base that does not drain
- The unit trips the breaker repeatedly after cleaning
- Persistent warm air from the supply vents after cleaning
A certified HVAC professional can diagnose issues that go beyond surface cleaning, including refrigerant charge problems and electrical faults. If you are experiencing a system that is not cooling, our articles on a central air unit not blowing cold air and a central air system that turns on but does not cool provide additional troubleshooting context.
Frequently Asked Questions
Can I use a pressure washer on my outdoor AC unit?
No. Pressure washers bend the soft aluminum fins and can force water into the fan motor and electrical components. Use a garden hose with a gentle spray nozzle instead.
How do I know if my condenser coils are dirty?
Look for visible dust, matted debris, or a fuzzy coating on the fin surface. You may also notice reduced cooling performance indoors or longer run times. If the outdoor unit feels unusually hot and airflow from the top seems weak, dirty coils are a likely cause.
Should I cover my outdoor unit in winter?
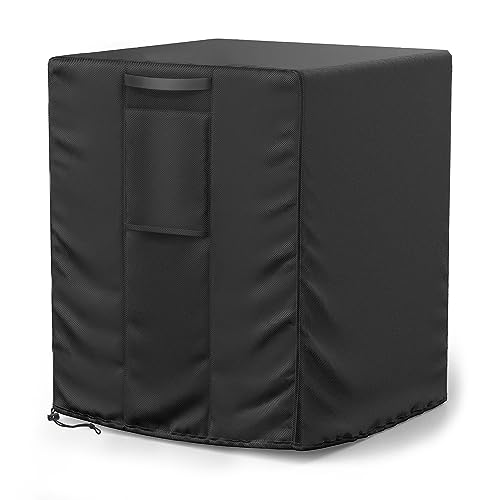
A breathable cover can help keep debris out during the off-season, but never wrap the unit tightly. Trapped moisture can cause corrosion. If your system runs year-round as a heat pump, do not cover it. For general maintenance context, see our guide on cleaning an HVAC system.
What if my unit still does not cool after cleaning?
Cleaning restores airflow but does not fix refrigerant leaks, compressor faults, or thermostat issues. If performance does not improve, have a technician inspect the system. Our article on a central air unit that stopped blowing cold air covers common causes.
Can I clean the outdoor unit myself if I have a heat pump?
Yes, the outdoor cleaning procedure is similar for heat pumps. The same rules apply: disconnect power, clear debris, clean the coils gently from inside out, and straighten fins. For related reading, see central heat pump.
Is it safe to use household coil cleaners?
Only use products specifically labeled for aluminum condenser coils. Harsh acids can damage the fins and void warranties. Follow the dwell time on the label and rinse thoroughly.
Keep Your System Running at Its Best
Outdoor cleaning is one part of a complete maintenance routine. Explore our related guides on indoor coil care, drain line cleaning, and filter replacement to protect your entire cooling system.
Explore More Maintenance Guides