Clean Mould From Air Conditioner: Complete Removal & Prevention Guide
Discover why mould grows inside your AC, how to remove it safely step by step, and the practical habits that keep your unit mould-free season after season.
A musty smell when your air conditioner kicks on is more than an annoyance — it is often the first sign that mould has taken hold inside your unit. Mould spores thrive in the cool, damp environment of evaporator coils, drain pans, and filters, and once established they can circulate through your home every time the system runs. This guide explains exactly how to clean mould from your air conditioner, which tools and cleaning products to use, when to call a professional, and how to prevent the problem from coming back.
Whether you own a window unit, a ductless mini-split, or a full central system, the underlying cause is the same: moisture combined with organic dust and darkness. Understanding that relationship is the key to effective, lasting removal.
What You Will Find in This Guide
- Signs Your AC Has Mould
- What Causes Mould Inside an Air Conditioner
- Safety Precautions Before You Start
- Step-by-Step Mould Removal
- Choosing Cleaning Products by Tier
- Special Notes for Window Units
- Special Notes for Central Systems
- How to Prevent Mould From Returning
- When to Call a Professional
- Frequently Asked Questions
Signs Your Air Conditioner Has Mould
Mould does not always announce itself with visible black patches. Because the evaporator coil sits in a dark, enclosed compartment, growth often begins out of sight. Watch for these indicators:
- Musty or earthy odour when the fan starts — the single most reliable early warning.
- Visible dark spots on the filter, coil fins, blower wheel, or drain pan.
- Increased allergy symptoms such as sneezing, itchy eyes, or congestion that improve when you leave the room.
- Water pooling near the indoor unit or a clogged condensate drain line.
- White, grey, or black fuzz on the plastic housing or inside the air outlet grille.
- Recurring respiratory irritation for family members who spend time in the cooled room.
If you notice more than one of these signs, inspect the indoor unit promptly. A clean HVAC system is not just about efficiency — it is about indoor air quality.
What Causes Mould Inside an Air Conditioner
Mould needs three things to grow: moisture, organic food (dust, skin cells, pollen), and a surface to colonise. An air conditioner provides all three in abundance. The most common triggers are:
- Clogged drain lines. When condensate cannot escape, water backs up into the drain pan and insulation. A clogged condensate drain line is one of the leading causes of mould growth.
- Dirty filters. Dust trapped on the filter becomes food for mould when humidity rises. Learn proper filter cleaning to break the cycle.
- High indoor humidity. If indoor relative humidity stays above 60%, moisture lingers on coils long after the compressor stops.
- Switching the unit off while damp. Shutting down immediately after cooling leaves the evaporator coil wet.
- Poor drainage slope. A drain pan that does not slope toward the outlet holds standing water.
- Infrequent deep cleaning. Coils and blower wheels accumulate biofilm over months of use.
Maintenance insight: Regular air conditioner coil cleaning and a scheduled drain line cleaning remove the food and moisture mould needs. Combine both with a seasonal cleaning service for your air conditioner for the most reliable protection.
Safety Precautions Before You Start
Mould removal involves chemicals, electrical components, and airborne spores. Protect yourself and your home before touching the unit:
- Disconnect power at the breaker or unplug the unit completely.
- Wear an N95 mask and safety goggles to avoid inhaling spores or splashing cleaning solution.
- Use nitrile gloves — many disinfectants irritate skin.
- Ventilate the area by opening windows and running a fan away from the work zone.
- Keep children and pets away until surfaces are dry.
- Do not mix cleaners. Never combine bleach with ammonia-based products.
Important: If you see extensive black mould spreading into ductwork, drywall, or insulation, stop and contact a certified HVAC technician. Porous materials contaminated with mould usually need professional remediation, not surface cleaning.
Step-by-Step Mould Removal
Follow this sequence for a thorough clean. Each step builds on the previous one, so avoid skipping ahead.
Remove and Clean the Filter
Slide out the filter and rinse it under lukewarm water. For visible mould, wash with a mild dish soap solution and a soft brush, then soak for ten minutes in a diluted white-vinegar solution. Rinse thoroughly and let it dry completely in the shade before reinstalling. A second filter is worth keeping on hand so the unit can run while the first dries.
Clean the Evaporator Coils
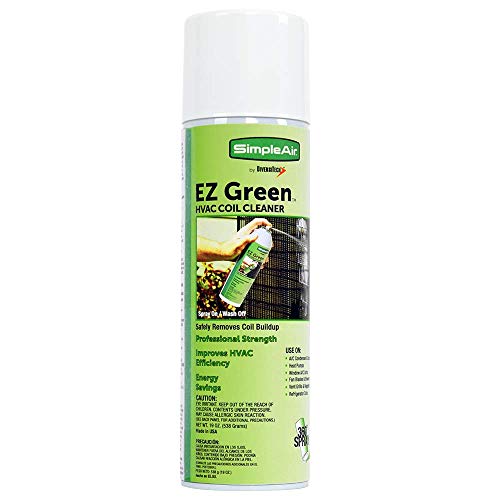
Spray a no-rinse coil cleaner approved for indoor use onto the fins, following the product directions. Let it dwell, then gently wipe with a soft cloth. For stubborn biofilm, use a fin comb to straighten bent fins before cleaning. Rinse only if the product instructions permit, and make sure the drain pan can carry away the water.
Disinfect the Drain Pan and Drain Line
Remove the drain pan if accessible. Scrub it with a disinfectant solution, paying attention to corners and the outlet. Flush the drain line with a vinegar-and-water mix or a dedicated drain cleaner. A clogged line will bring mould back within weeks, so verify that water flows freely before reassembly.
Clean the Blower Wheel and Housing
The blower wheel is a common hiding place for mould because it stays damp. Use a soft brush and a spray bottle of diluted vinegar or a specialised HVAC cleaner. Wipe the housing interior with a disinfectant wipe. Be careful not to bend the blower fins or get electrical components wet.
Treat the Air Outlet Grille and Insulation
Remove the front grille and wash it with soapy water. If the insulation or foam gasket shows mould, replace it — porous materials cannot be reliably cleaned. Wipe down all plastic surfaces with a disinfectant that is safe for plastics.
Dry and Reassemble
Leave the unit open and run a fan or use a hairdryer on a cool setting to dry every surface completely. Reinstall the filter, grille, and drain pan only when everything is dry to the touch. Moisture left behind will restart the growth cycle.
Run the Unit in Fan Mode
After reassembly, run the AC in fan-only mode for 30 to 60 minutes to push out residual moisture and any loosened spores. This simple habit is also a powerful prevention step at the end of every cooling session.
Pro tip: A deep clean of the condenser coils and the outside air conditioning unit complements the indoor work. A clean outdoor unit helps the system dehumidify more effectively, reducing the moisture that mould needs.
Choosing Cleaning Products by Tier
Cleaning supplies fall into broad market tiers. The right choice depends on how severe the mould is and how often you plan to clean. Use this comparison to decide which tier fits your situation.
| Product Category | Tier | Best For | Key Traits |
|---|---|---|---|
| All-purpose vinegar-based spray | Essential Tier | Light surface mould, monthly upkeep | Simple formulation, safe on most plastics, good for filters and grilles |
| No-rinse foaming coil cleaner | Balanced Tier | Routine coil cleaning, mild biofilm | Clings to fins, lifts debris, suitable for most evaporator coils |
| EPA-registered disinfectant spray | Balanced Tier | Drain pans, blower housings, visible mould spots | Broad-spectrum kill claim, requires dwell time, check plastic compatibility |
| HVAC-specific mould treatment kit | Premium Tier | Recurring mould, thorough seasonal deep clean | Includes coil cleaner, drain treatment, and applicator tools; formulated for HVAC surfaces |
| Professional-grade fogging disinfectant | Premium Tier | Whole-system treatment, post-remediation | Requires PPE and often professional application; reaches ductwork and hidden cavities |
An entry-level vinegar spray handles routine maintenance well, while a mid-tier foaming coil cleaner offers a better balance of convenience and effectiveness for most households. Premium kits are a long-term investment for homes that struggle with recurring humidity or have experienced a previous mould outbreak.
Special Notes for Window Units
Window air conditioners are especially prone to mould because their drain pans are shallow and the unit is often tilted incorrectly. Follow the general steps above, then pay extra attention to:
- Confirming the unit tilts slightly outward so condensate drains rather than pooling.
- Removing the chassis (if your model allows) to access the coil and drain pan.
- Cleaning the mould from a window air conditioner with a focus on the drip tray and the foam seals around the chassis.
- Replacing weather stripping if it is waterlogged or discoloured.
If you are considering a replacement unit because mould has compromised the insulation or chassis, our guide to window air conditioners explains what to look for in a new model with better drainage design.
Special Notes for Central Systems
Central air systems hide mould in places a homeowner cannot easily reach: the indoor coil cabinet, the plenum, and the ductwork. For a central system:
- Replace the filter with a high-MERV option appropriate for your system, and change it on schedule.
- Inspect the condensate drain and the drain line for slime and blockages.
- Have the evaporator coil cleaned by a technician at least once a year — this is part of proper central air coil cleaning.
- If mould is suspected in the ducts, arrange air duct cleaning or HVAC duct cleaning before the next cooling season.
A central system that is running but not blowing cold air or showing other cooling faults may be struggling because of a dirty coil or restricted airflow — both of which encourage mould. Addressing the root cause protects both air quality and efficiency.
How to Prevent Mould From Returning
Removal is only half the job. These habits keep mould from re-establishing:
- Keep indoor humidity between 40% and 55%. A hygrometer is an inexpensive way to monitor this.
- Run the fan for 15 to 30 minutes after cooling to dry the coil.
- Clean or replace filters every one to three months — more often in dusty homes or during heavy pollen seasons.
- Flush the drain line monthly with vinegar to prevent biofilm buildup.
- Schedule a professional tune-up annually with a certified HVAC provider.
- Fix leaks promptly. A central air unit leaking water creates the exact damp environment mould loves.
- Use a dehumidifier in basements or rooms with chronic moisture issues.
Seasonal checklist: Before summer, clean the filter, flush the drain, and inspect the coil. After summer, run the fan dry and cover the outdoor unit if appropriate. These two touchpoints dramatically reduce the chance of a mould bloom when the system restarts.
When to Call a Professional
DIY cleaning is safe and effective for surface mould on accessible components. Call a professional when:
- Mould is visible inside ductwork, on insulation, or behind the drywall.
- The musty odour persists after a thorough clean.
- The unit has not been serviced in several years and the coil is heavily fouled.
- You suspect refrigerant leaks or electrical damage near the mould growth.
- Any household member has severe asthma or a compromised immune system.
A certified HVAC technician can perform a full system inspection, clean inaccessible components, and recommend remediation if the mould has spread beyond the unit. For broader system health, see our guide to common AC problems and how to address them early.
Ready to Upgrade to a Mould-Resistant AC?
If recurring mould suggests your current unit has poor drainage or aging seals, explore our recommended air conditioners below. Each model was selected with drainage design and cleanability in mind.
View Recommended UnitsFrequently Asked Questions
How do I know if my air conditioner has mould?
Can I clean mould from my AC myself?
How often should I clean my air conditioner to prevent mould?
What causes mould in an air conditioner?
Is AC mould dangerous to health?
Cleaning mould from an air conditioner is a manageable task when you understand the source of the moisture and follow a structured removal process. Regular HVAC cleaning and attention to drainage keep the system healthy, while a planned drain maintenance routine and periodic coil cleaning stop mould before it starts. For a complete picture of system care, revisit our clean HVAC system guide and make seasonal maintenance a habit — your indoor air quality will show the difference.