Dryer Air Duct: The Complete Guide to Safe and Efficient Ventilation
A well-designed and properly maintained dryer air duct protects your home from fire risk, keeps laundry drying efficiently, and extends the life of your appliance. Learn how to evaluate, clean, and replace your dryer vent ducting.
START LEARNINGWhy the dryer air duct matters: The duct is the path that carries hot, moisture-laden air and lint from your dryer to the outdoors. When that path is restricted, crushed, or clogged, the consequences range from slow drying cycles to serious fire hazards. Understanding how this component works is the foundation of safe laundry operation.
What Is a Dryer Air Duct and Why It Matters
A dryer air duct, also called a dryer vent duct, is the conduit that connects the back of your clothes dryer to an exterior vent hood. Every cycle pushes heated air through the drum, and that air must exit the home. As it travels, it carries moisture, fine lint particles, and residual heat. The duct's job is to move that exhaust outdoors quickly and without obstruction.
When the duct is working as intended, clothes dry in a predictable amount of time, the laundry room stays reasonably comfortable, and lint is captured at the lint trap rather than accumulating along the duct walls. When airflow is restricted, the dryer runs hotter and longer. Lint that would otherwise be expelled coats the interior of the duct, and that lint is highly combustible. According to fire safety data, dryer vent systems that are neglected are a leading cause of residential laundry fires.
The duct also plays a role in indoor air quality and moisture control. If a duct terminates inside a crawlspace, attic, or garage instead of outdoors, the moisture it releases can feed mold growth and damage building materials. A correctly routed, properly terminated duct protects both the appliance and the building envelope.
Types of Dryer Air Duct Materials
Not all dryer ducting is created equal. The material and construction affect airflow, durability, and safety. The table below compares the common options using tier descriptors rather than numeric labels.
| Duct Type | Market Tier | Best For | Key Considerations |
|---|---|---|---|
| Rigid galvanized steel | Premium | Long runs, new construction, whole-home retrofits | Smooth interior, durable construction, resists crushing; requires fittings and careful sealing at joints |
| Rigid aluminum | Premium | Standard residential installations | Lightweight, rust-resistant, good airflow; less rigid than steel and can dent if handled roughly |
| Semi-rigid metal | Mid-Range | Transition pieces, short flexible connections | Compromise between flexibility and airflow; best used for short spans rather than the full run |
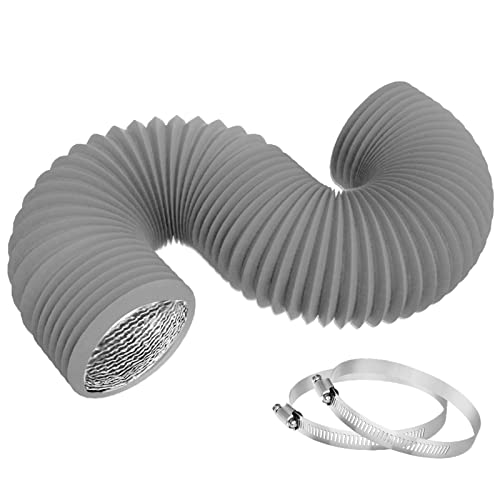
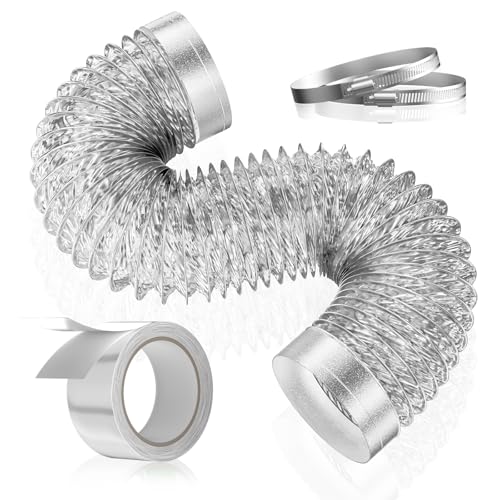
| Flexible foil (corrugated) | Entry-Level | Temporary setups, tight spaces with no alternative | Corrugated walls trap lint, can sag and crush; generally discouraged for permanent installations |
| Flexible plastic or vinyl | Entry-Level | Not recommended for dryer exhaust | Heat-sensitive, can melt or ignite, prone to crushing; avoid for any permanent dryer vent |
The consensus among building code authorities and appliance manufacturers is clear: rigid metal ducting is the preferred standard. Semi-rigid metal is acceptable for short transitions. Flexible foil and plastic products are best reserved for situations where nothing else fits, and even then they should be replaced with rigid metal as soon as practical. If you are evaluating broader ventilation components for your home, the same principles of smooth interior surfaces and sealed joints apply to the dampers and HVAC fittings that regulate airflow in ducted systems.
Sizing and Length Rules for Dryer Vent Ducting
Dryer manufacturers publish a maximum allowable duct length in the installation manual, typically 25 feet from the dryer outlet to the exterior hood. That allowance is not a single straight line in most homes. Each 90-degree elbow effectively shortens the allowed run, usually by about 5 feet, and each 45-degree elbow by about 2.5 feet. A run with two elbows and a short vertical rise can consume most of the allowance before any horizontal distance is counted.
Duct diameter is equally important. Most residential dryers use 4-inch round duct. Reducing to 3-inch duct to squeeze through a tight wall cavity might seem convenient, but it chokes airflow and accelerates lint accumulation. Flexible transition pieces that kink behind the appliance create the same problem. The dryer should sit far enough from the wall that the transition duct remains as straight and unobstructed as possible.
When a run exceeds the manufacturer's allowance, the correct solution is a booster fan designed for dryer venting, not a larger duct or a series of creative fittings. Booster fans restore airflow in long runs, but they require periodic inspection because lint can accumulate on the fan blades. Homes with complex layouts may find that relocating the dryer closer to an exterior wall is more effective than any accessory.
Safety note: Never terminate a dryer duct inside an attic, crawlspace, garage, or any interior space. Exhaust must always exit the building envelope through an approved exterior hood with a backdraft damper. Interior termination introduces moisture, lint, and carbon monoxide risk from gas dryers into the living environment.
Installation Best Practices for Dryer Air Ducts
A properly installed duct is straight, short, and sealed. These three qualities determine how well the system performs over its service life.
Keep It Straight
Route the duct along the most direct path to the exterior. Avoid unnecessary turns, and when a bend is unavoidable, use a smooth metal elbow rather than a flexible kink.
Support the Run
Horizontal sections should be supported at regular intervals so the duct does not sag. Sagging creates low points where lint and moisture collect, gradually narrowing the passage.
Seal Every Joint
Use metal foil tape or duct sealant at connections. Avoid screws that protrude into the duct interior, because lint snags on them and builds up over time.
Terminate Correctly
The exterior hood should have a working backdraft damper and be clear of obstructions. Keep the hood free of lint and ensure it opens freely when the dryer runs.
Avoid Screws Inside
Fasteners that pierce the duct wall create lint-catching edges. Prefer external clamps and foil tape for a smooth interior surface.
Insulate in Cold Climates
Duct sections passing through unconditioned spaces should be insulated to prevent condensation, which can combine with lint to form stubborn blockages.
If you are planning a larger ventilation upgrade alongside the dryer work, the installation principles for ducted air conditioning and duct sealing share the same emphasis on smooth interiors, minimal bends, and tight joints. The difference is that dryer ducts handle hotter, moister air and therefore demand even more attention to material compatibility.
Cleaning and Maintaining Your Dryer Air Duct
Routine maintenance is the single most effective way to prevent duct problems. The lint trap in the dryer captures only a portion of the lint produced during a cycle; the rest travels into the duct. Over months and years, that residual lint coats the duct walls, reducing airflow and creating fuel for a fire.
A practical maintenance schedule includes emptying the lint trap after every load, inspecting the exterior vent hood monthly, and cleaning the full duct run at least once per year. Households with heavy laundry volume, long duct runs, or several bends should shorten that interval to every six months. Homes with pets, especially long-haired breeds, generate more lint and benefit from more frequent attention.
Cleaning methods range from simple DIY approaches to professional service. A dryer vent cleaning hose attached to a vacuum can remove loose lint from accessible sections. A duct cleaning brush kit allows the homeowner to work through the run from both ends. For long or complex runs, especially those routed through walls or ceilings, a professional service is the safer and more thorough option. The page on dryer vent cleaning explains the step-by-step process in more detail, and the guide to dryer vent cleaning hoses covers the tools used for the job.
When the duct is in poor condition or has been neglected for years, cleaning alone may not be enough. A full dryer vent duct replacement restores the system to modern standards and is often the right decision when the existing duct is flexible foil, crushed, or routed poorly.
Warning Signs That Your Dryer Duct Needs Attention
Dryer vent problems develop gradually, but they send clear signals along the way. Recognizing them early prevents inconvenience and reduces risk.
- Longer drying times: A load that once finished in a single cycle now needs two. Restricted airflow is the most common cause.
- Overheating: The dryer or the laundry room feels unusually warm. Heat that cannot escape builds up in the appliance and the surrounding space.
- Burning smell: Any burning odor during operation warrants stopping the dryer immediately and inspecting the duct.
- Excess lint around the trap: Lint collecting around the lint trap housing or behind the dryer suggests the duct is not carrying lint away efficiently.
- Visible lint at the exterior hood: Lint clinging to or hanging from the outside vent flap indicates buildup within the run.
- The vent flap does not open: A stuck or weakly moving damper means airflow is compromised.
- Condensation or moisture: Dampness around the duct joints or at the exterior hood can indicate a blockage or poor termination.
Any of these signs calls for an inspection before the next load. If the duct itself is damaged, crushed, or made of unsuitable material, replacement is the durable solution. Homeowners who prefer to have the work handled by specialists can consult dryer vent cleaning companies for professional evaluation and service.
When and How to Replace a Dryer Vent Duct
Replacement is warranted in several situations: the existing duct is flexible foil or plastic, the duct has been crushed or kinked behind the appliance, the run is excessively long with multiple elbows, the duct passes through an interior space, or the duct is so clogged that cleaning cannot restore adequate airflow. In each case, installing rigid metal ducting brings the system up to a safe and efficient standard.
The replacement process begins with measuring the run and planning the route. The goal is the shortest, straightest path to an exterior wall with a single elbow at the dryer connection. Materials include 4-inch rigid metal duct sections, metal elbows, a transition collar, foil tape, and an exterior hood with a backdraft damper. The old duct is removed, the path is cleared, and the new sections are assembled with sealed joints. The dryer is pushed back only as far as the transition allows without compressing the duct.
For runs that pass through finished walls, the in-wall dryer vent approach uses recessed boxes and rigid ducting concealed behind drywall. This method produces a clean installation and protects the duct from accidental damage. Homeowners planning a broader laundry room refresh may also consider related ventilation topics such as duct cleaning to keep the entire home's air pathways in good condition.
Professional Dryer Vent Services
Professional services are valuable for homeowners who want a thorough inspection and cleaning without handling the tools themselves. A technician uses rotary brushes and high-powered vacuums to clear the full run, inspects the exterior hood, and checks the transition behind the dryer. Many services also measure airflow before and after cleaning to document improvement.
Choosing a provider is easier when you know what to look for. Local companies that specialize in vent work typically offer before-and-after documentation and can advise on whether the existing duct meets current standards. If you are searching for help nearby, the guide on finding dryer vent cleaning in your area outlines the questions to ask and the credentials to verify. For homeowners who prefer a hands-on approach, the dryer vent cleaning guide covers the DIY route in detail.
How Dryer Ventilation Fits Into Whole-Home Air Management
The dryer duct is one part of a larger system that manages air movement, moisture, and temperature throughout the home. Households dealing with excess humidity often look at dehumidifiers versus air conditioners and whether a dehumidifier is needed alongside their ventilation improvements. In homes with central systems, duct cleaning and duct sealing keep conditioned air where it belongs and reduce the load on the equipment.
Understanding the different types of air conditioning units and how each manages airflow provides useful context. A dryer duct is a dedicated exhaust path, while HVAC ducts distribute conditioned air; both depend on smooth interiors, minimal restrictions, and proper termination. Homes with ducted mini-split systems and other ducted configurations benefit from the same maintenance discipline that keeps a dryer vent clear.
Seasonal Dryer Duct Checklist
| Frequency | Task | Why It Matters |
|---|---|---|
| Every load | Empty the lint trap | Prevents lint from entering the duct and reduces fire fuel |
| Monthly | Inspect the exterior vent hood | Confirms the damper opens freely and lint is not accumulating outside |
| Every 3 months | Check the transition behind the dryer | Ensures the duct is not crushed or kinked when the appliance is pushed back |
| Every 6–12 months | Clean the full duct run | Removes accumulated lint and restores airflow |
| Annually | Inspect duct material and joints | Identifies deterioration, loose connections, or unsuitable materials |
| As needed | Replace damaged or outdated ducting | Restores safe operation and brings the system up to current standards |
Frequently Asked Questions About Dryer Air Ducts
How often should a dryer air duct be cleaned?
A dryer air duct should be cleaned at least once per year. Homes with heavy laundry use, long duct runs, or multiple bends may require cleaning every six months to maintain safe and efficient operation.
What is the best material for a dryer air duct?
Rigid metal ducting, either galvanized steel or aluminum, is the best material. It offers smooth interior walls for efficient airflow, resists crushing, and holds up well against heat and moisture. Semi-rigid metal is a good alternative for short, flexible connections.
Can a dryer air duct be too long?
Yes. Most manufacturers recommend a maximum duct run of 25 feet from the dryer to the exterior vent, with each 90-degree elbow reducing that allowance by about 5 feet. Longer or more complex runs increase lint accumulation and reduce drying efficiency.
What are the signs that a dryer air duct needs attention?
Common signs include clothes taking longer than usual to dry, the dryer feeling unusually hot to the touch, a burning smell, excessive lint around the lint trap area, and visible lint buildup at the exterior vent flap. Any of these signals warrants an immediate inspection.
Is flexible foil ducting safe for a dryer vent?
Flexible foil ducting is generally discouraged for dryer vents. Its corrugated interior traps lint, it can sag and create low points where moisture collects, and it may crush behind the appliance. Transition to rigid or semi-rigid metal ducting wherever possible.
Should I use screws to connect dryer duct sections?
Screws that protrude into the duct interior create lint-catching edges. The preferred method is to use foil tape or external clamps at joints. If a mechanical fastener is necessary, keep it short and smooth on the inside.
Take the Next Step Toward a Safer Laundry Room
Whether you need a cleaning, a replacement duct, or a professional inspection, the right information makes the decision easier. Explore the guides above and move forward with confidence.
REVIEW THE GUIDE