How to Install an Air Conditioner in a Sliding Window
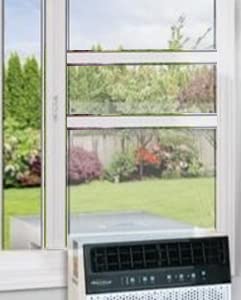
Sliding windows need a different approach than double-hung windows. This guide walks you through choosing the right unit, building a secure mount, sealing the gap, and testing the installation so your room stays cool and your window stays safe.
Why Sliding Windows Need Special Handling
A standard window air conditioner is designed with a top channel that rests against a lower sash in a double-hung window. Sliding windows open horizontally, so there is no sash to clamp the unit in place. That changes three things: how the unit is supported, how the opening is sealed, and how the window is locked.
Most sliding window installations rely on a side panel kit, a support bracket, and a filler panel for the vertical gap above the unit. Without these parts, the unit can tip outward, rain can enter, and the window cannot be secured. If you are still deciding between unit styles, our overview of how an air conditioner works explains the components you will be handling during installation.
Tools and Materials Checklist
Gather everything before you lift the unit. Most of these items are standard household tools, and the window kit should come with the air conditioner.
| Category | Items | Why You Need It |
|---|---|---|
| Measuring | Tape measure, pencil, level | Confirm fit and set the correct downward tilt. |
| Cutting | Utility knife, fine-tooth saw or foam cutter | Trim side panels and filler board to size. |
| Fastening | Drill, screwdriver, exterior-rated screws | Secure the support bracket and window lock. |
| Sealing | Weatherstripping, foam sealant, removable caulk | Close air gaps around the unit and panels. |
| Support | Sliding-window AC bracket, shims | Carry the weight and prevent tipping. |
| Safety | Work gloves, helper, window lock or security bar | Protect hands, lift safely, and secure the window. |
Brackets range from entry-level universal kits to heavy-duty professional-grade mounts. Match the bracket rating to the weight of your unit.
Choosing an AC That Fits a Sliding Window
Start by checking the manufacturer's documentation. Many window units list supported window types, and some are explicitly approved for sliding windows. If the manual says double-hung only, plan to use a dedicated sliding-window bracket and kit, or choose a different model.
Key fit checks
- Width: The unit plus its side panels must fit inside the window opening with the window closed against it.
- Height: The unit must clear the window track and leave room for a filler panel above it.
- Weight: Confirm that your bracket and wall can support the unit. Heavier units belong on a reinforced exterior bracket.
- Electrical: Use a dedicated circuit where possible. Our guide to window AC installation covers outlet and breaker considerations.
Type comparison for sliding windows
| Option | Tier | Best For |
|---|---|---|
| Standard window AC with sliding-window kit | Essential tier | Small bedrooms and single rooms with a standard sliding window. |
| Window AC with reinforced bracket | Mid-tier | Larger units and second-floor windows where stability matters. |
| Through-the-wall or mini-split alternative | High-end tier | Permanent cooling when the window frame cannot support a unit. |
For capacity guidance, see horizontal air conditioner installation in a sliding window and our sizing notes in sliding glass door installation.
Measuring the Window and Planning the Mount
Measure the clear opening at the narrowest point, then measure the width of the unit with its side panels extended. Leave roughly a quarter inch of clearance for the window to close against the unit without binding.
- Measure the window opening width and height.
- Measure the AC cabinet width and height, plus the side panel extension.
- Confirm the window track depth and the thickness of the frame.
- Decide where the support bracket will anchor to the exterior wall.
Step-by-Step Installation
-
Prepare the window and bracket
Clean the window track and inspect the frame for damage. Install the support bracket according to its instructions, anchoring it to solid exterior framing. Check that it is level side to side.
-
Assemble the side panels
Slide the accordion panels into the unit's side channels. Do not trim them yet; fit the unit in the opening first so you can mark the exact length needed.
-
Set the unit on the bracket
With a helper, lift the AC onto the bracket. Slide it into the window opening until the front face sits against the interior sill. Check the slight downward tilt toward the outside.
-
Extend and trim the panels
Pull the side panels out to meet the window frame. Mark the excess, remove the unit if needed, and trim the panels with a utility knife or fine-tooth saw.
-
Close the window against the unit
Slide the window sash until it contacts the AC cabinet. Add the manufacturer's filler panel above the unit to close the vertical gap, then secure it with the provided clips or screws.
-
Seal the perimeter
Apply weatherstripping along the window sash and frame contact points. Use removable caulk or foam sealant on remaining gaps. Insulate the side panels if the kit includes insulation.
-
Lock and secure the window
Install a window lock or security bar so the window cannot be opened from outside. Confirm that the unit cannot slide or tip.
-
Power up and test
Plug into a dedicated outlet, turn the unit on, and check airflow, drainage, and noise. Follow our new AC testing checklist for a full verification.
Sealing and Insulating the Opening
Air leaks around a sliding window AC waste energy and let humid air in. Seal in this order: the vertical filler panel, the side panels, the window sash contact line, and the exterior perimeter.
- Cut rigid foam board to fill the gap above the unit, then wrap the edges with weatherstripping.
- Seal side panel edges with removable caulk so you can remove the unit at the end of the season.
- Check the exterior for gaps where rain could enter, and add a drip edge if the kit provides one.
- If humidity remains high, review our guides on lowering humidity in a room and dehumidifying without a dehumidifier.
Seasonal removal is easier when you use removable sealants and keep the original packaging for the panels and screws.
Safety, Security, and Support Brackets
The most common sliding-window AC failures are tipping and insecure windows. Both are preventable with the right bracket and a lock.
- Use a bracket rated for the unit's weight, and anchor it to exterior framing rather than siding alone.
- Never rely on the window sash alone to hold the unit in place.
- Install a window lock or security bar so the opening cannot be forced from outside.
- Keep the cord away from sharp edges and do not use an extension cord for a high-draw unit.
- Check the installation after the first week and again mid-season for loose screws or sealant gaps.
For more on securing the opening, see how to secure a window with an air conditioner. If you are comparing mount types, our wall-mounted AC installation guide explains permanent anchoring options.
Testing and Troubleshooting
Run the unit for at least 20 minutes and check for these signals:
- Cool air at the vent: If airflow is weak, check the filter and the outdoor coil.
- Drainage: Water should drip outside. Interior moisture usually means the tilt is wrong.
- Vibration: Add shims under the bracket or tighten mounting screws.
- Window seal: Run a hand along the edges to feel for leaks.
If the unit is not cooling at all, use our house not cooling troubleshooting guide. For long-term care, see how long an AC lasts and plan seasonal filter cleaning.
Frequently Asked Questions
Can any window air conditioner be installed in a sliding window?
No. Choose a model rated for horizontal or sliding windows, or use a dedicated sliding-window bracket and side panel kit. Units designed strictly for double-hung windows may not sit securely.
Do I need a support bracket for a sliding window AC?
Yes. A bracket carries the weight and prevents tipping. It also protects the window frame from stress and makes the installation safer on upper floors.
How do I seal the gap above and below a sliding window AC?
Use the included filler panel or cut rigid foam board to size, then seal the edges with weatherstripping and removable caulk. Insulate the accordion side panels and check for gaps after closing the window.
Why does my sliding window AC leak water inside?
Interior water usually means the unit is tilted the wrong way or the drain path is blocked. The unit should slope slightly toward the outside. Level it side to side, add a slight backward tilt, and clear the drain holes.
Can I install a window AC in a sliding window on the second floor?
Yes, but use a heavy-duty bracket rated for the unit and the exterior wall. Never lean out of the window during installation, and have a helper hold the unit while you secure it.
How do I remove the unit at the end of the season?
Unplug the unit, remove the window lock and filler panel, then lift the unit off the bracket with a helper. Clean and store the panels and screws, and seal the window opening.
Related Installation and Cooling Guides
Explore more detailed guides to finish your project:
- Window air conditioner in a sliding window — alternate step-by-step approach.
- Sliding window AC installation details — panel and bracket notes.
- Installing a window AC in a wall — permanent mount option.
- How hard is window AC installation? — difficulty and time expectations.
- Horizontal AC in a sliding window — orientation and fit tips.
- Portable AC without a window — alternative venting methods.