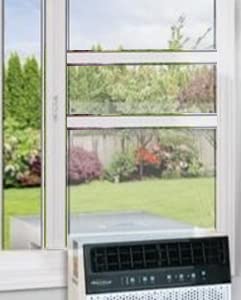
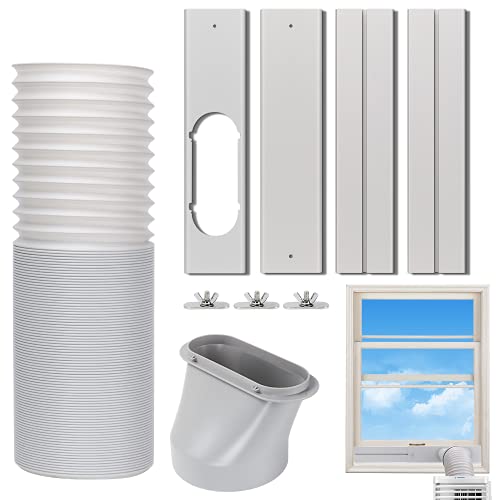
How to Install a Window Air Conditioner in a Sliding Window
A practical, step-by-step guide for fitting, securing, and sealing a window AC unit in a horizontal sliding window — without damaging the frame or compromising safety.
Why sliding windows need special treatment: A sliding window opens sideways, not upward. That means the usual sash-and-frame method used for double-hung windows does not apply. You need a horizontal mounting strategy, a reliable support bracket, and a sealing panel that fills the vertical gap created when the window is open.
This guide walks you through measuring, preparing, mounting, sealing, and testing — in the right order — so the unit stays put, cools efficiently, and keeps rain and warm air out.
1. Confirm Your Window Type and Unit Compatibility
Before anything else, confirm that your window is a true horizontal slider (also called a gliding window) and that your AC unit is suitable for it. Not all window units are designed for sideways installation.
- Check the window: A horizontal sliding window has at least two panels that glide left or right. One panel is typically fixed, and the other moves.
- Check the unit: Look for a model described as suitable for sliding or casement windows, or one with a reversible or adjustable side panel. Standard double-hung window units can sometimes work, but the mounting and sealing approach differs.
- Check the opening height: The window's vertical opening must be tall enough to accommodate the unit's height plus the sealing panel.
- Check the weight: A window AC can weigh a substantial amount. Confirm that the window frame and surrounding wall can support it, ideally with a bracket.
2. Gather the Tools and Materials
Having everything on hand makes the job faster and safer. You will typically need:
- Measuring tape and a pencil
- Drill with appropriate bits (if mounting a bracket)
- Support bracket or window AC mounting bracket
- Insulation foam board or a window sealing kit designed for sliding windows
- Weatherstripping or foam tape
- Caulk or silicone sealant (for permanent sealing around the frame)
- Adjustable wrench or screwdriver
- Level
- Scissors or utility knife
- Gloves and safety glasses
If you are unsure how a typical window unit is constructed and installed, our guide on how air conditioners work is a helpful primer before you start handling the unit.
3. Measure the Window and the Unit
Accurate measurements prevent gaps and wobbling. Measure the following:
- Window opening width: Measure the width of the opening when the sliding panel is fully open.
- Window opening height: Measure the vertical distance from the sill to the top of the frame.
- Unit width and height: Confirm that the unit fits within the opening with a bit of clearance.
- Sill depth: Confirm the sill is deep enough to support the unit and any bracket.
Write the numbers down. You will need them when cutting the insulation panel and positioning the bracket.
4. Prepare the Window and Frame
Clean the window track and sill thoroughly. Remove dirt, old weatherstripping, and debris so the unit and sealing materials sit flush.
- Inspect the track for damage. A bent or worn track can prevent the window from closing properly against the unit.
- Check that the sliding panel moves smoothly. If it sticks, lubricate the track before installation.
- If you plan to drill into the frame for a bracket, confirm that the material is suitable (wood, vinyl, or metal) and use the appropriate fasteners.
If your window is old or the frame is loose, it may be worth reviewing our guide on installing a window air conditioner in a window for general frame considerations before proceeding.
5. Install the Support Bracket
A support bracket is the most important safety component when installing an AC in a sliding window. It transfers the unit's weight to the exterior wall or sill instead of relying on the window frame.
- Position the bracket: Place the bracket so it sits level and extends outward from the sill. Most brackets are adjustable; set the depth to match your unit.
- Mark the mounting holes: Use a pencil to mark where the bracket will attach to the exterior wall or sill.
- Pre-drill and fasten: Drill pilot holes and secure the bracket with the recommended fasteners. Use a level to confirm it is horizontal.
- Check stability: Apply gentle downward pressure to confirm the bracket does not flex or move.
6. Position the AC Unit in the Window
With the bracket in place, lift the unit into the opening. This is a two-person job for larger units.
- Open the sliding panel fully.
- With one person holding the unit, slide it into the opening from the inside.
- Rest the unit on the bracket and the sill. The rear of the unit should extend outside, and the front should sit inside the room.
- Confirm the unit is level. A slight backward tilt (about 2–3 degrees) is often recommended so condensation drains outside, but follow the manufacturer's instructions for your specific model.
- Close the sliding panel until it meets the unit's side. It will not close completely — that gap will be filled with the sealing panel.
For more general guidance on positioning and securing a window unit, see our article on how to secure a window with an air conditioner.
7. Fill the Gap with a Sealing Panel
In a sliding window, the open section is vertical. You need a rigid panel — usually foam board or a purpose-made window sealing kit — to fill the space between the unit and the window frame.
- Measure the gap: Measure the height and width of the open space beside the unit.
- Cut the panel: Cut the foam board or sealing material to size. It should fit snugly with no large gaps.
- Insulate the edges: Apply foam tape or weatherstripping to the edges of the panel for a tighter seal.
- Insert the panel: Slide the panel into the gap and press it into place. If using a kit, follow the manufacturer's instructions for securing it.
- Seal small gaps: Use caulk or silicone sealant around the edges of the panel and any remaining gaps between the unit and the frame.
8. Lock the Window and Add Security
Once the unit and panel are in place, secure the sliding window so it cannot be opened from outside.
- Use a window lock or a wooden dowel cut to fit the track behind the sliding panel.
- Check that the panel cannot be pushed inward or removed from outside.
- If the window has a built-in lock that no longer aligns, use a secondary lock or clamp.
Security is often overlooked. A window AC creates an opening that must be protected. For a deeper look at this topic, read our guide on securing a window with an air conditioner.
9. Test the Installation
Before you call the job done, run a full test:
- Plug the unit in and turn it on.
- Check for cool air within a few minutes.
- Listen for unusual rattling or vibration — this can indicate the unit is not level or the panel is loose.
- Check for water leaks inside the room. A small amount of condensation outside is normal; water inside indicates a drainage or tilt issue.
- Feel around the sealing panel for drafts. If you feel air escaping, add more weatherstripping or sealant.
If the unit runs but does not cool, our troubleshooting article on an AC that turns on but produces no cold air can help you diagnose the issue. If everything works, you are ready to enjoy a cooler room.
Mounting Options Compared
The table below summarizes the common approaches for sliding window AC installation. It uses neutral tier descriptors rather than numerical figures.
| Method | Best For | Stability | Installation Complexity |
|---|---|---|---|
| Standard sill support (no bracket) | Small, lightweight units on ground-floor windows | Entry-level | Essential tier — quick and simple |
| Adjustable support bracket | Most sliding window installations, including upper floors | Mid-tier to high-end tier, depending on build | Balanced tier — requires drilling and leveling |
| No-drill clamp bracket | Rentals and windows where drilling is not allowed | Mid-tier | Starter tier — clamps to sill |
| Professional-grade custom frame | Large units, permanent installations, or unusual window sizes | Top-tier | Professional-grade — best handled by a contractor |
Installation Effort and Professional Help
The effort required depends on the unit size and the bracket type. A small unit with a no-drill bracket can be installed in under an hour by two people. A larger unit with a drilled bracket and custom sealing panel may take half a day.
If you are not comfortable working at height, drilling into the exterior wall, or lifting a heavy unit, hiring a professional is the safer choice. Our article on how to get an installation quote explains what to ask and how to compare proposals without focusing on numerical figures.
For a broader comparison of installation approaches, see how hard it is to install a window AC unit and installing a window air conditioner in a wall if you are considering a through-the-wall alternative.
Frequently Asked Questions
Can any window AC be installed in a sliding window?
Not every unit is ideal, but many standard window units can work if you use a support bracket and a proper sealing panel. Check the manufacturer's documentation for sliding or casement window compatibility. Units with reversible side panels or adjustable frames are the easiest to adapt.
Do I need a special bracket for a sliding window?
A support bracket is strongly recommended for any window AC, and it is essential for sliding windows because the frame does not provide the same upward support as a double-hung sash. Choose an adjustable bracket that fits your sill depth and unit weight.
How do I seal the gap beside the unit?
Use rigid foam board or a window sealing kit cut to the height and width of the opening. Line the edges with foam tape or weatherstripping, insert the panel, and seal small gaps with caulk. Avoid covering the unit's vents.
Should the unit tilt backward or forward?
Most manufacturers recommend a slight backward tilt so condensation drains outside. A small tilt of about 2–3 degrees is common, but always follow the instructions for your specific model. Too much tilt can cause the compressor to run inefficiently.
Can I install a sliding window AC on an upper floor?
Yes, but a secure bracket is non-negotiable. Never rely on the window frame alone on an upper floor. If you cannot install a bracket safely, hire a professional. Also check local regulations, as some areas have specific requirements for exterior-mounted units.
What if the unit does not cool after installation?
Check that the unit is set to cool mode, the filter is clean, and the sealing panel is not blocking airflow. If the unit runs but produces no cold air, review our troubleshooting guide before calling a technician.
How do I keep rain and debris out?
The sealing panel and weatherstripping handle most rain intrusion. Make sure the panel fits snugly and the unit tilts slightly backward so water drains outside. If you live in a windy area, add a small exterior hood or flashing above the unit.
Can I remove the unit in winter?
Yes. Many people remove window AC units for the cold season to improve insulation and reduce drafts. Keep the bracket in place if it is permanently mounted, and store the unit upright. Reinstall it in spring following the same steps.
Related Guides
If you are still in the research phase, these resources can help you compare approaches and understand your home's cooling setup:
- Installing a horizontal air conditioner in a sliding window
- Installing an air conditioner in a sliding window
- Installing a window AC in a sliding glass door
- General window AC installation guide
- Window AC installation in a standard window
- Portable AC installation without a window
- Using a portable AC without a window
- Using a window AC without a window
- Installing a window AC in a wall
- Through-the-wall window AC installation
- Wall air conditioner installation
- Wall-mounted AC unit installation
For broader context on home cooling, you may also want to read about house air conditioners, central air conditioning units, and how long an AC typically lasts.
Ready to Choose Your Window AC?
Now that you know how to install a window air conditioner in a sliding window, the next step is picking the right unit for your room size and window type. Browse our recommended models below, selected for reliable performance and straightforward installation.