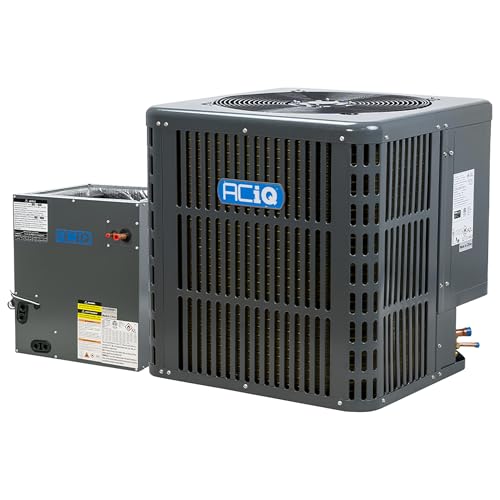
Why this guide matters: If your home already has ductwork, installing central air is typically faster and less invasive than a full ducted system build-out. But reusing existing ducts is only a smart move when the ducts are properly sized, sealed, and insulated. This guide walks you through every stage of the process so you can make confident decisions before contacting a contractor.
Can You Reuse Existing Ducts for a New Central AC?
In most homes built after the 1970s, the ductwork is already present but may be attached to a furnace, a heat pump, or an older air handler. When you install a new central air conditioner, the outdoor condenser and indoor evaporator coil are added to the existing duct system. The key question is not whether you can reuse the ducts, but whether the ducts are compatible with the new equipment.
Existing ducts are generally reusable when they meet four conditions: correct sizing for the new system's airflow, no significant leaks, adequate insulation for the climate, and proper routing to each conditioned room. If any of these fail, duct repair or modification becomes part of the project scope. Contractors assess this using a Manual J load calculation combined with a duct inspection.
Step-by-Step Installation Process
Installing central air in a house with ducts follows a predictable sequence. Each step matters because skipping one — especially the duct assessment — leads to comfort problems, premature equipment wear, or unnecessary energy waste.
Load Calculation & Sizing
Perform a Manual J calculation to determine the correct cooling capacity in tons for your home. Sizing must account for insulation, windows, orientation, and climate zone.
Duct Inspection & Testing
Check duct size, sealing, insulation, and routing. A duct blaster test identifies leakage. Ducts that are undersized or leaky must be repaired or replaced before installation.
Equipment Selection
Choose a condenser and evaporator coil that match the calculated load. Match the air handler's airflow rating to the duct capacity. Consider high-efficiency and inverter models for long-term savings.
Removal of Old Equipment
If replacing an existing system, the old condenser, coil, and refrigerant lines are removed. Refrigerant is recovered per EPA regulations. The indoor coil is swapped or the air handler replaced.
Line Set & Electrical
New refrigerant line sets are routed between the indoor coil and outdoor condenser. Electrical connections, disconnect boxes, and condensate drainage are installed to code.
Duct Connections & Sealing
The new coil or air handler is connected to the existing plenum and ducts. All joints are sealed with mastic or foil tape. Insulation gaps are repaired to prevent condensation and energy loss.
Vacuum & Refrigerant Charge
The system is evacuated to remove moisture and air, then charged with refrigerant according to the manufacturer's specifications. Subcooling and superheat are verified.
Testing & Commissioning
Airflow is measured at each register. Static pressure is checked. The system is run through a full cooling cycle and temperature differential is verified before handoff.
Duct Inspection: What Contractors Look For
Before any equipment is ordered, a thorough duct assessment determines whether the existing network is ready for a new central air system. The inspection covers several factors that directly affect performance and efficiency.
| Inspection Area | What Is Checked | Why It Matters |
|---|---|---|
| Duct Sizing | Supply and return duct dimensions vs. required CFM | Undersized ducts restrict airflow, causing high static pressure and uneven cooling. |
| Sealing | Joint integrity, mastic condition, tape adhesion | Leaky ducts waste conditioned air and pull in unconditioned air from attics or crawlspaces. |
| Insulation | R-value, coverage, vapor barrier condition | Poor insulation causes condensation, energy loss, and reduced cooling delivery. |
| Routing | Length, bends, and proximity to unconditioned spaces | Long or convoluted runs reduce airflow and require larger equipment to compensate. |
| Cleanliness | Debris, dust buildup, mold, pest intrusion | Contaminated ducts affect indoor air quality and should be cleaned before new equipment is connected. |
| Return Path | Return grille size and location | Inadequate return air starves the system and increases energy consumption. |
If the inspection reveals issues, contractors may recommend insulated ductwork upgrades, sealing with mastic, or partial replacement of problem runs. In older homes, insulated flexible air duct sections are often replaced because the inner liner can collapse over time, reducing airflow.
Matching New Equipment to Existing Ducts
The most common installation mistake is selecting a condenser based on square footage alone, then discovering the ducts cannot handle the airflow. Central air systems are matched as a system: condenser, evaporator coil, air handler, and ductwork must all align on capacity and airflow.
Key Matching Criteria
- Nominal tonnage: A 3-ton system requires roughly 1,200 CFM of airflow. Existing ducts must be able to deliver that volume without excessive static pressure.
- Coil compatibility: The evaporator coil must match the condenser's refrigerant type (R-410A or R-32/R-454B) and physical cabinet dimensions.
- Air handler airflow: Variable-speed and multi-speed air handlers can adapt to duct limitations better than single-speed models, but they cannot overcome severely undersized ducts.
- Plenum transitions: The connection between the new coil and existing plenum must be sealed and sized to avoid turbulence and pressure loss.
If your goal is maximum efficiency, pairing a new high-efficiency condenser with an existing older coil is rarely worthwhile. The coil and condenser should be replaced together as a matched system. For homes considering ductless alternatives in hard-to-duct areas, installing a mini-split can supplement a central system without abandoning the existing ducts.
Duct Modifications You May Need
Not every existing duct system is ready for a new central air installation without modification. The following changes are common and should be budgeted as part of the project scope.
Common Duct Modifications
- Adding or enlarging return air grilles to improve airflow
- Sealing leaking joints with mastic and reinforcing mesh
- Replacing collapsed or damaged flexible duct sections
- Adding insulation to ducts running through unconditioned attics or crawlspaces
- Installing balancing dampers to improve room-by-room airflow
- Reconfiguring the plenum to fit the new coil or air handler dimensions
- Repairing or replacing duct sections with pest damage or mold growth
For homes with ducts in crawlspaces or attics, insulating ductwork in crawl spaces is often recommended because unconditioned spaces cause significant energy loss. Similarly, if the ducts are metal and uninsulated, lined ductwork or external wrap improves performance.
Installation Timeline and What to Expect
When existing ducts are in usable condition, most central air installations complete in one to three days. The schedule typically breaks down as follows:
- Day 1: Equipment removal, duct inspection, line set routing, and electrical preparation.
- Day 2: Coil or air handler installation, duct connections, sealing, and refrigerant line brazing.
- Day 3: Vacuum, refrigerant charge, airflow testing, and commissioning.
If duct modifications are extensive, add one to two days. In homes where ducts need significant repair, the contractor may recommend completing duct work before equipment installation to avoid contaminating the new coil with debris.
How to Choose the Right HVAC Contractor
The quality of installation matters as much as the equipment. A properly sized, well-sealed system installed by a qualified technician will outperform a premium system installed poorly. Look for contractors who:
- Perform a room-by-room Manual J load calculation
- Inspect and test existing ducts before quoting equipment
- Provide a written scope covering duct modifications and sealing
- Hold proper state licensing and EPA Section 608 certification
- Offer a workmanship warranty alongside the manufacturer warranty
- Pull required permits and schedule inspections
For more on evaluating installation providers, see installing central AC and installing central air with existing ductwork. If your home lacks ducts entirely, the process differs significantly — see installing air conditioning in a house without ducts.
Efficiency Considerations for Ducted Central Air
Central air efficiency is not determined by the condenser rating alone. The duct system is part of the delivered efficiency equation. A high-SEER2 condenser connected to leaky, undersized ducts may deliver performance closer to an entry-level system. Key efficiency levers include:
- Duct sealing: Sealing leaks in attics and crawlspaces can recover 10–20% of lost conditioned air.
- Insulation upgrades: Adding R-8 insulation to ducts in unconditioned spaces reduces thermal gain.
- Proper refrigerant charge: Under- or over-charging reduces capacity and efficiency.
- Airflow balance: Balancing dampers ensure each room receives the designed airflow.
- Filter maintenance: A clean filter maintains design airflow and protects the coil.
For homes pursuing top-tier efficiency, an inverter air conditioning unit paired with a properly sealed duct system delivers the best combination of comfort and energy performance. Inverter compressors modulate capacity instead of cycling on and off, which reduces temperature swings and humidity issues.
When Ducts Are Not Worth Reusing
In some situations, the existing ducts should be abandoned or replaced rather than reused. Warning signs include:
- Ducts sized for an older, smaller system that cannot handle the new airflow
- Extensive pest damage, mold growth, or collapsed flex duct
- Asbestos-containing duct wrap in older homes
- Ducts routed through spaces that cannot be properly insulated
- Return air pathways that are severely undersized or missing
In these cases, options include partial duct replacement, adding a second zone, or converting to a ductless system in problem areas. For homes where ducts are entirely absent or beyond repair, installing central air in a house without ducts covers the alternatives.
Frequently Asked Questions
Can I install central air using my existing ductwork?
Yes, in many cases existing ductwork can be reused for a new central air system. However, the ducts must be inspected for leaks, proper sizing, insulation integrity, and compatibility with the new equipment. A professional load calculation and duct assessment are essential before proceeding.
How long does central air installation take when ducts already exist?
When ductwork is already in place, a typical central air installation takes one to three days. This includes equipment removal, line set connection, electrical work, refrigerant charging, and system testing. Duct modifications or repairs can extend the timeline.
Do existing ducts need to be replaced for a new central AC?
Not always. Ducts in good condition with proper sizing and sealing can often be reused. However, undersized, leaky, or uninsulated ducts should be repaired or replaced to ensure the new system performs efficiently and delivers comfortable airflow throughout the home.
What size central air unit do I need for my home?
System sizing depends on your home's square footage, insulation, window area, climate zone, and duct capacity. A Manual J load calculation performed by a qualified contractor is the most accurate method. Never size a unit solely by square footage, as this can lead to inefficiency and comfort issues.
Final Takeaway
Installing central air in a house with existing ducts is a smart path when the ducts are properly sized, sealed, and insulated. The installation is faster and less invasive than a full system build-out, but the duct assessment is non-negotiable. Start with a Manual J load calculation, inspect and test the ducts, and match the equipment to both the home's load and the duct system's airflow capacity. Choose a contractor who treats the ducts and equipment as one system — that is the difference between a comfortable, efficient home and a system that never quite performs as expected.