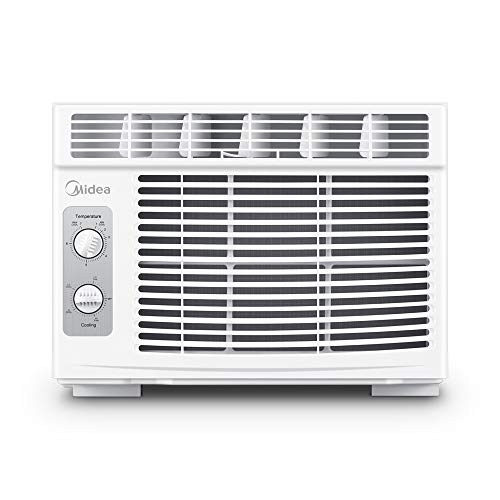
What Do You Need to Install a Window Air Conditioner?
A complete checklist of tools, hardware, support brackets, sealing materials, and electrical checks you need before installing a window air conditioner safely and securely.
START LEARNINGAC Units Guide Philosophy: Window air conditioners are among the most accessible cooling solutions, but a safe and efficient installation depends on having the right tools and materials ready. This guide walks you through everything you need so you can plan, prepare, and install with confidence.
Essential Tools Checklist
Before you begin, gather these basic tools. Most homeowners already own many of them, and the rest are easy to obtain at any hardware store.
- Tape measure: To measure the window opening and confirm the unit fits within the manufacturer's specified dimensions.
- Drill with bits: For installing support brackets, side panels, and window locks. Choose bits suited to your window frame material.
- Screwdriver set: Phillips and flathead, for assembly and securing brackets.
- Level: Ensures the unit is properly leveled, which is essential for drainage and quiet operation.
- Utility knife: For trimming foam insulation and sealing materials.
- Pencil or marker: To mark drill points and bracket positions.
- Work gloves: For handling metal brackets and sharp edges safely.
- Safety glasses: Protect your eyes during drilling and cutting.
If you are comparing installation approaches, our general wall mounted air conditioner with installation guide covers related planning tips for other mounting types.
Support and Mounting Hardware
Window air conditioners can be heavy, especially larger capacities. Proper support hardware prevents the unit from shifting, reduces vibration, and protects both the unit and the window frame.
Window AC Bracket or Support
A steel bracket that mounts outside the window to carry the unit's weight. Essential for larger units and upper-floor installations. Many brackets are adjustable to fit different window depths.
Window Lock or Security Bar
Prevents the window from being opened from outside while the unit is installed. Also helps hold the window sash firmly against the unit.
Side Accordion Panels
Usually included with the unit. These panels fill the gap between the AC and the window frame. If missing or damaged, replacement kits are available.
L-Brackets and Screws
For securing side panels and window sash. Use hardware recommended by the manufacturer where possible.
Foam Gasket or Weatherstrip
Applied between the unit and the window frame to reduce vibration and prevent air leaks.
Drain Kit (Optional)
Some units benefit from a drain kit that directs condensate away from the window and wall, reducing moisture issues.
For very heavy or large units, consider a wall mount bracket style support that transfers weight to the wall rather than the window frame. If you are exploring other AC types, our wall mounted air conditioner without outdoor unit article explains alternative solutions.
Sealing and Insulation Materials
Sealing is one of the most overlooked parts of window AC installation. Good sealing keeps hot air out, cool air in, and prevents insects, drafts, and water intrusion.
- Foam insulation strips: Fill gaps between the unit, side panels, and window frame.
- Weatherstripping: Applied to the upper window sash where it meets the unit.
- Removable sealant or caulk: For seasonal installations, removable sealant lets you seal gaps without permanent changes.
- Insulated side panels: Some kits offer insulated panels that improve efficiency and reduce condensation.
- Drip edge or deflector (optional): Helps direct condensate away from the wall and window.
Poor sealing can cause condensation inside the room or on the window frame, which may lead to mold. For related moisture issues, see our water dripping from AC vents and what a dehumidifier does for your house articles.
Electrical Requirements
Window air conditioners draw significant current, especially larger units. Before installing, confirm that your electrical setup can handle the load safely.
- Check the unit's electrical rating: Most small window units run on standard household voltage, while larger units may require a dedicated circuit. Review the nameplate or manual.
- Dedicated circuit: Larger units often require a dedicated circuit to prevent breaker trips and overheating.
- Outlet proximity: Ensure a properly grounded outlet is within reach of the unit's power cord. Do not use extension cords for permanent installations.
- GFCI protection: Outlets near water or outdoors should be GFCI-protected. This is especially important for window units on lower floors.
- Breaker capacity: Confirm that the circuit breaker can handle the unit's amperage. If unsure, consult a licensed electrician.
Window and Room Checks
The window itself must be suitable for the unit. Before installation, verify the following:
- Window type: Double-hung windows are the most common choice for window ACs. Casement and slider windows may require special brackets or adapters.
- Window width and height: Match the opening to the unit's required dimensions. The unit should fit securely without excessive gaps.
- Window frame condition: The frame should be solid and free of rot or damage. Weak frames may not support the unit safely.
- Clearance outside: Ensure there is space for airflow and for the bracket if used. Avoid blocking windows or walkways.
- Room size and cooling capacity: Choose a unit sized for the room. Oversized or undersized units reduce comfort and efficiency. Our how to size an air conditioner guide can help.
- Security: Consider how the window will be secured when the unit is installed. Use a window lock or bracket to prevent unauthorized opening.
If your window is not suitable or you prefer a different approach, our wall mounted air conditioner for small room article covers alternatives that may be easier to install in some spaces.
Step-by-Step Installation Overview
Once your tools and materials are ready, the process generally follows these steps. Always refer to the manufacturer's manual for model-specific instructions.
- Read the manual: Understand the specific requirements for your unit, including bracket recommendations and clearance.
- Assemble the bracket (if used): Follow the bracket instructions to attach it to the window frame or exterior wall.
- Prepare the window: Clean the frame, check for damage, and remove the screen if necessary.
- Install side panels: Attach the accordion panels to the unit as instructed, then slide the unit into the window.
- Level the unit: Use a level to ensure proper drainage and quiet operation. Slight outward tilt is often recommended.
- Secure the unit: Fasten the unit to the bracket and window frame with the provided screws or brackets.
- Seal gaps: Apply foam insulation, weatherstripping, and sealant around the unit and side panels.
- Lock the window: Install a window lock or security bar so the window cannot be opened from outside.
- Test the unit: Plug in and turn on. Check cooling, fan speeds, and drainage after a short period of operation.
If you are comparing window units with other types, our wall mounted air conditioner and heating units article covers year-round options. For ductless alternatives, see wall mounted mini split.
Installation Complexity by Unit Tier
What you need depends partly on the size and class of the unit. The table below summarizes typical requirements by tier:
| Tier | Category | Best For | Typical Installation Requirements |
|---|---|---|---|
| Entry-Level | Small capacity window unit | Bedrooms, home offices, small rooms | Basic tools, standard outlet, side panels, foam insulation. Often manageable by one person. |
| Mid-Range | Medium capacity window unit | Living rooms, larger bedrooms | Additional support bracket recommended, dedicated outlet, stronger sealing kit. Two-person lift may be safer. |
| Premium | Large capacity or inverter window unit | Large rooms, year-round use | Heavy-duty bracket, dedicated circuit may be required, careful leveling, thorough sealing for efficiency. |
| Flagship | Smart or high-efficiency window unit | Smart homes, energy-conscious households | All of the above plus network setup, careful placement for Wi-Fi signal, and professional install may be advisable. |
For very large units or difficult installations, professional service may be the better choice. Our wall unit air conditioner installation article explains what to expect in professional installations.
Safety Tips
- Lift with help: Larger units are heavy and awkward. Use two people or a lifting aid.
- Secure the unit: Never rely on the window frame alone to hold the unit. Always use a bracket and secure the window.
- Check for damage: Inspect the power cord and plug. If damaged, do not use the unit.
- Keep water away from electrical components: Ensure proper drainage and avoid pooling near outlets.
- Do not block airflow: Keep the outdoor side clear of obstruction for safe and efficient operation.
- Use GFCI outlets: Especially important for units near water or on lower floors.
If you notice issues after installation, such as wall unit air conditioner not blowing cold air, check the unit's manual and consider professional service. For general troubleshooting, see our troubleshooting air conditioning guide.
Frequently Asked Questions
What tools do I need to install a window air conditioner?
Basic tools include a tape measure, drill with bits, screwdriver set, level, utility knife, and weather sealant. Some installations also require a window bracket, foam insulation, and a support bracket for heavier units.
Do I need a bracket to install a window AC?
A bracket or support is strongly recommended for most window units, especially larger or heavier models. It secures the unit, reduces vibration, and relieves stress on the window frame.
How do I seal a window around a window AC unit?
Use the manufacturer's accordion side panels plus foam insulation strips, weatherstripping, or removable sealant to close gaps. Proper sealing keeps insects out and prevents cooled air from escaping.
Can I install a window air conditioner by myself?
Many small and medium window units are manageable for one person, but larger units may require two people for safe lifting and placement. Follow the manufacturer's instructions and use proper support hardware.
What window type is best for a window AC?
Double-hung windows are the most compatible with standard window units. Casement and slider windows may require special brackets or adapters. Verify compatibility before purchase.
Do I need a dedicated outlet for a window AC?
Smaller units may run on a standard outlet, but larger units often require a dedicated circuit. Check the unit's electrical rating and consult a licensed electrician if unsure.
Ready to Prepare Your Window AC Installation?
Now that you know what tools, hardware, and checks are needed, explore our recommended window AC units and installation accessories below.
VIEW RECOMMENDED OPTIONS