DIY HVAC Duct Cleaning: A Complete Homeowner's Guide
Learn how to clean your home's air ducts safely, improve airflow, and reduce dust using proven do-it-yourself methods and the right tools.
START THE GUIDEWhy Duct Cleaning Matters: Your HVAC ductwork distributes conditioned air to every room in your home. Over time, dust, pet dander, pollen, and debris accumulate inside the ducts, reducing airflow and circulating allergens. Regular cleaning helps your system run more efficiently and keeps indoor air healthier for your family.
What Is HVAC Duct Cleaning?
HVAC duct cleaning is the process of removing dust, debris, and contaminants from the supply and return ductwork connected to your heating, ventilation, and air conditioning system. Unlike a simple vent wipe-down, proper duct cleaning addresses the interior surfaces of the duct system where buildup occurs.
Understanding how your system works is the first step. Learn more about the components of HVAC heat pumps and how airflow moves through your home to appreciate why clean ducts matter for both comfort and efficiency.
Signs Your Ducts Need Cleaning
Not every home needs immediate duct cleaning, but certain warning signs suggest it is time to act:
- Visible dust or debris blowing out of supply vents when the system runs
- Persistent dust buildup on furniture and surfaces shortly after cleaning
- Musty or stale odors coming from vents
- Uneven airflow between rooms
- Recent home renovation or remodeling that generated heavy dust
- Pets that shed heavily or occupants with allergies
If you notice these signs alongside an air conditioner running but not cooling, duct blockage could be a contributing factor worth investigating.
Tools and Materials You Need
Before starting, gather the following items. Using the right tools makes the job safer and more effective.
| Tool / Material | Purpose | Notes |
|---|---|---|
| Shop vacuum with HEPA filter | Captures fine dust and debris | Essential for indoor air safety |
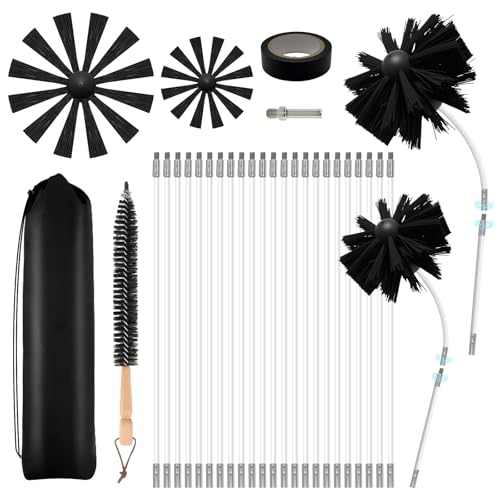
| Flexible duct brush | Loosens dust from duct walls | Choose a length that reaches accessible sections |
| Screwdriver or nut driver | Removes vent covers and register grilles | Match the bit to your vent screws |
| Drop cloth or plastic sheeting | Protects floors and furniture | Place under each vent before cleaning |
| Dust mask (N95 or better) | Protects lungs from airborne particles | Always wear during cleaning |
| Safety glasses and gloves | Protects eyes and hands | Recommended for all DIY duct work |
| Flashlight or headlamp | Inspects duct interiors | Helps spot heavy buildup |
For related maintenance tasks, you may also find it useful to review guides on evaporator coils and furnace cleaners to keep your entire system in good condition.
Step-by-Step DIY Duct Cleaning Process
Step 1: Turn Off the HVAC System
Safety comes first. Turn off your HVAC system at the thermostat and, if possible, at the breaker panel. This prevents the blower from circulating dust while you work and protects the system from accidental damage.
Step 2: Prepare the Work Area
Lay drop cloths or plastic sheeting beneath each vent you plan to clean. Remove furniture or cover it to protect against dust. Seal off the work area from other rooms if possible to contain airborne particles.
Step 3: Remove Vent Covers and Register Grilles
Using a screwdriver, carefully remove the vent covers and register grilles from the walls, floors, or ceilings. Set the screws aside in a small container so they do not get lost. Wash the covers in warm soapy water and set them aside to dry.
Step 4: Inspect the Duct Interior
Shine a flashlight into each duct opening. Look for heavy dust accumulation, debris, pest droppings, or signs of mold. If you see significant contamination, mold growth, or pest activity, stop and consult a professional. DIY cleaning is best suited for routine surface dust.
Step 5: Vacuum the Duct Openings
Attach a brush or crevice tool to your shop vacuum and work it into the duct opening. Use gentle back-and-forth motions to loosen and capture dust near the opening. Work methodically around the entire perimeter of the opening.
Step 6: Brush and Vacuum Deeper Sections
For accessible duct runs, insert a flexible duct brush into the opening and gently work it along the interior walls. Follow up with the vacuum to capture loosened debris. Avoid forcing the brush too far if you encounter resistance, which could indicate a damper or a sharp turn.
Step 7: Clean the Vent Covers
Once the vent covers are dry, reinstall them. If they are damaged or bent, consider replacing them with new covers for a better seal and improved airflow.
Step 8: Replace the HVAC Filter
While your system is off, replace the air filter with a fresh one. A clean filter is essential for maintaining indoor air quality and protecting your equipment. This simple step pairs well with general energy efficiency improvements for your air conditioner.
Step 9: Restore Power and Test the System
Turn the HVAC system back on at the breaker and thermostat. Let the system run for a few minutes and check that airflow from each vent is strong and even. If airflow remains weak, there may be a deeper blockage requiring professional attention.
When to Call a Professional
DIY duct cleaning is effective for routine dust removal, but some situations require professional expertise:
- Visible mold growth inside ductwork or on the HVAC components
- Suspected asbestos-containing materials in older ducts or insulation
- Pest infestations or animal nesting inside ducts
- Extensive contamination that reaches beyond accessible sections
- Persistent airflow problems after basic cleaning
- Duct systems located in sealed crawl spaces or hard-to-reach attics
If your system shows signs of refrigerant issues alongside airflow problems, review fixing a Freon leak in a central air conditioner and Freon stop leak guidance to understand related system health concerns.
Benefits of Regular Duct Cleaning
Maintaining clean ductwork offers several practical advantages:
- Improved indoor air quality: Fewer dust particles and allergens circulate through your home
- Better system efficiency: Unrestricted airflow helps your HVAC system operate as designed
- Extended equipment life: Cleaner ducts reduce strain on the blower motor and other components
- Reduced dusting: Less dust settles on furniture and surfaces
- Fewer odors: Removing debris eliminates musty smells
For homeowners focused on efficiency, pairing duct cleaning with energy-saving air conditioner practices and ways to reduce AC electricity bills creates a comprehensive maintenance strategy.
How Often Should You Clean Your Ducts?
There is no single schedule that fits every home. Consider these general guidelines:
| Home Situation | Suggested Frequency | Best For |
|---|---|---|
| Average home with no pets or smokers | Every 2 to 3 years | Routine maintenance |
| Home with pets or allergy sufferers | Annually | Higher dust and dander load |
| Recent renovation or remodeling | After project completion | Construction dust removal |
| Newly purchased older home | Within the first year | Unknown maintenance history |
Combining duct cleaning with seasonal HVAC checkups and regular filter replacement keeps your whole system in good shape. If you are also considering upgrades, explore options such as ENERGY STAR air conditioner units and high-efficiency HVAC systems.
Frequently Asked Questions
How often should I clean my HVAC ducts?
Most homes benefit from a thorough duct cleaning every two to three years. Homes with pets, smokers, or recent renovations may need cleaning more frequently, while homes with minimal dust may go longer between cleanings.
Can I clean my HVAC ducts myself?
Yes, light to moderate dust buildup in accessible duct sections can be handled with DIY methods using a shop vacuum, brush attachments, and proper protective gear. However, extensive contamination, mold growth, or inaccessible ductwork should be handled by a professional.
What tools do I need for DIY duct cleaning?
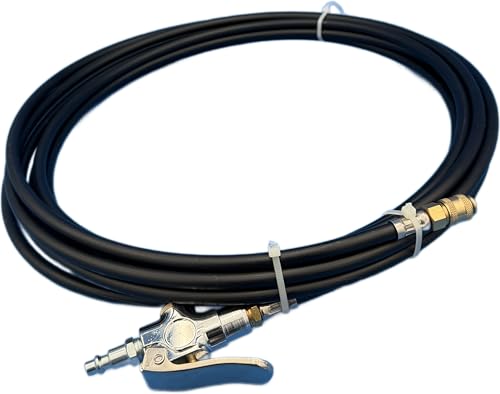
You will need a shop vacuum with a HEPA filter, a long flexible brush, a screwdriver to remove vent covers, a drop cloth, a dust mask, safety glasses, and gloves. Optional tools include a duct brush kit and an air compressor for light debris.
Is DIY duct cleaning safe?
DIY duct cleaning is safe for routine surface dust when you wear protective gear and avoid disturbing materials like asbestos or mold. Never enter crawl spaces with poor ventilation or handle ductwork containing suspected hazardous materials without professional guidance.
Will duct cleaning improve my AC performance?
Clean ducts support better airflow, which helps your AC system operate more efficiently. If your system still struggles after cleaning, review resources like home AC fan working but no cold air and consider contacting a technician.
Final Thoughts
DIY HVAC duct cleaning is a practical maintenance task that most homeowners can perform with the right tools and precautions. By following the steps in this guide, you can reduce dust, improve airflow, and support your system's efficiency. For situations beyond routine dust, trust a qualified professional to ensure the job is done safely.
Before you begin, review related guides on ductless heat air conditioners, heating and ductwork, and heating, ventilating, and air conditioning systems to build a complete understanding of your home's comfort infrastructure.