How to Wire an AC Thermostat
Wiring a thermostat is manageable when you understand the terminal letters, the wire colors, and the safety steps. This guide walks through the process, explains common configurations, and highlights where professional help is the safer choice.
Quick answer: Turn off power at the breaker and air handler, photograph and label the existing wires, then match each wire to the new thermostat's terminals using the manufacturer's diagram. Common terminals are R (power), C (common), W (heat), Y (cooling), G (fan), and O/B (heat pump reversing valve). If you lack a C wire or have a heat pump, confirm compatibility before starting.
Safety First: Before You Touch Any Wires
Thermostat wiring carries low voltage, but the air handler and outdoor unit carry line voltage. Before opening the thermostat or the air handler panel, turn off power at the breaker that serves the HVAC system and at the service switch near the air handler. Verify power is off with a non-contact voltage tester if you are unsure.
Photograph the existing wiring before disconnecting anything. Label each wire with a small piece of tape and the terminal letter it was connected to. This record is your reference if the new thermostat's labeling differs. If you are not comfortable working with electrical components, stop and call a qualified technician. For related service context, see HVAC technician and HVAC contractor.
Warning: Never work on thermostat wiring with power on. Shorting low-voltage wires can blow the system fuse or damage the control board. If you smell burning or see damaged wires, stop and call a professional.
Thermostat Terminal Letters and Wire Colors
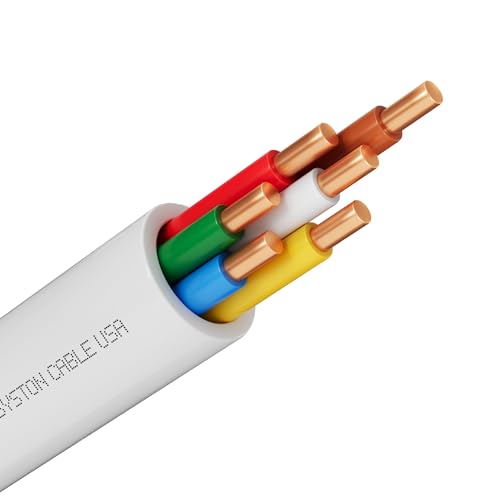
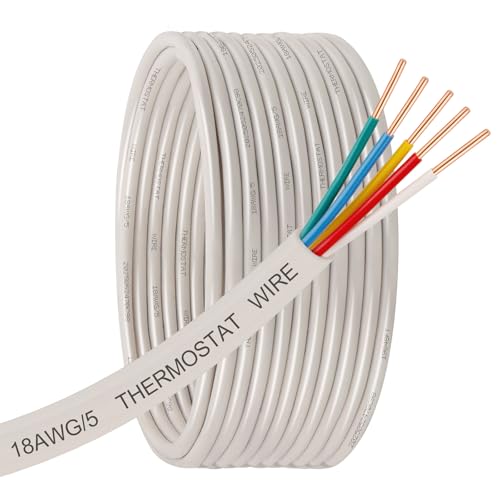
Thermostat terminals follow a loose industry convention, but colors are not universal. Always trust the terminal labels and your photographed reference over wire color alone. The table below shows the most common terminals and typical wire colors.
| Terminal | Function | Typical Wire Color |
|---|---|---|
| R / Rc / Rh | 24V power (Rc cooling, Rh heating) | Red |
| C | Common wire for continuous power | Blue or black |
| W / W1 / W2 | Heat (W2 for second-stage heat) | White |
| Y / Y1 / Y2 | Cooling / compressor (Y2 for second stage) | Yellow |
| G | Indoor blower fan | Green |
| O / B | Reversing valve (heat pump) | Orange (O) or dark blue (B) |
| AUX / E | Auxiliary or emergency heat (heat pump) | Varies |
R, Rc, and Rh
The R terminal provides 24V power to the thermostat. Some thermostats have separate Rc (cooling) and Rh (heating) terminals; if your system uses a single transformer, a jumper may connect them, but many modern thermostats handle this internally. Follow the new thermostat's instructions for jumper placement.
The C Wire
The C wire provides a continuous return path to the transformer, which is required for many smart thermostats. If your existing wiring lacks a C wire, options include running a new wire bundle, using an add-a-wire adapter, or installing a power adapter at the air handler. For a detailed look, see smart thermostat without C wire.
Heat Pump Terminals
Heat pumps use an O or B terminal to control the reversing valve. The correct terminal depends on your equipment and manufacturer. Setting this incorrectly can cause the system to heat when it should cool, or vice versa. If you have a heat pump, confirm the O/B setting before wiring. For related guidance, see HVAC heat pumps and thermostat that automatically switches from AC to heat.
Step-by-Step Wiring Process
The process below covers a typical replacement of an existing thermostat. New installations or systems with unusual wiring may require additional steps.
- Turn off power. Switch off the breaker for the HVAC system and the service switch at the air handler.
- Remove the old thermostat. Pop off the cover, unscrew the base, and gently pull the wires free. Do not let the wires fall back into the wall.
- Photograph and label. Take a clear photo and label each wire with its terminal letter.
- Check the new thermostat's labels. Compare the new thermostat's terminal labels to your existing wiring. Note any differences, such as separate Rc and Rh terminals.
- Mount the new base. Level the base plate and screw it into the wall or the existing wall anchor holes.
- Connect the wires. Match each labeled wire to the corresponding terminal on the new thermostat. Tighten each screw firmly but do not overtighten.
- Install the thermostat body. Snap or screw the thermostat onto the base according to the manufacturer's instructions.
- Restore power and test. Turn the breaker back on and test HEAT, COOL, FAN, and AUTO modes. Confirm the system responds correctly in each mode.
Handling Extra Wires
If your existing wiring has more wires than the new thermostat supports, cap unused wires with wire nuts and tuck them safely into the wall. Do not leave bare wire ends exposed. If the new thermostat requires terminals your existing wiring does not provide, check whether the thermostat supports a jumper or configuration for your system.
Configuring the Thermostat After Wiring
After wiring, the thermostat usually needs configuration for your system type. This includes selecting conventional versus heat pump, setting the number of stages, choosing the reversing valve behavior, and setting the fan control. Follow the manufacturer's setup menu carefully; incorrect configuration can cause the system to run inefficiently or not at all.
For heat pump systems, confirm the O/B setting and the auxiliary heat configuration. For conventional systems, confirm the number of heating and cooling stages. If your system has a dual-fuel setup, configure the thermostat to switch between the heat pump and the furnace as intended. For related context, see central air with furnace and HVAC system.
Common Wiring Problems and Fixes
If the thermostat does not work after wiring, check these common issues before calling a professional:
- Blank display: Confirm power is on and the C wire (if required) is connected. Check the system fuse at the air handler.
- System does not respond in one mode: Recheck the wiring at the thermostat and at the air handler control board.
- Fan runs but no heating or cooling: Confirm the W or Y wire is connected and the thermostat is configured for the correct system type.
- Heat pump heats when set to cool: The O/B reversing valve setting is likely reversed. Check the thermostat configuration and the equipment manual.
- Thermostat restarts or flickers: The C wire may be loose or missing; verify connections and power.
If these steps do not resolve the issue, a qualified technician can diagnose wiring and control board faults. For related troubleshooting, see common AC problems and my AC is running but not cooling.
When to Call a Professional
Call a licensed HVAC technician if any of the following apply:
- You need to run new wires through walls or to a different location.
- Your system is a heat pump or dual-fuel setup and you are unsure about O/B or auxiliary heat wiring.
- The existing wiring is damaged, brittle, or has exposed conductors.
- The new thermostat requires a C wire that is not present and you cannot install an adapter.
- The system does not operate correctly after wiring and configuration.
A professional can confirm compatibility, run new wiring safely, and configure the thermostat for your equipment. For related service context, see HVAC professional and HVAC service.
Frequently Asked Questions
What do the thermostat terminal letters mean?
Common letters include R (power), C (common), W (heat), Y (cooling/compressor), G (fan), O/B (reversing valve for heat pumps), and AUX/E (auxiliary/emergency heat). Always match the new thermostat's labels to the existing wiring.
Do I need a C wire to wire an AC thermostat?
Many smart thermostats require a C wire for continuous power. If your existing wiring lacks a C wire, you may need to run a new wire, use an add-a-wire adapter, or install a power adapter at the air handler.
Can I wire a thermostat myself?
Replacing an existing thermostat with a compatible model is often a straightforward DIY task if power is turned off and the wiring is labeled correctly. New wiring runs, heat pump configurations, or unfamiliar systems are best handled by a qualified HVAC technician.
What happens if I wire the thermostat incorrectly?
Incorrect wiring can prevent the system from operating, cause blowing fuses, or damage the thermostat or HVAC control board. Always turn off power at the breaker and air handler before wiring, and verify each wire against the manufacturer's diagram.
Do wire colors always match the terminal letters?
No. Wire colors are a convention, not a rule. Always trust the terminal labels on the old thermostat and the manufacturer's diagram for the new thermostat. Photographing and labeling the existing wiring prevents mistakes.
Ready to compare thermostats and wiring accessories? Browse our recommended products below.
View Recommended ProductsRelated Guides
Auto-changeover thermostat Smart thermostat without C wire HVAC heat pumps Central air with furnace HVAC buying guide Common AC problems HVAC sensors HVAC maintenance guide