Installing a Mini Split AC System: A Homeowner's Guide
Understand what professional mini split installation involves—from the site survey and line set routing to electrical requirements and final testing—so you can plan with confidence.
Explore the Installation ProcessWhy This Guide Matters: A ductless mini split AC system is one of the most flexible cooling solutions for homes without ductwork or for targeted room comfort. Installation quality directly affects efficiency, longevity, and warranty coverage. This guide explains each stage of the process so you know what to expect and what questions to ask before work begins.
What Installing a Mini Split AC System Involves
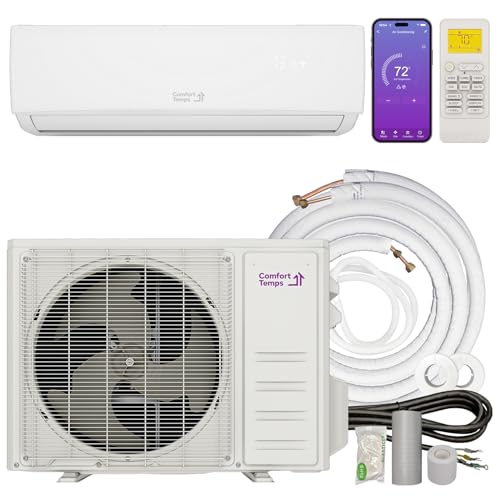
A mini split system consists of an outdoor condenser unit connected to one or more indoor air handlers via a refrigerant line set. Installation is a multi-step process that combines mechanical work, electrical connections, and refrigerant handling. While the general steps are consistent, the specific scope depends on whether you are installing a single-zone system or a multi-zone configuration.
Homeowners new to ductless technology often begin with the ductless mini-split overview, which explains how these systems differ from central air and window units. If your home lacks existing ductwork, the ductless air conditioning for older homes guide covers retrofit considerations.
Step 1: Site Survey & Sizing
Determine the cooling load for each zone, choose indoor unit locations, and identify a suitable spot for the outdoor unit with proper clearance and drainage.
Step 2: Mounting & Line Set Routing
Mount the indoor unit securely, drill the wall penetration, and route the refrigerant line set, condensate drain, and communication cable to the outdoor unit.
Step 3: Electrical Connections
Install or verify the dedicated circuit, connect power to both units, and confirm that all wiring meets local electrical code requirements.
Step 4: Vacuum & Charge
Evacuate the line set with a vacuum pump to remove moisture and non-condensable gases, then release refrigerant per manufacturer specifications.
Step 5: Testing & Commissioning
Run the system through cooling and heating modes, check for leaks, verify airflow, and confirm that the system reaches target temperatures.
Step 6: Handover & Documentation
Review operation with the homeowner, register the warranty, and provide maintenance guidance for filters and coils.
For a focused look at the installation labor itself, the guide on installing a mini split walks through the practical steps in more detail.
Pre-Installation Checklist
Careful preparation before installation day reduces surprises and helps the job proceed smoothly. The following checklist covers the essentials that homeowners and installers should review together.
- Confirm the Cooling Load: Use a room-by-room load calculation or a reputable sizing guide to select the correct capacity for each zone. Undersized or oversized systems can compromise comfort and efficiency.
- Choose Indoor Unit Locations: Mount indoor heads high on a wall with clear airflow, away from direct sunlight and heat sources, and with a short, accessible route for the line set.
- Select the Outdoor Unit Spot: Choose a level, well-drained surface with adequate clearance for airflow and service access. A wall bracket or ground pad may be needed; the mini split stand guide explains mounting options.
- Verify Electrical Capacity: Confirm that your electrical panel can support a dedicated circuit for the system. Review the electrical outlet and plug standards guide for context.
- Check Permit Requirements: Many jurisdictions require permits for refrigerant work or electrical changes. Your installer should confirm what is needed before work begins.
- Plan Line Set Routing: Minimize bends and avoid long runs that exceed manufacturer limits. The ductwork design guide offers useful context on airflow planning.
Mini Split System Tiers and Installation Scope
Installation scope varies with the system tier you choose. We use universal market descriptors—essential tier, balanced tier, and top-tier—to describe the relative positioning of systems without relying on volatile figures.
| System Tier | Typical Configuration | Best For | Installation Considerations |
|---|---|---|---|
| Essential Tier | Single-zone mini split | One room, add-on cooling, small living spaces | Shortest line set, one wall penetration, straightforward electrical |
| Balanced Tier | Dual-zone or tri-zone mini split | Several rooms, open-plan living areas | Multiple indoor heads, longer line set runs, dedicated circuit |
| Top-Tier | Multi-zone (four to five zones) or high-efficiency system | Whole-home ductless cooling, older homes without ducts | Extensive line set routing, larger outdoor unit, careful load balancing |
For larger homes, the five-zone mini split overview explains how multi-zone systems distribute cooling across the home. If you are comparing central air with ductless options, the ductless mini split installation overview provides useful context.
Electrical Requirements for Mini Split Installation
Mini split systems require a dedicated electrical circuit. Single-zone systems often use a 110V circuit, while larger multi-zone systems typically require 220V. A licensed electrician should verify panel capacity and install the circuit to code.
Some systems offer plug-in convenience, while others are hardwired. The choice affects installation scope and should be confirmed during the site survey. For broader context on home electrical planning, review the electrical outlet and plug standards guide.
If your home uses a programmable thermostat for other equipment, the electronic home thermostat overview explains how modern controls integrate with HVAC systems, including mini splits that support smart thermostats.
DIY vs. Professional Installation
Some homeowners consider DIY mini split installation to reduce project scope, but refrigerant handling, vacuuming the line set, and electrical connections are tasks that require specialized tools and knowledge. Many manufacturers require professional installation to keep the warranty valid, and refrigerant work is regulated in many regions.
A professional installation typically includes a proper load calculation, code-compliant electrical work, a pressure test and vacuum, and commissioning. The HVAC contracting overview explains how to evaluate contractors, while the HVAC quotes guide helps you compare proposals.
If you want to understand what happens right after installation, the first week after AC installation guide covers what to monitor and what to expect from your new system.
Mini Split Heat Pumps and Year-Round Comfort
Many mini split systems are heat pumps, meaning they provide both cooling and heating. This makes them a versatile choice for homeowners who want a single system for year-round comfort. The mini split heating and air conditioning overview explains how these systems work in both modes.
If efficiency is a priority, the ENERGY STAR mini split heat pump guide explains how certified systems deliver strong performance. Homeowners comparing heat pumps with traditional AC can review heat pump vs air conditioner for a side-by-side comparison.
Ready to Explore Mini Split System Options?
Review recommended single-zone and multi-zone mini split systems across essential, balanced, and top tiers. Compare features, efficiency, and suitability before making your decision.
View Recommended Systems