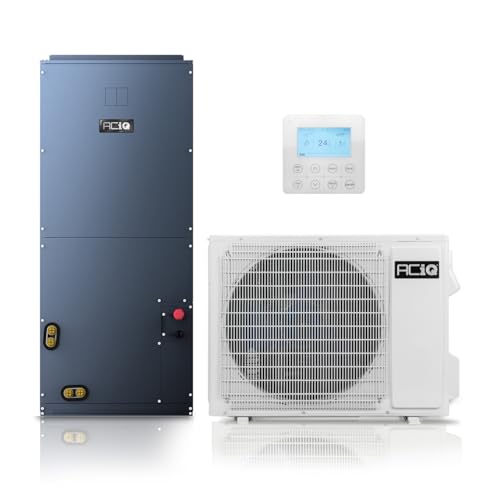
Central Air Conditioning System Installation: Complete Guide
Everything you need to know about planning, installing, and commissioning a central air conditioning system — from load calculations and ductwork design to electrical requirements and final testing.
Explore the Installation ProcessWhy This Guide Matters: A central air conditioning system installation is one of the most significant home comfort investments you will make. Proper installation determines energy efficiency, indoor air quality, system longevity, and overall comfort for years to come. This guide walks you through every stage — from pre-installation planning to post-installation verification — so you can make informed decisions and work confidently with your HVAC contractor.
Pre-Installation Planning: The Foundation of a Successful Install
Before any equipment is ordered or any ductwork is modified, thorough planning is essential. The pre-installation phase determines whether your central air conditioning system will perform efficiently for the next 15 to 20 years. Proper planning addresses load calculation, equipment selection, ductwork assessment, and electrical readiness.
A professional installer begins with a Manual J load calculation — a room-by-room assessment of heat gain and loss based on square footage, window orientation, insulation levels, air infiltration, and local climate data. This calculation determines the correct system capacity. An undersized unit will struggle to maintain comfort during peak summer days, while an oversized unit will short-cycle, leading to humidity problems and accelerated wear.
- Manual J load calculation — determines the precise cooling capacity needed for your home's unique characteristics.
- Manual S equipment selection — matches the equipment to the calculated load and selects the appropriate indoor and outdoor units.
- Manual D ductwork design — ensures that airflow is properly distributed to every room without excessive static pressure.
- Electrical panel assessment — verifies that your home's electrical service can support the new equipment's amperage requirements.
- Site survey — identifies the best location for the outdoor condenser unit and the indoor air handler or furnace.
💡 Expert Tip: Ask your contractor to show you the Manual J calculation results. A reputable installer will be transparent about the load calculation and explain how it justifies the equipment selected for your central air conditioning system for home installation.
Ductwork: The Delivery Network for Cool Air
Ductwork is often the most overlooked component of a central air installation, yet it directly impacts energy efficiency and comfort. If your home already has ductwork — common in homes built after 1980 — the installer will inspect it for leaks, proper sizing, and insulation. In central air conditioning installation in older homes, new ductwork may need to be routed through closets, soffits, or attic spaces.
Duct sealing is critical. The U.S. Department of Energy estimates that typical ducted systems lose 20% to 30% of conditioned air through leaks. During installation, every joint, seam, and connection should be sealed with mastic or foil tape. Insulated ductwork is recommended for runs through unconditioned spaces such as attics or crawlspaces.
Duct Sizing
Return and supply ducts must be sized according to the system's airflow requirements, typically 400 CFM per ton of cooling capacity. Undersized ducts cause high static pressure and reduced airflow.
Duct Sealing
All joints, seams, and penetrations should be sealed with mastic or UL-listed tape. This prevents conditioned air from escaping into unconditioned spaces.
Insulation
Ducts running through unconditioned spaces must be insulated to prevent thermal loss and condensation. R-8 insulation is recommended for attics in most climates.
Air Balance
After installation, dampers should be adjusted to balance airflow across all rooms, ensuring even temperatures throughout the home.
Electrical Requirements and Safety
A central air conditioning system requires a dedicated electrical circuit. Most residential central AC units operate on 240 volts and draw between 15 and 60 amps, depending on capacity. Before installation, a licensed electrician should verify that your home's electrical panel has sufficient capacity and that the wiring, breaker, and disconnect switch meet local code requirements.
If your home's electrical panel is outdated or at capacity, an upgrade may be necessary before the central air conditioning split system can be installed. This is a critical safety consideration that should never be overlooked. The installer will also verify proper grounding and install a service disconnect within sight of the outdoor unit.
- Dedicated 240-volt circuit — sized according to the nameplate amperage of the outdoor condenser unit.
- Proper breaker sizing — typically 30 to 60 amps, following the manufacturer's specifications and local electrical codes.
- Disconnect switch — required within sight of the outdoor unit for service safety.
- Grounding and bonding — ensures electrical safety and protects sensitive electronic components.
- Low-voltage wiring — connects the thermostat to the indoor and outdoor units for control and communication.
The Central AC Installation Process: Step by Step
Once planning and site preparation are complete, the actual installation follows a structured sequence. Understanding these steps helps you communicate effectively with your contractor and set realistic expectations for the project timeline.
Site Preparation
The installation team clears the work areas, protects flooring and furnishings, and confirms the locations for the indoor air handler, outdoor condenser, and thermostat.
Indoor Unit Installation
The air handler or furnace is positioned and connected to the ductwork. In many homes, the indoor coil is mounted on top of or below the furnace in a matched system configuration.
Outdoor Condenser Placement
The condenser unit is set on a level pad with proper clearance for airflow. It is connected to the refrigerant lines, electrical service, and condensate drain.
Refrigerant Line Set
Copper refrigerant lines are routed between the indoor and outdoor units, brazed, and pressure-tested. Proper line sizing and insulation are essential for efficient operation.
Evacuation and Charging
The system is evacuated with a vacuum pump to remove moisture and non-condensable gases, then charged with refrigerant according to the manufacturer's specifications.
Thermostat and Controls
A new thermostat is installed and configured. Smart thermostats can be integrated at this stage for remote monitoring and scheduling.
System Testing and Commissioning
The installer verifies airflow, refrigerant charge, temperature differential, and electrical readings. All functions are tested in heating and cooling modes where applicable.
Final Inspection and Handover
The system is inspected by local authorities, and the homeowner receives operating instructions, warranty information, and maintenance recommendations.
Understanding Equipment Tiers for Central AC Installation
Central air conditioning systems are available in several market tiers, each offering different levels of efficiency, features, and build quality. Understanding these tiers helps you align your installation with your long-term comfort and efficiency goals.
| Tier | Best For | Key Characteristics |
|---|---|---|
| Entry-Level | Basic cooling needs, mild climates, limited-use installations | Single-stage compressor, standard efficiency ratings, essential features, reliable performance for straightforward applications |
| Mid-Range | Year-round comfort, mixed climates, energy-conscious households | Two-stage or variable-speed compressor, higher efficiency ratings, quieter operation, improved humidity control |
| Premium | Whole-home comfort, extreme climates, smart home integration | Fully variable-speed operation, top-tier efficiency, advanced filtration, smart thermostat compatibility, premium sound dampening |
| Luxury | Custom homes, luxury properties, maximum efficiency and comfort | Flagship-tier components, professional-grade controls, zoning-ready, ultra-quiet operation, premium warranty coverage |
When planning your central air conditioning system installation, consider that mid-range and premium tier systems often deliver better long-term efficiency and comfort than entry-level units, particularly in climates with significant temperature swings. The difference is most noticeable in humidity control and noise levels during operation.
Choosing the Right System Configuration
Central air conditioning systems come in several configurations, and the right choice depends on your home's existing infrastructure and your comfort priorities. A central air conditioner with furnace is a common matched system that provides both heating and cooling through shared ductwork. If you have a boiler or radiant heating system, a standalone central air conditioner may be the better fit.
For homes without ductwork, central air conditioning ductless systems offer an alternative that avoids major structural modifications. However, in homes where ductwork exists or can be economically installed, a traditional central air conditioner system remains the most efficient way to cool an entire home.
If you are replacing an existing system, consider whether the new unit should match the capacity of the old one or whether a new load calculation indicates a different capacity is appropriate. Older homes may have ductwork sized for a different system, and a central air conditioner replacement is an ideal time to verify duct sizing and insulation.
Working with HVAC Contractors
Selecting the right contractor is as important as selecting the right equipment. Look for licensed, insured professionals with experience installing the specific brand and model you have chosen. Ask for references from recent installations in homes similar to yours, and confirm that the contractor will pull all necessary permits and arrange for final inspection.
A detailed written proposal should include the equipment model numbers, ductwork modifications, electrical work, refrigerant line specifications, and any additional materials. Avoid contractors who provide vague estimates or pressure you to make an immediate decision. For larger projects involving duct modifications, consider obtaining a central air conditioning split system proposal that includes a room-by-room airflow plan.
⚠️ Important: Never attempt a central air conditioning system installation yourself unless you are a licensed HVAC professional. Refrigerant handling requires EPA certification, and improper installation can void warranties, create safety hazards, and lead to costly central air conditioning repair down the line.
Post-Installation Maintenance for Long-Term Performance
Proper maintenance after installation protects your investment and ensures the system operates at peak efficiency. A central air conditioning system maintenance plan should include regular filter replacement, annual professional inspections, coil cleaning, and refrigerant level checks.
During the first year after installation, monitor the system's performance closely. If you notice uneven cooling, unusual noises, or increased energy consumption, contact your installer promptly — these issues are often covered under the installation warranty and are easier to resolve early. Many contractors offer a first-year maintenance visit as part of the installation package, which includes verifying that the system is still operating according to the commissioning specifications.
- Replace or clean air filters every 1–3 months depending on filter type and household conditions.
- Schedule professional maintenance annually before the cooling season begins.
- Keep the outdoor unit clear of debris, vegetation, and obstructions within at least 2 feet on all sides.
- Check condensate drain lines for clogs and algae growth, especially in humid climates.
- Monitor energy usage trends — a sudden increase may indicate a developing issue that warrants professional attention.
Frequently Asked Questions
How long does a central air conditioning system installation take?
A typical central air conditioning system installation takes one to three days, depending on the complexity of the ductwork, electrical upgrades, and whether the home already has existing infrastructure. Installations in older homes or those requiring new ductwork may take longer.
Do I need a permit to install a central air conditioning system?
Yes, most municipalities require a permit for central air conditioning installation. Permits ensure the work meets local building codes and safety standards, and they are typically obtained by the licensed HVAC contractor. The final inspection protects both the homeowner and the contractor.
Can central air conditioning be installed in an older home without ductwork?
Yes, but it requires additional planning. Options include installing new ductwork, using a ductless mini-split system, or utilizing existing spaces like attics and crawlspaces for duct routing. A professional assessment is essential to determine the most practical approach for your home's layout and construction.
What electrical requirements does a central AC system need?
Most central air conditioning systems require a dedicated 240-volt circuit with a properly sized breaker, typically 30 to 60 amps depending on the unit's capacity. A licensed electrician should verify your panel's capacity before installation to ensure safety and code compliance.
How do I choose the right size central air conditioner for my home?
Sizing should be based on a Manual J load calculation that considers square footage, insulation, window area, climate, and occupancy. An oversized or undersized unit will reduce efficiency and comfort. This calculation should always be performed by a qualified HVAC professional as part of the central air conditioning system for home planning process.
Ready to Explore Central Air Conditioning Options?
Browse our curated selection of central air conditioning systems and accessories to find the right match for your home and installation project.
View Recommended Central AC Systems