Installing an Air Conditioner in a Wall
A practical, step-by-step guide to through-the-wall AC installation — from choosing the right unit and sleeve to framing, electrical work, and the final seal that keeps your room cool and dry.
START THE GUIDEWhy Install an AC in a Wall Instead of a Window?
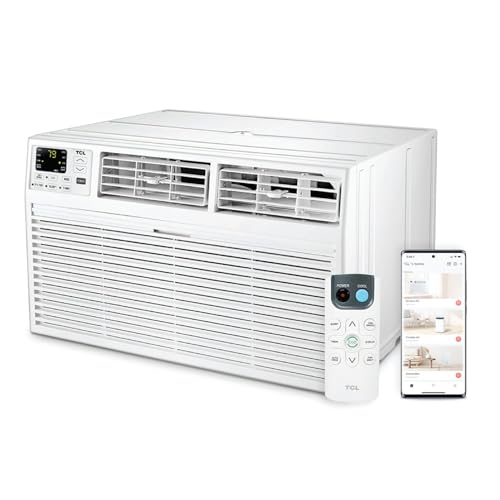
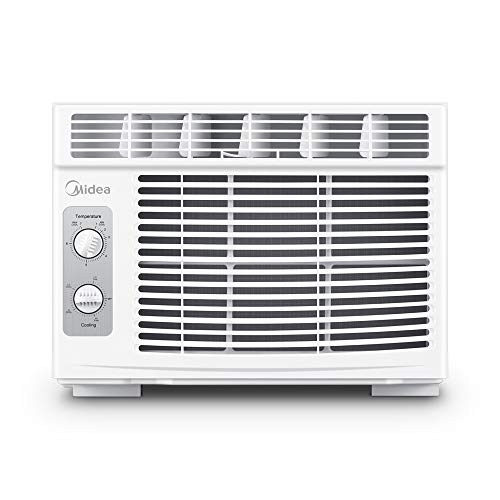
A through-the-wall air conditioner sits in a permanent opening cut into an exterior wall. Unlike a window unit, it does not block natural light or a window opening, and it does not rely on a sash to hold the unit in place. This makes it a strong option for rooms where windows are small, frequently used, or where a cleaner built-in appearance is preferred. If you are still deciding between approaches, our guide to installing a window air conditioner in a wall explains how the two methods differ.
Wall installation also improves security and reduces vibration noise, because the unit is anchored into the structure rather than balanced on a sill. The trade-off is that the job requires cutting and framing an opening, which is a more involved project than a window drop-in. Homeowners planning a permanent solution often compare this route with a ductless setup; see installing a mini-split if you want to understand the alternative that avoids a large wall opening.
Two main approaches
- Existing sleeve replacement: if the home already has a wall sleeve from a previous unit, the job is mostly measuring, sliding, and sealing. This is the simplest path and the one most DIYers can manage.
- New wall opening: cutting a new hole, adding framing, and running a dedicated circuit. This is structural work and should be planned with a licensed HVAC technician and electrician.
Types of Wall Air Conditioners
Wall-mounted cooling covers several product categories. The descriptor tiers below are relative positions within the category and do not represent any specific monetary figure.
| Type | Tier Descriptor | Best For |
|---|---|---|
| Standard through-the-wall unit (115V) | essential tier | Bedrooms and small offices with an existing sleeve |
| Through-the-wall with heat pump (230V) | mid-tier | Year-round comfort in one unit |
| Inverter through-the-wall unit | high-end tier | Quieter operation and steadier efficiency |
| Packaged terminal unit for commercial spaces | commercial-grade | Hotels, offices, and multi-room buildings |
If quiet operation and efficiency are priorities, an inverter wall unit is worth a closer look — our overview of the inverter through-the-wall air conditioner covers how variable-speed compressors behave in a permanent installation. Owners replacing an older unit in an existing opening may also want to review installing a through-the-wall air conditioner for the replacement-specific workflow.
Before You Start: Planning and Permits
Planning prevents most installation failures. Confirm three things before any cutting begins: the wall construction, the electrical capacity, and the local code requirements.
1. Understand the wall you are cutting
Exterior walls are typically framed with studs spaced at regular intervals, with sheathing, insulation, and siding outside. A wall sleeve must sit in a properly framed opening that transfers load around the cut. If you have never framed an opening, treat this as professional work. The framing step is also the point where insulation choices matter; the same principles used for insulated ductwork apply to sealing the sleeve cavity so outside air does not leak into the room.
2. Check electrical capacity
Wall units draw significant current. Smaller 115V models usually need a dedicated 15-amp or 20-amp circuit; larger 230V models typically need a dedicated 20-amp to 30-amp circuit. A dedicated circuit means the AC is not shared with other outlets. If your electrical panel is near capacity, a panel upgrade may be needed, which is outside DIY scope. Budget the electrical work as a separate task and hire a licensed electrician.
3. Confirm permits and building rules
Many jurisdictions require a permit for cutting a new exterior wall opening, and apartment or HOA rules may restrict modifications to the facade. Check before ordering the unit. Landlords and property managers should approve the plan in writing.
4. Choose the sleeve and unit together
The sleeve and the air conditioner must match. Manufacturers publish sleeve dimensions and the compatible model list. Buy the sleeve and unit as a matched pair when possible, and keep the manual for future replacements. Sleeve-based installs are also easier to service, which is why they are the standard for permanent wall installations.
Tools and Materials Checklist
Tools
- Stud finder and level
- Measuring tape and pencil
- Drill with bits, plus a hole saw if needed
- Reciprocating saw or oscillating tool for the opening
- Framing square and utility knife
- Caulking gun and expanding foam applicator
- Voltage tester and screwdrivers
- Safety glasses, gloves, and dust mask
Materials
- Wall sleeve matched to the unit
- Framing lumber for the opening
- Weather-resistant caulk and expanding foam
- Flashing or drip rail for the exterior
- Insulation for the sleeve cavity
- Dedicated circuit wiring and breaker (electrician)
- Exterior trim and touch-up siding
Step-by-Step Wall Installation
The steps below assume a new opening. If you already have a sleeve, skip to the mounting and sealing steps. Electrical work should be completed and inspected before the unit is powered on.
- Choose the wall location. Pick an exterior wall with clear access outside and no obstructions such as utility lines, downspouts, or a neighbor's window. The location should let the unit drain condensation away from the house and allow airflow around the exterior grille. Keep the unit away from heat sources and direct sun if possible.
- Mark and verify the opening. Use the sleeve dimensions plus framing clearance to mark the opening. Confirm there are no studs, wiring, or plumbing inside the cut area using a stud finder and a voltage tester. Mark the interior and exterior lines and double-check with a level.
- Cut the opening carefully. Score the interior drywall with a utility knife before sawing to reduce dust and tear-out. Cut from inside with a reciprocating saw, staying just inside your lines. Remove insulation and sheathing, then test-fit the framed opening before proceeding.
- Frame the opening. Add headers and trimmer studs to carry the load around the cut. The frame must be square and level so the sleeve sits flush. Use pressure-treated lumber where it contacts masonry or exterior sheathing. This is the step most often done incorrectly — a crooked opening causes leaks and vibration.
- Install the wall sleeve. Set the sleeve into the framed opening with a slight downward slope toward the outside so condensation drains away from the room. Secure it to the framing with the manufacturer's fasteners. Seal the gap between the sleeve and the framing with expanding foam, then trim the excess.
- Flash and seal the exterior. Install flashing above the opening and caulk the exterior perimeter with weather-resistant sealant. This is the most important defense against water intrusion. Seal around the sleeve, the trim, and any fasteners. Do not seal the unit's drain holes.
- Run the electrical circuit. Have a licensed electrician install the dedicated circuit, receptacle, and breaker that match the unit's rating plate. Confirm the receptacle is within reach of the unit's cord and that the circuit is GFCI-protected where local code requires it. Never use an extension cord for a permanent wall AC.
- Slide the unit into the sleeve. With help, lift the unit into the sleeve and push it back until the flange meets the interior trim. Follow the manual for the correct depth and any required brackets. Check that the unit sits level and that the exterior grille is unobstructed.
- Insulate and seal the interior. Seal gaps around the unit's face with foam gasket or caulk as directed. Insulate any remaining cavity around the sleeve so warm outside air does not bypass the unit. This step directly affects comfort and efficiency. For related guidance, see how insulating a window AC unit solves the same air-leak problem in a different installation type.
- Test, observe, and finish. Restore power and run the unit through a full cycle. Check for vibration, water leaks, and unusual noise. After 24 hours, inspect the exterior seal again. Finish the interior with trim and patch the drywall, then complete the exterior trim and touch up siding. Keep the manual and receipt for warranty registration.
Planning the Project Scope
Two variables drive the scope of a wall installation: whether an opening already exists, and how much electrical work is required. Use these factors to decide whether the project is a DIY task or a professional job.
| Scenario | DIY Feasibility | Professional Needed |
|---|---|---|
| Replacing a unit in an existing sleeve | Moderate — measuring, lifting, sealing | Optional, unless wiring is damaged |
| New opening in wood-frame wall | Low — framing and flashing are structural | HVAC technician plus electrician |
| New opening in masonry or brick wall | Not recommended | Masonry and HVAC professionals |
| Adding a dedicated circuit | No | Licensed electrician |
If the wall sleeve concept is new to you, our guide to installing an air conditioner in a wall sleeve focuses specifically on the replacement workflow and the measurements that matter most. Homeowners comparing permanent wall mounting with a smaller, easier project may also find the walkthrough for installing a small window air conditioner useful as a baseline.
Common Installation Mistakes to Avoid
- Cutting before checking for utilities. Wiring and plumbing hidden in the wall are a real hazard. Test and inspect before any cut.
- Skipping the sleeve. Units without a sleeve are harder to replace, less stable, and more prone to water leaks.
- Ignoring the slope. A sleeve that slopes the wrong way sends condensation into the room instead of outside.
- Poor exterior flashing. Most wall AC leaks come from the exterior seal, not the unit. Flash and caulk properly.
- Sharing a circuit. A wall AC needs a dedicated circuit. Sharing an outlet causes breaker trips and can be unsafe.
- Oversizing the unit. An oversized AC cools too quickly and leaves the room humid. Match capacity to the room; our Manual J load calculation overview explains the right sizing method.
- Forgetting the permit. Unpermitted structural or electrical work can complicate insurance claims and resale.
After Installation: Keeping It Efficient
A clean filter and an unobstructed exterior grille do most of the work in keeping a wall unit efficient. Clean or replace the filter monthly during peak cooling season, and check the exterior grille for leaves or debris every few months. If you notice water inside the room, stop using the unit and inspect the slope and drain path first. For broader upkeep guidance, see our resources on maintenance on an air conditioning unit and maintenance for HVAC systems.
If the unit is not cooling, the cause is usually airflow, a dirty coil, or a refrigerant issue. Before calling a technician, confirm the filter is clean and the exterior is clear. For diagnostic help, our troubleshooting resources are a good starting point.
Frequently Asked Questions
Can I install a wall air conditioner myself?
Replacing a unit in an existing sleeve is within reach for a careful DIYer. Cutting a new wall opening, framing it, and adding a dedicated circuit involve structural and electrical work that should be handled by licensed professionals.
Do wall air conditioners need a sleeve?
Most through-the-wall units are designed for a metal wall sleeve. The sleeve supports the unit, protects the opening, and allows future replacement without cutting the wall again.
What electrical circuit does a wall AC need?
Smaller 115V units typically need a dedicated 15-amp or 20-amp circuit, while larger 230V units need a dedicated 20-amp to 30-amp circuit. Always follow the manufacturer's rating plate and local electrical code.
How do I stop water from leaking into the room?
Check the sleeve slope first — it should tilt slightly toward the outside. Next, inspect the exterior caulk and flashing. If the leak persists, the unit's drain path or internal pan may need service.
Can I put a window unit in a wall opening?
Some window units can be installed in a wall with proper support and framing, but they are not designed for it. A through-the-wall unit with a matching sleeve is the safer, code-friendly choice. Our guide to installing a window air conditioner in a wall covers this alternative in detail.
How long does the installation take?
Replacing a unit in an existing sleeve takes about one to two hours. A new opening with framing and electrical work typically spans a full day or more, depending on wall construction and inspections.
Related Installation Guides
If your home has no ductwork and you are weighing options beyond a wall unit, the overview of installing air conditioning in a house without ducts compares ductless and wall-mounted approaches. For a broader project view, see installing an AC unit and installing a new HVAC system.
For homes where a wall opening is not possible, portable units are a common fallback. The guide to installing a portable AC unit in a casement window explains the venting workaround.