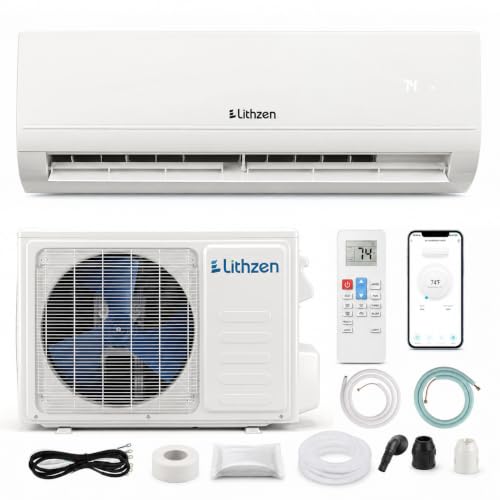
Split System Heating and Cooling Installation: Complete Guide
Everything you need to know before, during, and after a split system heating and cooling installation — site survey, electrical work, line set routing, commissioning, and the checks that protect your investment.
Start ReadingQuick summary: A split system heating and cooling installation pairs an indoor air handler with an outdoor heat pump condenser, connected by refrigerant lines. Getting it right means a proper load calculation, correct electrical sizing, careful line set routing, deep vacuum evacuation, and a full commissioning check. This guide walks through each stage so you know exactly what a quality install looks like.
What a Split System Heating and Cooling Installation Involves
A split system heat pump provides both cooling in summer and heating in winter by reversing the refrigerant cycle. Because the same equipment handles both seasons, installation must satisfy the demands of each mode — not just cooling. That means sizing for the heating load as well as the cooling load, choosing a location that drains condensate properly in summer and defrosts correctly in winter, and commissioning both modes before handoff.
Installation typically covers five phases: pre-installation planning, electrical preparation, mounting and line set routing, vacuum and charge, and commissioning. Each phase has its own checkpoints, and skipping any of them shows up later as reduced efficiency, refrigerant leaks, or premature component failure.
If you are still deciding between system types, our overview of split system heating and cooling units and split system air conditioning and heating will help you narrow down the right configuration before scheduling an install.
Phase 1: Pre-Installation Planning
Most installation problems are decided before anyone drills a hole. Planning should cover load calculation, equipment selection, placement, and permitting.
Load Calculation
A proper room-by-room load calculation accounts for square footage, ceiling height, insulation, window area, orientation, and local climate. For heat pumps, the calculation must consider both cooling and heating loads, because the system must satisfy whichever is larger in your climate. A cooling-only estimate is not sufficient for a heat pump installation.
If you want to understand why sizing matters so much, our guide on what happens if an AC is too big or too small explains the consequences of oversizing and undersizing. For context on how capacity translates to real spaces, see two ton heat pump and two and a half ton air conditioning unit.
Equipment Selection
Choose a system that matches the load in both modes and fits your efficiency goals. Inverter-driven heat pumps modulate compressor speed for better part-load efficiency and temperature stability. If the system will run in cold weather, confirm its rated heating capacity at your design outdoor temperature rather than relying on nominal ratings alone.
Our guides to split system heat pumps and split system air conditioner and heat pump explain the differences between models and configurations.
Indoor and Outdoor Placement
Indoor heads should be positioned to distribute air across the room without blowing directly on occupants, with enough clearance above and below for airflow and filter access. Wall-mounted heads are the most common choice; see split system wall mounted air conditioner and wall mounted air conditioner with heat pump for placement considerations.
Outdoor units need clearance for airflow, a level pad, and a location that allows condensate to drain and defrost water to flow away. Avoid enclosing the unit or placing it where snow accumulation blocks airflow.
Permits and Contractor Selection
Check with your local building department about permit requirements for mechanical and electrical work. Confirm that your chosen contractor is licensed and insured, and ask for the load calculation, equipment submittals, and a written scope before work begins. For a broader walkthrough of the installation process, see split system air conditioner and installation.
Phase 2: Electrical Preparation
Split system heat pumps require a dedicated circuit. Most residential outdoor units run on 208–240V, while some smaller mini-splits operate on 110–120V. The installer or electrician verifies panel capacity, installs the correct breaker, and provides a service disconnect near the outdoor unit.
Wiring includes power to the outdoor unit, communication wiring between indoor and outdoor units, and a condensate pump circuit if one is required. All connections must follow local electrical codes and the manufacturer's installation manual.
For related reading, see wall mounted air conditioner heater combo 110 volt if you are considering a lower-voltage configuration, and split unit air conditioner installation considerations for a broader view of the planning work involved.
Phase 3: Mounting and Line Set Routing
This phase is where installation quality becomes visible — and where shortcuts cause the most problems later.
Indoor Unit Mounting
The indoor head is mounted on a wall bracket secured to studs or appropriate anchors. The wall penetration for the line set is drilled at a slight downward angle toward the outdoors so condensate cannot run back inside. A drain line is routed with a continuous downward slope to the outside or to a condensate pump.
Proper mounting hardware matters, especially on masonry or metal studs. See wall mount bracket for mini split systems for bracket considerations and wall mounted air conditioning unit installation for placement guidance.
Outdoor Unit Placement
The outdoor unit sits on a level pad or wall bracket with clearance for airflow on all sides. Refrigerant lines are routed with gradual bends, supported along their length, and insulated to prevent condensation and heat loss. The line set length should stay within the manufacturer's maximum to avoid capacity loss.
Line Set and Drainage
Refrigerant lines must be clean, dry, and correctly sized. Flare connections are torqued to specification, not over-tightened. The condensate drain must be trapped where required and pitched continuously. Poor drainage is one of the most common causes of indoor water leaks after installation — see water is dripping from AC vents and water leaking from air conditioner outside unit if you suspect a drainage issue after install.
Phase 4: Vacuum, Charge, and Leak Check
After the line set is connected, the system is evacuated with a vacuum pump to remove air and moisture. A deep vacuum held for a specified period, with a decay test to confirm no leaks, is the standard. Only then is the refrigerant charge released or adjusted to the manufacturer's specified subcooling or superheat target.
Shortcuts here — skipping the vacuum, releasing charge too early, or guessing the charge — shorten compressor life and reduce efficiency. Ask your installer for vacuum readings and the charge verification method used.
For background on how the cycle works and why these steps matter, see split type air conditioner and split air conditioning.
Phase 5: Commissioning and Handoff
Commissioning confirms the system performs as designed in both modes. A thorough handoff includes:
- Cooling test: Temperature split across the indoor coil within manufacturer specification.
- Heating test: Verify heating operation, defrost cycle behavior, and outdoor unit performance.
- Airflow check: Confirm airflow at each indoor unit and adjust louvers for even distribution.
- Drain check: Confirm condensate flows freely and the trap is working.
- Thermostat walkthrough: Review settings, schedules, and any smart features. See split unit thermostat for control options, and thermostat that controls heat and cool for combined-mode controls.
- Documentation: Warranty registration, commissioning report, and maintenance schedule.
If you need a combined installation and heating review, see split system air conditioning and heating. For setups with wall-mounted combos, review wall mounted air conditioner heater combo installation and wall mounted air conditioner with installation for related checklists.
How Long Installation Takes
| Configuration | Typical Duration | Best For | Key Factor |
|---|---|---|---|
| Single-Zone Ductless Mini-Split | 4–8 hours | One room, additions | Line set routing distance |
| Multi-Zone Ductless | 1–2 days | Several rooms from one outdoor unit | Number of indoor heads |
| Ducted Split Heat Pump | 2–3 days | Whole-home comfort | Ductwork condition and layout |
| Retrofit in Older Home | 1–3 days | No existing ductwork | Wall access and electrical upgrades |
Timelines assume standard access and no unexpected structural or electrical issues. Contractors typically confirm the schedule after the site survey.
After Installation: Protecting Your Investment
A good installation is the start of reliable service, not the end. Simple habits protect the system:
First Week
Run both modes, check for unusual noise or water, and confirm condensate drains freely. Note any temperature differences between rooms.
Filter Care
Clean or replace filters every one to three months. See split AC filter replacement for a step-by-step guide.
Annual Service
Schedule professional maintenance to check refrigerant charge, electrical connections, and coil cleanliness. See split system air conditioning maintenance.
Outdoor Unit Care
Keep the outdoor unit clear of leaves, debris, and snow. Rinse the condenser coil seasonally.
If something seems off in the first weeks, address it early. Our guides to split system air conditioning repairs and troubleshooting air conditioning help you decide whether a call to your installer is warranted.
Choosing the Right Installation Contractor
Installation quality varies widely between contractors, and the difference shows up for years. Ask for:
- Load calculation: A room-by-room calculation, not a rule-of-thumb estimate.
- Written scope: Clear description of equipment, line set length, electrical work, and cleanup.
- References: Recent installs similar to your home and system type.
- Licensing and insurance: Confirm current coverage in your jurisdiction.
- Warranty terms: Understand what the manufacturer covers versus what the contractor guarantees.
For more context, see split system air conditioner considerations when installed, which covers the broader scope of a professional install. If you need a combined review of heating and cooling installation and related questions, our overview of split air conditioner units and split units provides useful background.
Frequently Asked Questions
How long does split system heating and cooling installation take?
A single-zone ductless split install typically takes four to eight hours. Multi-zone systems and ducted configurations take longer, often one to three days, depending on the number of indoor units, line set routing complexity, and whether ductwork is involved.
Do I need a permit to install a split system heat pump?
Permit requirements vary by jurisdiction. Many municipalities require an electrical and mechanical permit for new split system installations. Check with your local building department before work begins, and confirm that your contractor handles permit applications.
What electrical work is required for split system installation?
Split systems need a dedicated circuit sized to the outdoor unit's requirements. Most residential units use 208–240V power, while smaller mini-splits may run on 110–120V. An electrician or licensed HVAC installer verifies panel capacity and installs the disconnect and breaker.
Can a split system heating and cooling installation work in an older home?
Yes. Ductless split systems are popular for older homes without ductwork because they require only a small wall penetration for refrigerant lines. Ducted configurations may need retrofitting, which adds complexity and planning time.
What should be checked after split system installation?
After installation, verify airflow at each indoor unit, check heating and cooling operation in both modes, confirm the condensate drain flows freely, inspect refrigerant line insulation, and review the commissioning report with temperature split readings and refrigerant charge verification.
Ready to Compare Split System Heating and Cooling Units?
Browse our recommended split system heat pumps and cooling-heating units below. Each listing includes capacity, efficiency tier, and key features so you can match a system to your home and climate.
View Recommended Units