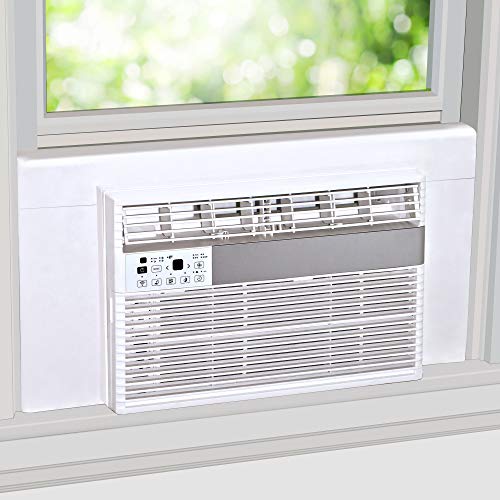
Side opening windows — also called casement, crank-out, or roll-out windows — look elegant and offer excellent ventilation. But when summer heat arrives, homeowners quickly discover that these windows present a real challenge for cooling. The reason is simple: most window air conditioners on the market are built for double-hung windows that slide up and down. A side opening window swings outward on a hinge, leaving a tall, narrow opening that a traditional AC simply cannot sit in securely.
This guide explains exactly how to solve that problem. You will learn what type of unit actually fits a window air conditioner for windows that open sideways, how to support it safely, how to seal the opening against rain and insects, and which product categories to look for when you are ready to buy. By the end, you will have a clear, step-by-step plan that protects both your window and your home.
Why Side Opening Windows Are Different
A double-hung window has two sashes that slide vertically. When you close the lower sash onto the top of an AC unit, the sash itself provides structural support and the unit rests on the window sill. A side opening window works on a completely different principle. The sash swings outward on hinges, and there is no sill ledge or sliding sash to hold the unit in place. The frame is typically narrower, the opening is taller than it is wide, and the crank mechanism is not designed to carry any load beyond the glass and frame itself.
That is why a standard horizontal window unit cannot simply be "wedged in." Doing so risks the unit falling, damaging the window, and creating a serious safety hazard — especially from upper floors. The correct approach uses a purpose-built vertical unit or an engineered bracket that transfers the weight to the exterior wall.
Types of Air Conditioners That Work With Side Opening Windows
1. Dedicated Casement / Vertical Window AC
These are the ideal solution. A casement window air conditioner is taller and narrower than a standard unit, matching the proportions of a side opening window. Instead of resting on a sill, it is mounted with a bracket that attaches to the window frame or the exterior wall. Many models include a filler panel that seals the remaining gap above and below the unit. If your window is a casement style, search for window air conditioner for crank out windows and vertical window AC options to find units built for this exact opening.
2. Standard Window AC With a Specialized Installation Kit
Some homeowners successfully use a standard window unit in a side opening window by adding a rigid support bracket and a custom side panel kit. This approach is workable only if the unit is small and light (usually the entry-level tier of compact units), and only with a bracket that is bolted to the wall — never to the window crank. If you go this route, look for a window AC installation kit that includes insulated side panels and a heavy-duty bracket.
3. Portable Air Conditioner With a Sliding Window Kit
When a permanent installation is not allowed (for example, in a rental) or the window geometry is unusual, a portable unit is a practical fallback. The exhaust hose is routed through a panel fitted into the side opening. A window panel for portable air conditioner makes the seal much cleaner than improvising with cardboard or plastic. Portable units are less efficient than window units, but they require no structural modification.
4. Through-the-Wall or Mini-Split Alternatives
If you are remodeling anyway, a through-the-wall installation or a ductless mini-split removes the window problem entirely. A ductless mini-split AC needs only a small wall penetration for the refrigerant lines, and a through-the-wall unit uses a dedicated wall sleeve. Both are more permanent and typically more efficient than a window unit, though they require professional installation.
Comparison: Which Option Fits Your Situation?
| Option | Best For | Support Required | Installation Effort |
|---|---|---|---|
| Casement / vertical window AC | Homeowners who want a permanent, efficient window solution | Built-in bracket (usually included) | Moderate — DIY possible with care |
| Standard AC + installation kit | Small rooms and lighter units | Exterior wall bracket (mandatory) | Moderate to high — custom fitting |
| Portable AC + window panel | Renters, temporary setups, awkward windows | None (floor-standing) | Low |
| Mini-split | Long-term cooling, multiple rooms, best efficiency | Wall-mounted indoor and outdoor units | High — professional install |
| Through-the-wall AC | New construction or planned remodeling | Wall sleeve | High — structural work |
Step-by-Step Installation for a Side Opening Window
The following steps apply to a dedicated casement AC or a standard unit used with a proper bracket. Read them fully before you start. If your window is on the second floor or higher, or if the unit is heavy, hire a professional — the safety stakes are real.
- Measure the window opening carefully. Record the width, height, and depth of the opening with the sash fully open. Also measure the distance to the nearest obstruction on the exterior wall. Casement units are sized by these dimensions, so accuracy here determines whether the unit will fit at all.
- Check the window type and crank mechanism. Identify whether the window is a true casement, an awning, or a slider. Each has a different hinge geometry. A window AC for sliding windows is a different product from a casement unit, so confirm your window style before ordering.
- Select the right unit and support system. Choose a casement AC that matches your measured opening, or select a standard unit with a compatible window AC bracket support. The bracket must attach to the exterior wall or window frame with lag bolts — never to the crank arm or the movable sash.
- Mount the exterior bracket. Follow the manufacturer's template. Drill pilot holes, apply sealant around each fastener, and confirm the bracket is level and rated for the unit's weight. For upper floors, add a safety strap or cable as a secondary restraint.
- Position the air conditioner on the bracket. With a helper, lift the unit onto the bracket and slide it into the opening. The unit should tilt slightly outward (about 3–5 degrees) so condensate drains outside rather than into the room. Many brackets have a built-in tilt.
- Seal the sides and top of the opening. Use the insulated filler panels supplied with the unit, or cut rigid foam board to fit. Seal gaps with weather-resistant foam or caulk. This step prevents rain intrusion, stops cool air from escaping, and blocks insects. A proper seal is what separates a professional result from a drafty one.
- Secure the unit and test it. Fasten the unit to the bracket per the instructions, close and lock the window sash as far as it will go, and plug the unit into a dedicated circuit. Run it for 15 minutes and check for vibration, water leakage, and proper cooling.
Choosing the Right Capacity for Your Room
Capacity matters as much as fit. An undersized unit runs constantly and never reaches the set temperature; an oversized unit cools too quickly, cycles on and off, and leaves the room humid. As a rough guide, use about 20 BTU per square foot of floor area for an average room, then adjust upward for sunny exposures, kitchens, and rooms with many occupants.
- Up to 150 sq ft: 5,000–6,000 BTU — typical for a small bedroom or office.
- 150–250 sq ft: 8,000–10,000 BTU — a standard bedroom or small living area.
- 250–400 sq ft: 12,000–14,000 BTU — a large bedroom, studio, or open living space.
- 400–550 sq ft: 15,000–18,000 BTU — a large living room or open-plan area.
For a full breakdown by room size, see our guide to window air conditioners for small rooms and our BTU sizing article. If your room is a bedroom, the window AC unit for bedroom guide covers noise and airflow considerations as well.
Efficiency and Long-Term Operation
Once the unit is installed, efficiency determines how well it performs over years of use. Look for a high SEER rating and, if you want finer control, consider a window air conditioner with inverter technology. Inverter compressors modulate their speed instead of switching on and off, which maintains a steadier temperature and uses less energy in the long run. A window air conditioner with remote control or a unit with a built-in thermostat also makes it easier to run the AC only when needed, which is an efficient habit over time.
If your window is on a wall that receives direct afternoon sun, add shade or awnings. If the room feels damp, a whole-house dehumidifier or a standalone dehumidifier can complement the AC and make a lower temperature setting comfortable. And if you notice the unit running but not cooling, our troubleshooting guide on window air conditioner not cooling properly covers the most common causes.
Common Installation Mistakes to Avoid
- Relying on the window sash for support. The single most dangerous mistake. Always use an exterior bracket.
- Forgetting the outward tilt. Without a slight tilt, condensate can pool and leak into the room. See our guide on window air conditioner leaking water inside house if this happens.
- Skipping the side seals. Gaps let hot air in and cool air out, wasting energy and inviting pests.
- Using an oversized unit. It cools fast but leaves humidity behind, and short cycling wears the compressor.
- Ignoring the electrical circuit. Check the amperage draw and make sure the outlet and breaker are rated for the unit. A dedicated circuit is safest for larger models.
- Installing alone on an upper floor. Units are heavy and awkward. Use a helper or a professional installer.
Maintenance After Installation
A well-installed unit still needs routine care. Clean or replace the air filter every two to four weeks during heavy use — a clogged filter reduces airflow and strains the compressor. Inspect the exterior bracket and fasteners at the start of each cooling season, and reapply sealant if you see cracks. Before winter, either remove the unit and reinstall the window sash, or cover the exterior with an insulated AC cover to prevent drafts. If you notice unusual noise, vibration, or water intrusion, address it early; small fixes are far easier than a failed unit mid-summer.
Frequently Asked Questions
Can a regular window air conditioner fit in a side opening window?
A standard window air conditioner is designed for double-hung windows that slide up and down. A side opening casement window requires a specially designed vertical or casement window AC unit, or a standard unit used with a custom installation kit and reinforced bracket. Standard horizontal units cannot be safely installed in side opening windows without proper modification.
What is the best type of air conditioner for a side opening window?
A dedicated casement window air conditioner, also known as a vertical window AC, is the best choice. These units are narrower and taller than standard units, designed to fit the vertical opening of a crank-out or side-sliding window. They usually come with mounting brackets that secure the unit to the window frame rather than relying on the window sash for support.
How do I install a window AC in a side opening window?
Installation involves measuring the window opening, selecting a compatible vertical AC unit or installation kit, mounting a reinforced support bracket to the exterior wall or window frame, positioning the unit so it rests on the bracket, sealing the sides with weatherproof panels or foam, and ensuring the unit tilts slightly outward for proper drainage. Professional installation is recommended for heavy units or second-story windows.
Do I need a special bracket for a side opening window air conditioner?
Yes. Side opening windows cannot support the weight of an AC unit the way a double-hung window sash can. A purpose-built bracket or support frame is essential. Some casement AC units include their own mounting system, while aftermarket brackets that bolt to the exterior wall are available separately. Never rely on the window crank or frame alone for structural support.
Can I use a portable air conditioner instead of a window unit for a side opening window?
Yes. A portable air conditioner with a sliding window kit or a custom exhaust panel can be a practical alternative when a casement window AC is not feasible. Portable units vent hot air through a hose that can be fitted into the side opening using a panel, and they do not require permanent modification of the window.
What if my casement window is very narrow?
Measure precisely. Some compact casement units are built for openings under 15 inches wide. If no window unit fits, a portable AC with a window panel is the most flexible fallback. For extremely small openings, a window air conditioner less than 14 inches wide may be available.
Can I install a side opening window AC myself?
Many homeowners with DIY experience can install a casement AC on the ground floor. The work involves drilling into the exterior wall, sealing fasteners, and lifting the unit into place. If the window is above the first floor, if the wall is masonry, or if you are unsure about the bracket's load rating, hire a licensed installer. Safety and weather sealing are worth professional attention.
Related reading: window AC in casement window · window air conditioner for side opening windows · window air conditioner for side sliding windows · installation kit for sliding windows · window air conditioner supports