Window Air Conditioner for Vertical Sliding Windows: Complete Guide
Everything you need to know about choosing, sizing, and installing a window AC unit in a vertical sliding window. Learn about fit requirements, installation kits, safety brackets, and the best unit types for your home.
Understanding Vertical Sliding Windows
A vertical sliding window (also called a single-hung or double-hung window) is one of the most common window styles in North American homes. It consists of two sashes that move up and down within the window frame. In a single-hung window, only the bottom sash moves; in a double-hung window, both sashes can be raised and lowered.
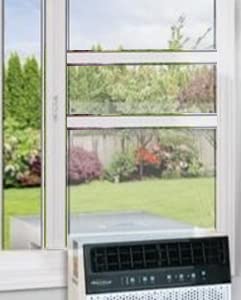
This window style is ideal for window air conditioners because the vertical opening creates a stable, rectangular space for the unit to sit in. The bottom sash can be raised to accommodate the AC unit, and the top sash remains in place to seal the upper portion of the opening. This configuration provides natural support and makes weather sealing relatively straightforward.
When you search for a window air conditioner for vertical sliding window installations, you are looking for a standard window AC unit. The key is ensuring the unit's dimensions match your window opening and that the window can securely hold the unit's weight.
Single-Hung vs. Double-Hung Windows
- Single-hung: Only the bottom sash moves upward. The top sash is fixed. This is the most common configuration and works well with standard window AC units.
- Double-hung: Both sashes can move. This allows more flexibility in positioning the AC unit, but it also means you need to secure both sashes to prevent drafts or security issues.
Both types are compatible with standard window AC units, but double-hung windows may require additional sash locks or brackets to keep the upper sash from sliding down.
Why Standard Window AC Units Fit Vertical Sliding Windows
Nearly all window air conditioners sold in North America are designed for vertical sliding windows. The chassis of a window AC unit is rectangular, with a flat bottom that rests on the window sill and side panels that expand to fill the gap between the unit and the window frame. The top of the unit is designed to be pressed against the raised bottom sash, creating a seal.
This design is why vertical sliding windows are the default assumption for window AC manufacturers. If you have a vertical sliding window, you can choose from virtually any window AC unit on the market, provided the dimensions fit your window opening.
Key Point: If you have a horizontal sliding window (side-to-side), you need a special side-opening AC unit or a different mounting solution. The guide on window air conditioners for sliding windows covers that configuration in detail.
For vertical sliding windows, the main considerations are:
- Window opening width: The unit's side panels must expand to fill the window width.
- Window opening height: The unit's height must be less than the window opening, with the bottom sash resting on top of the unit.
- Window sill depth: The unit needs enough sill depth to sit securely.
- Window type: Single-hung and double-hung windows both work, but double-hung windows may need extra securing.
How to Size Your Window AC for a Vertical Sliding Window
Sizing is the most important factor in choosing a window air conditioner. An undersized unit will run constantly without adequately cooling the room, while an oversized unit will cool too quickly and shut off before removing humidity, leaving the room feeling clammy and wasting energy.
Room Size and BTU Chart
Use the following chart as a starting point for sizing. These figures assume standard ceiling heights (8 feet), average insulation, and moderate climate conditions.
| Room Size (sq ft) | Recommended BTU | Typical Room Type |
|---|---|---|
| Up to 150 | 5,000 - 6,000 | Small bedroom, home office |
| 150 - 250 | 6,000 - 8,000 | Bedroom, small living room |
| 250 - 350 | 8,000 - 10,000 | Medium bedroom, dining room |
| 350 - 450 | 10,000 - 12,000 | Large bedroom, small apartment |
| 450 - 550 | 12,000 - 14,000 | Living room, studio apartment |
| 550 - 700 | 14,000 - 18,000 | Large living room, open floor plan |
Adjustments for Your Specific Situation
The chart above is a baseline. Adjust your BTU requirement based on these factors:
- Sun exposure: Rooms that receive direct sunlight all day need 10-20% more BTU.
- Occupancy: Each additional person adds about 600 BTU.
- Kitchen: Add 4,000 BTU if the AC will cool a kitchen.
- Ceiling height: For ceilings above 8 feet, increase BTU proportionally.
- Insulation: Poorly insulated rooms need more BTU; well-insulated rooms need less.
For a more precise calculation, use a BTU calculator that accounts for these variables. You can also refer to the guide on how to size an air conditioner for detailed formulas and examples.
Tip: If your vertical sliding window is in a small room, a window air conditioner for small room in the 5,000-6,000 BTU range is usually sufficient. For larger spaces, consider a larger unit or a window air conditioner with inverter technology for better efficiency.
Measuring Your Window Opening Correctly
Before you buy a window AC unit, measure your vertical sliding window opening carefully. The manufacturer specifies minimum and maximum window width and height requirements for each unit. If your window falls outside those ranges, the unit will not fit securely.
What to Measure
- Window width: Measure the inside width of the window frame from left to right at the point where the AC unit will sit.
- Window height: Raise the bottom sash to the position where it will rest on top of the AC unit. Measure the clear opening height from the sill to the bottom of the raised sash.
- Sill depth: Measure the depth of the window sill from the interior wall to the exterior edge. The AC unit needs enough depth to sit securely.
- Window type: Confirm whether the window is single-hung or double-hung, and note whether the bottom sash is removable or fixed.
Matching Measurements to Unit Specifications
Every window AC unit lists its minimum and maximum window width and its minimum window height in the product specifications. Compare your measurements to these specs. If your window is narrower than the minimum width, the unit will not fit. If it is wider than the maximum width, the side panels will not seal the gap.
For very narrow windows, you may need a compact unit designed for narrow windows or a unit less than 14 inches wide. If your window is unusually tall, check the maximum height specification carefully.
Important: Always measure the actual window opening, not the window frame or the glass. The AC unit sits in the opening between the frame and the raised sash.
Installation Kits and Bracket Support
Most window AC units include basic installation hardware: side accordion panels, a window sash lock, and sometimes a small bracket. For vertical sliding windows, these basic components are often sufficient, but there are situations where additional support or sealing is needed.
What Comes in a Standard Installation Kit
- Side panels: Accordion-style panels that expand to fill the gap between the AC unit and the window frame. These are essential for sealing and support.
- Sash lock: A small bracket or lock that secures the bottom sash to the top sash, preventing the bottom sash from sliding down and crushing the unit.
- Weather seal: Foam or rubber strips to seal gaps between the unit and the window frame.
- Support bracket (optional): Some units include a small exterior bracket, but many do not.
When You Need Additional Support
For larger or heavier units, especially those mounted in upper-floor windows or windows without a deep sill, an exterior support bracket is essential. A window air conditioner bracket no drilling option is available for renters or those who cannot drill into the exterior wall. These brackets attach to the window frame or sill and support the unit from below.
If you need a complete kit with all the accessories, look for a window air conditioner installation kit for sliding windows. These kits typically include reinforced side panels, a sash lock, weather seals, and sometimes a support bracket.
Bracket Types for Vertical Sliding Windows
| Bracket Type | Best For | Installation Method |
|---|---|---|
| No-drill bracket | Renters, windows without exterior access | Attaches to window frame with clamps or adhesive |
| Exterior support bracket | Heavy units, upper floors | Drills into exterior wall or window frame |
| Sill bracket | Windows with deep sills | Rests on the sill and supports the unit from below |
| Through-window bracket | Very large units | Spans the window opening and anchors to both sides |
For a comprehensive overview of support options, see the guide on window air conditioner supports and window AC bracket support.
Step-by-Step Installation Process
Installing a window AC unit in a vertical sliding window is a straightforward process, but it requires care and attention to detail. Follow these steps for a secure, efficient installation.
Step 1: Prepare the Window and Unit
- Clean the window sill and frame. Remove any debris, dirt, or old weather stripping.
- Check that the window opens and closes smoothly. Repair any broken sash cords or locks before installing the AC.
- Unpack the AC unit and remove all packaging materials. Keep the installation hardware and manual handy.
- If the unit includes a support bracket, assemble it according to the instructions before placing the unit in the window.
Step 2: Position the Unit
- With the window open, lift the AC unit and place it in the window opening. The unit should sit on the window sill with the front facing into the room.
- Center the unit in the window opening. For most installations, the unit should be centered, but some manuals specify a slight offset to allow for drainage.
- Ensure the unit is level. Many AC units have a slight tilt toward the exterior to allow condensation to drain. Check the manual for the recommended tilt.
Step 3: Secure the Side Panels
- Extend the accordion side panels to fill the gap between the AC unit and the window frame.
- Use the provided screws or clips to secure the panels in place. Some units have panels that slide into channels; others use adhesive-backed foam.
- Ensure the panels are tight against the window frame to prevent air leaks.
Step 4: Lower the Window Sash
- Lower the bottom sash until it rests on top of the AC unit. The sash should press against the top of the unit, creating a seal.
- If the sash does not sit flush against the unit, use foam weather stripping to fill the gap.
- Install the window sash lock to prevent the bottom sash from being raised (or the top sash from being lowered, in a double-hung window).
Step 5: Install the Support Bracket
- If you are using an exterior support bracket, install it according to the manufacturer's instructions. This usually involves attaching the bracket to the exterior wall or window frame and adjusting it to support the bottom of the AC unit.
- For no-drill brackets, follow the specific instructions for clamping or adhering the bracket to the window frame.
- Check that the bracket is secure and that the unit is supported evenly.
Step 6: Seal and Test
- Apply weather stripping or foam insulation to any gaps between the AC unit and the window frame, and between the sash and the unit.
- Plug in the AC unit and turn it on. Check that it cools properly and that there are no unusual noises or vibrations.
- Check for air leaks around the unit. Seal any remaining gaps.
Tip: If you are not comfortable installing the unit yourself, or if the unit is large or heavy, consider professional installation. A professional installer can ensure the unit is secure and properly sealed.
Safety Considerations and Window Security
Window air conditioners can be heavy, and improper installation can lead to injury or property damage. Follow these safety guidelines:
Weight and Support
- Check the weight of the AC unit. Units over 60 pounds should be installed by two people.
- Ensure the window sill and frame can support the weight of the unit. Older windows may have weakened frames that need reinforcement.
- Always use a support bracket for units installed in upper-floor windows, even if the manual does not explicitly require it.
Window Security
- Install a window sash lock to prevent the bottom sash from being raised. This is a simple but effective security measure.
- If you have a double-hung window, secure the top sash as well. A sash lock or a small bracket can prevent the top sash from being lowered.
- Consider a window AC security bracket that bolts the unit to the window frame. This prevents the unit from being pushed out or removed from the outside.
Electrical Safety
- Check the electrical requirements of the AC unit. Most window units run on 110-120V household current, but larger units may require a 220-240V circuit.
- Do not use an extension cord with a window AC unit. Plug the unit directly into a dedicated outlet.
- If the unit requires a 220V circuit, hire a licensed electrician to install the outlet. For more information, see the guide on window unit air conditioner 220V.
Common Problems and Troubleshooting
Even with proper installation, window AC units can develop issues. Here are some common problems and how to address them.
AC Not Cooling Properly
If the unit runs but does not cool, check the air filter first. A clogged filter restricts airflow and reduces cooling efficiency. Clean or replace the filter according to the manufacturer's instructions. If the filter is clean and the unit still does not cool, the problem may be low refrigerant, a faulty compressor, or a dirty condenser coil. For detailed troubleshooting, see the guide on window air conditioner not cooling properly.
Water Leaking Inside the House
Window AC units produce condensation, which should drain to the exterior. If water leaks inside, the unit may be tilted the wrong way, the drain hole may be clogged, or the installation may not be level. Check the unit's tilt and clear the drain hole. For more help, see the guide on window air conditioner leaking water inside house.
AC Unit Not Blowing Cold Air
If the fan runs but the air is not cold, the compressor may not be running. Check the thermostat setting and ensure the unit is in cooling mode. If the compressor does not start, the problem may be a faulty capacitor, a tripped breaker, or a refrigerant leak. See the guide on window air conditioner not blowing cold air for troubleshooting steps.
Unit Not Draining Water
Some units are designed to splash condensation onto the condenser coils to improve efficiency, which can cause water to drip from the exterior. If the unit is dripping excessively or not draining at all, check for a clogged drain hole or a misaligned installation. The guide on window air conditioner leaking water inside covers this issue in detail.
Fan Running But No Cooling
If the fan runs but the unit does not cool, the compressor may be faulty or the unit may be low on refrigerant. This is a common issue with older units. See the guide on window AC not cooling but fan is running for diagnostic steps.
Types of Window AC Units for Vertical Windows
Vertical sliding windows can accommodate a variety of window AC unit types. The best choice depends on your room size, efficiency preferences, and budget (using neutral tier descriptors: entry-level, mid-range, premium).
Standard Window AC Units
These are the most common and versatile units. They are designed to fit vertical sliding windows and are available in a wide range of BTU capacities. Standard units are typically entry-level to mid-range in terms of features and efficiency.
Inverter Window AC Units
Window air conditioners with inverter technology use a variable-speed compressor that adjusts its output to maintain the set temperature. These units are more energy-efficient and quieter than standard units, but they are typically premium-tier in terms of features and efficiency. Inverter units are a worthwhile investment for long-term use.
Window AC Units with Heat
Some window AC units include a heat pump or electric heating element, allowing them to provide both cooling and heating. These units are useful in climates with mild winters. See the guide on window air conditioners with heat and window unit with heater for more information.
Smart Window AC Units
Wi-Fi-enabled window AC units allow you to control the unit from your smartphone. These units often include scheduling, energy monitoring, and compatibility with smart home systems. If you want remote control, look for a window air conditioner with remote control or a Wi-Fi air conditioner thermostat accessory.
Units for Small Windows
If your vertical sliding window is unusually small, you may need a compact unit. The guides on window air conditioners for small windows and window air conditioner for small window opening cover options for narrow or short windows.
Portable AC Units for Vertical Windows
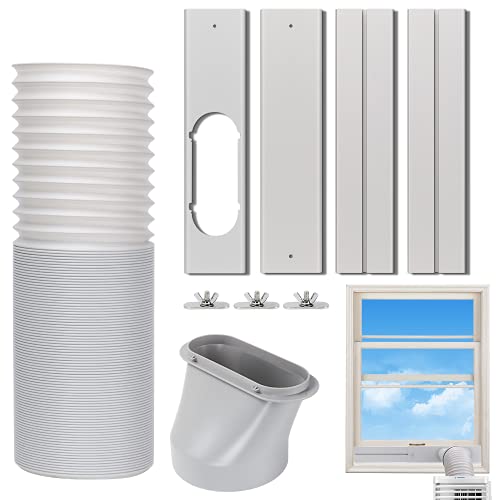
If your window cannot accommodate a traditional window AC unit, a portable air conditioner may be an alternative. Portable units require a window vent kit, and vertical sliding windows can usually accommodate the vent panel. See the guide on where can I find a portable air conditioner and window panel for portable air conditioner for more information.
Frequently Asked Questions
Yes, most standard window air conditioners are designed to fit vertical sliding windows. These windows open by moving the sash up and down, which is the most common configuration for window AC units. You need to verify that the window opening width and height meet the unit's specifications and that the window can support the unit's weight.
Vertical sliding windows open upward (sash moves vertically), while horizontal sliding windows move side to side. Standard window AC units are built for vertical sliding windows. Horizontal sliding windows require a special side-opening AC unit or a different mounting approach. If you have a horizontal sliding window, see the guide on window air conditioner for sliding windows.
The right size depends on room square footage and other factors such as sun exposure, occupancy, and insulation. Measure both the window opening width and the room area. A unit that is too small won't cool effectively, while an oversized unit will cycle on and off too frequently, reducing efficiency and dehumidification. Use the BTU chart in this guide as a starting point.
Most window AC units include basic installation hardware such as side panels and a window sash lock. However, for vertical sliding windows, a dedicated installation kit or bracket support improves safety, security, and weather sealing. These accessories are especially important for units mounted in upper-floor windows or windows without a deep sill.
Secure the unit using the included side accordion panels, install a window sash lock or bracket to prevent the upper sash from sliding down, and use an exterior support bracket for larger units. Always follow the manufacturer's installation instructions and consider professional installation for heavy units. For more options, see the guide on window air conditioner bracket no drilling.
Yes, but you must use a secure support bracket. Upper-floor installations carry a risk of the unit falling, which can cause serious injury or damage. A no-drill bracket or an exterior support bracket is essential. Also, check your building's regulations before installing a window AC unit on an upper floor.
If your window is too narrow, you may need a compact unit designed for narrow windows. These units are typically narrower than standard models and may have lower BTU capacities. See the guide on window air conditioners for narrow windows and window air conditioner less than 14 inches wide for options.
Ready to choose your unit? Now that you understand the requirements for a window air conditioner for vertical sliding window installations, you can confidently compare models. Check out the recommended products below to find the right unit for your home.